
Last updated on October 24th, 2025 at 07:42 am
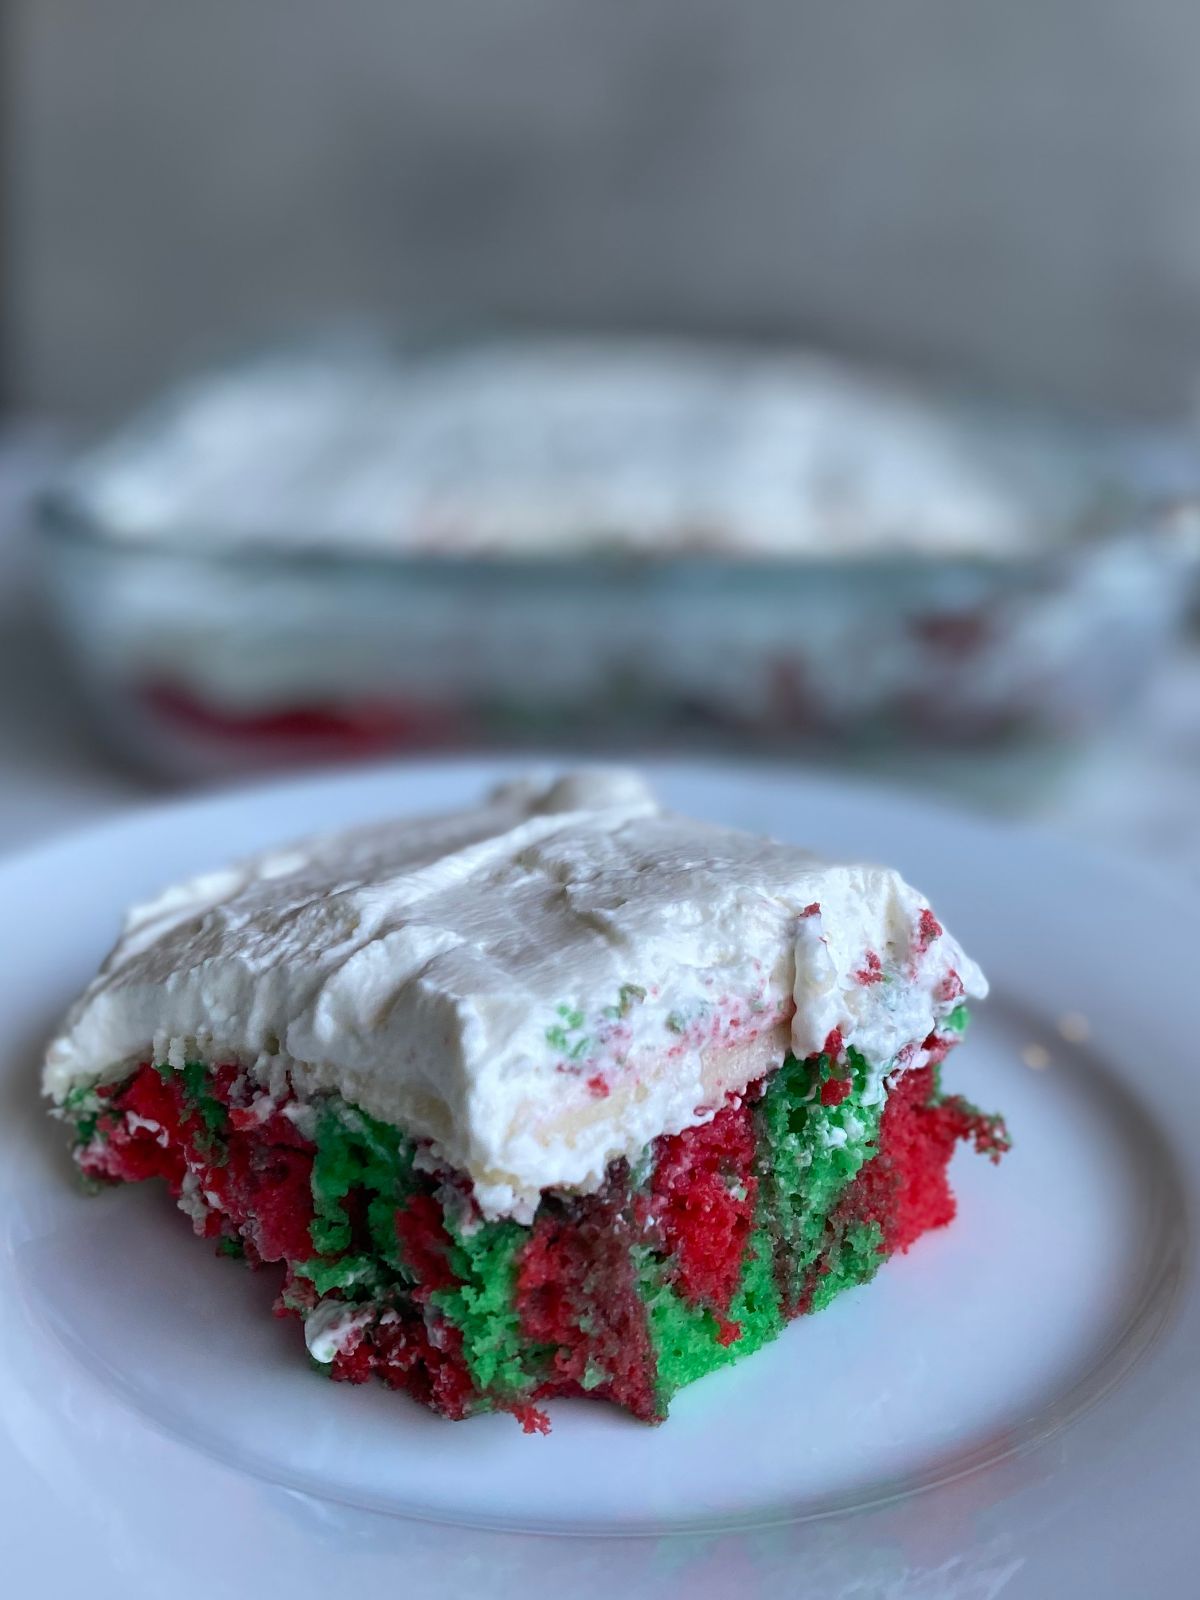
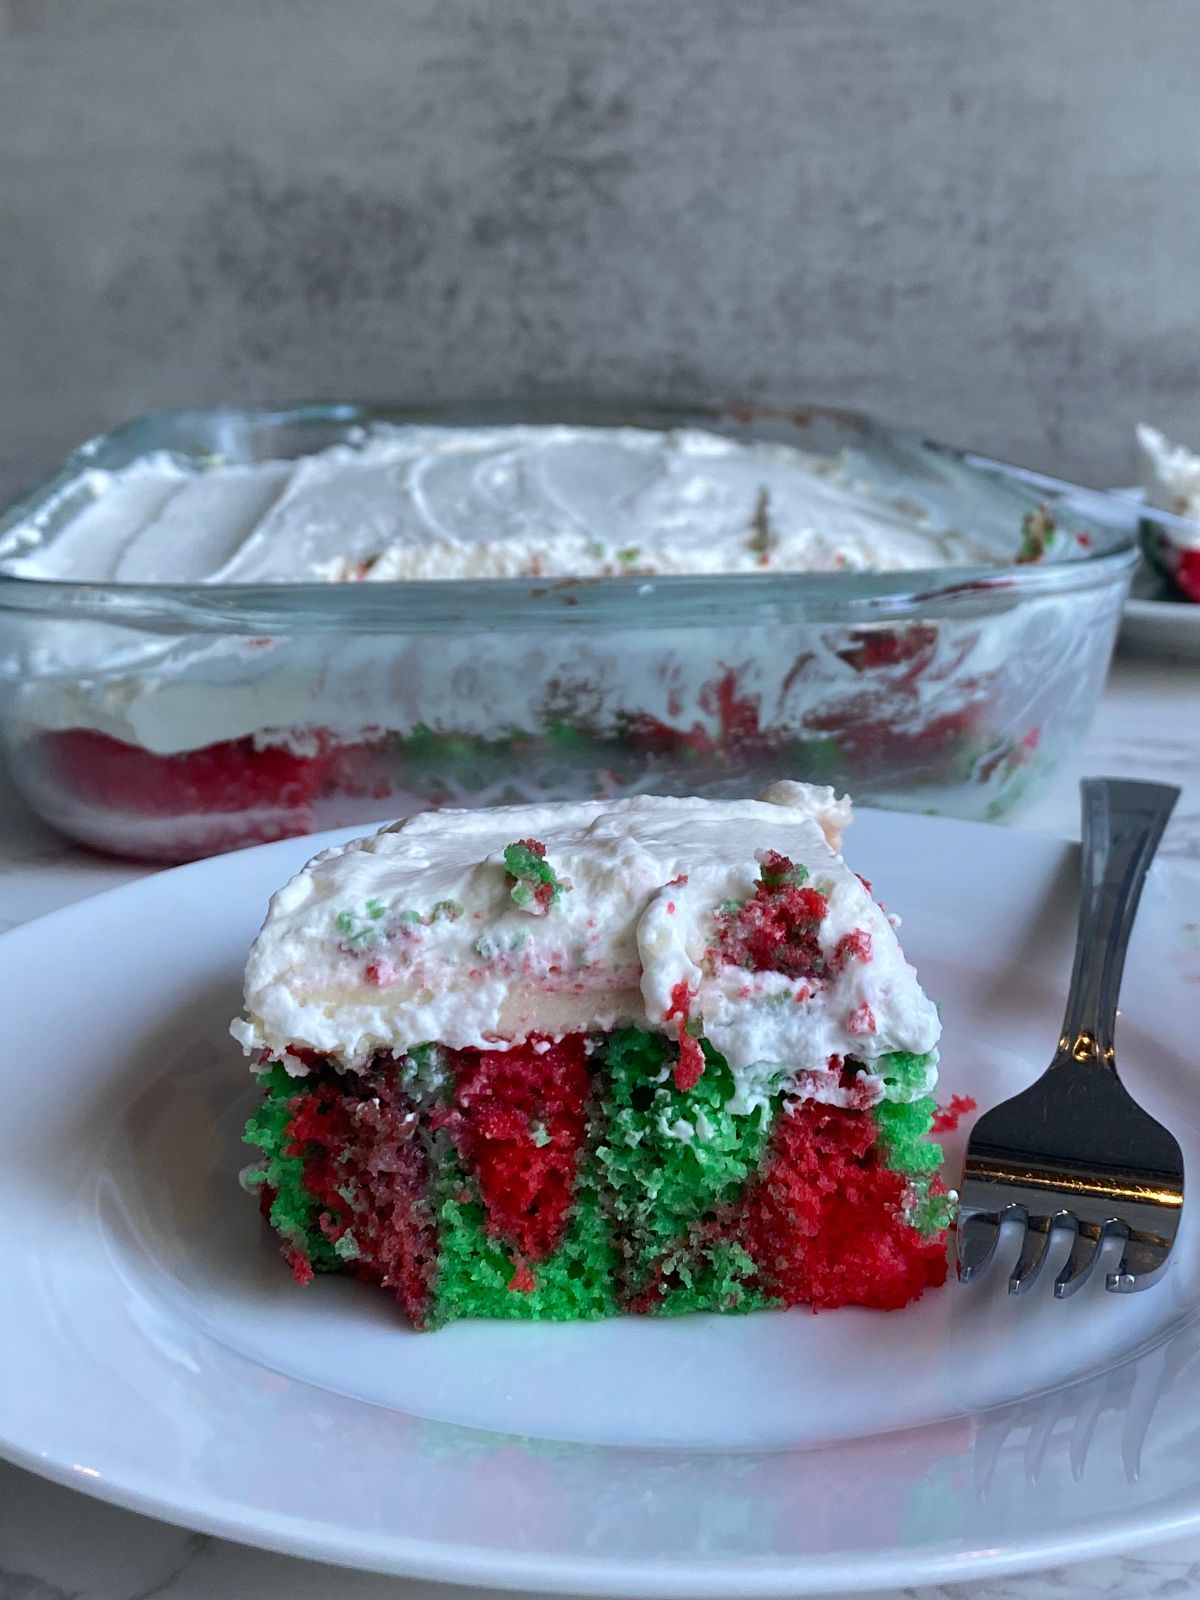
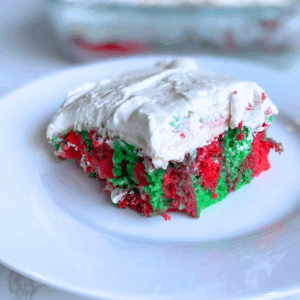
Looking for an easy Christmas dessert that looks festive but takes almost no effort? This Christmas Poke Cake is pure holiday magic. It starts with a simple white box mix, and with a few drops of red and green food coloring, you get a beautiful marbled cake that looks super festive. After baking, it’s soaked with sweetened condensed milk, topped with a layer of creamy vanilla buttercream, and finished with a fluffy cloud of whipped cream (or Cool Whip if that’s your style).
It’s rich, colorful, and totally party-ready. Perfect for holiday gatherings, potlucks, or a quick make-ahead treat when you want something special without spending all day in the kitchen.
Jump to Recipe
Ingredients for Christmas Poke Cake
For the cake
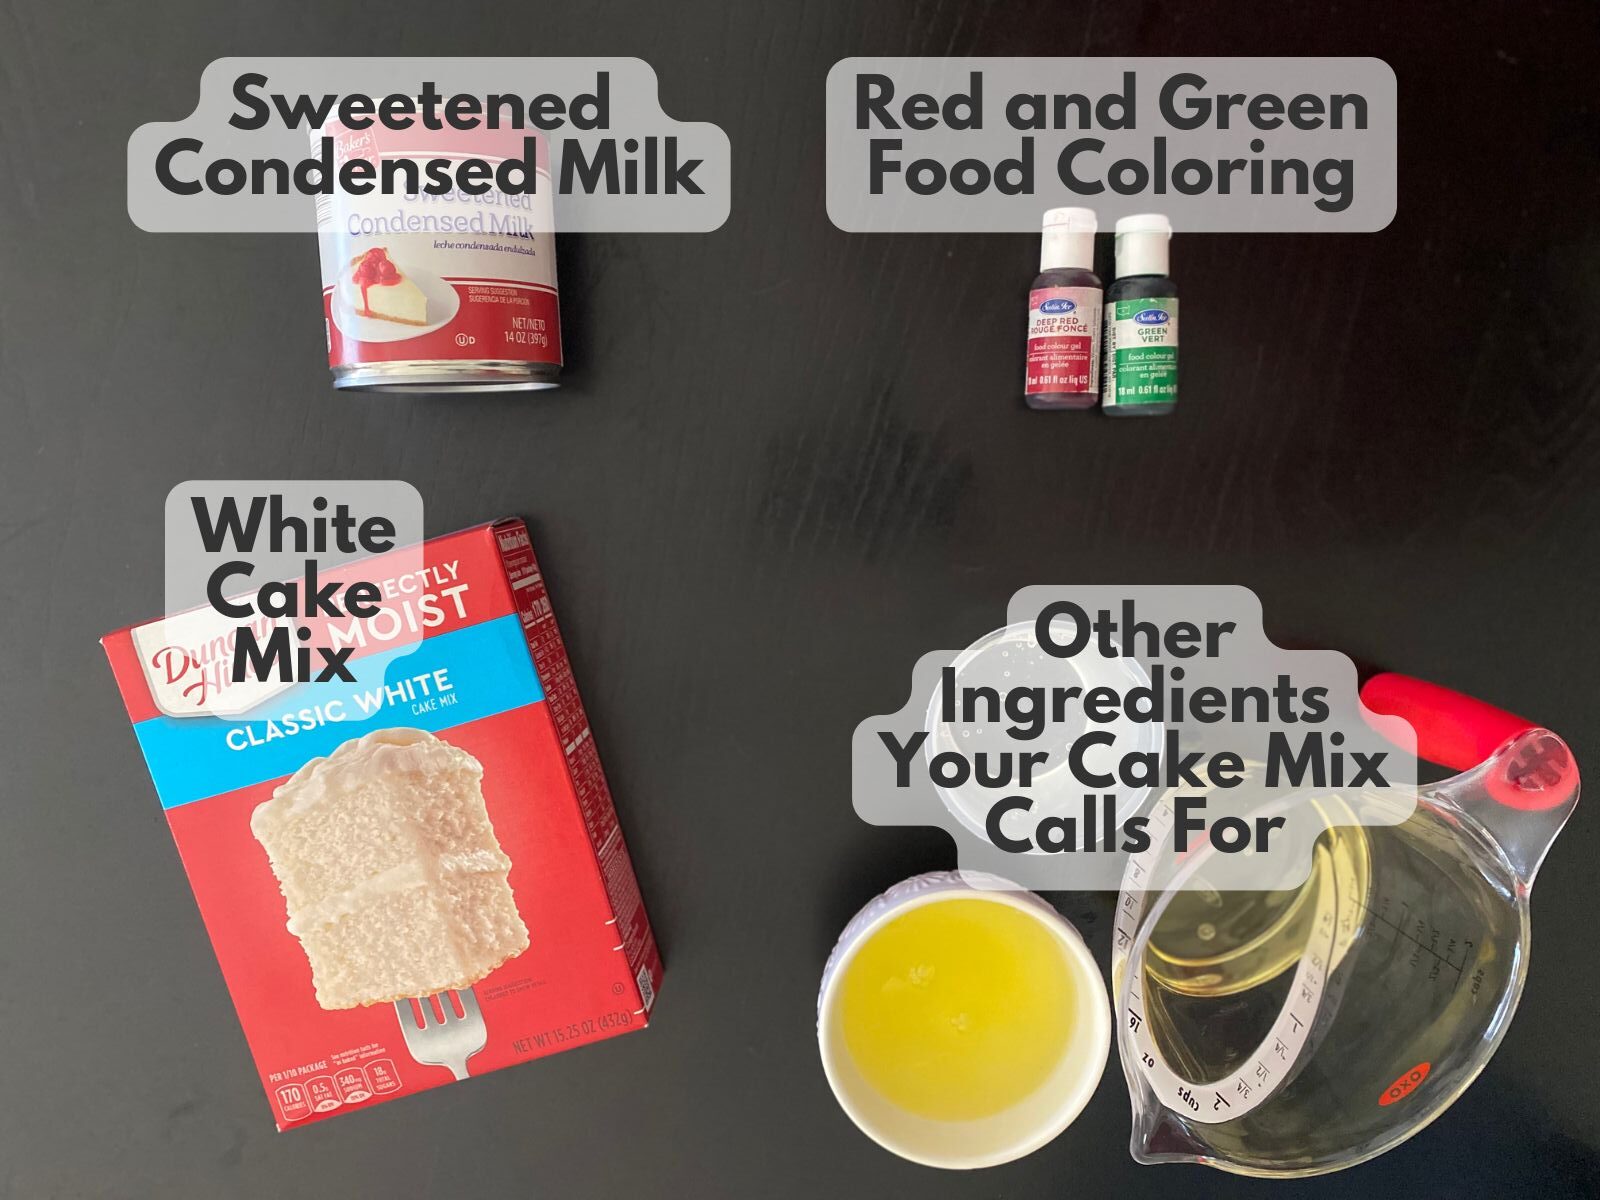
- 1 box white cake mix (plus ingredients listed on the box: usually eggs, oil, and water)
- Red gel food coloring
- Green gel food coloring
For the filling
- 1 can (14 oz) sweetened condensed milk
For the vanilla buttercream layer
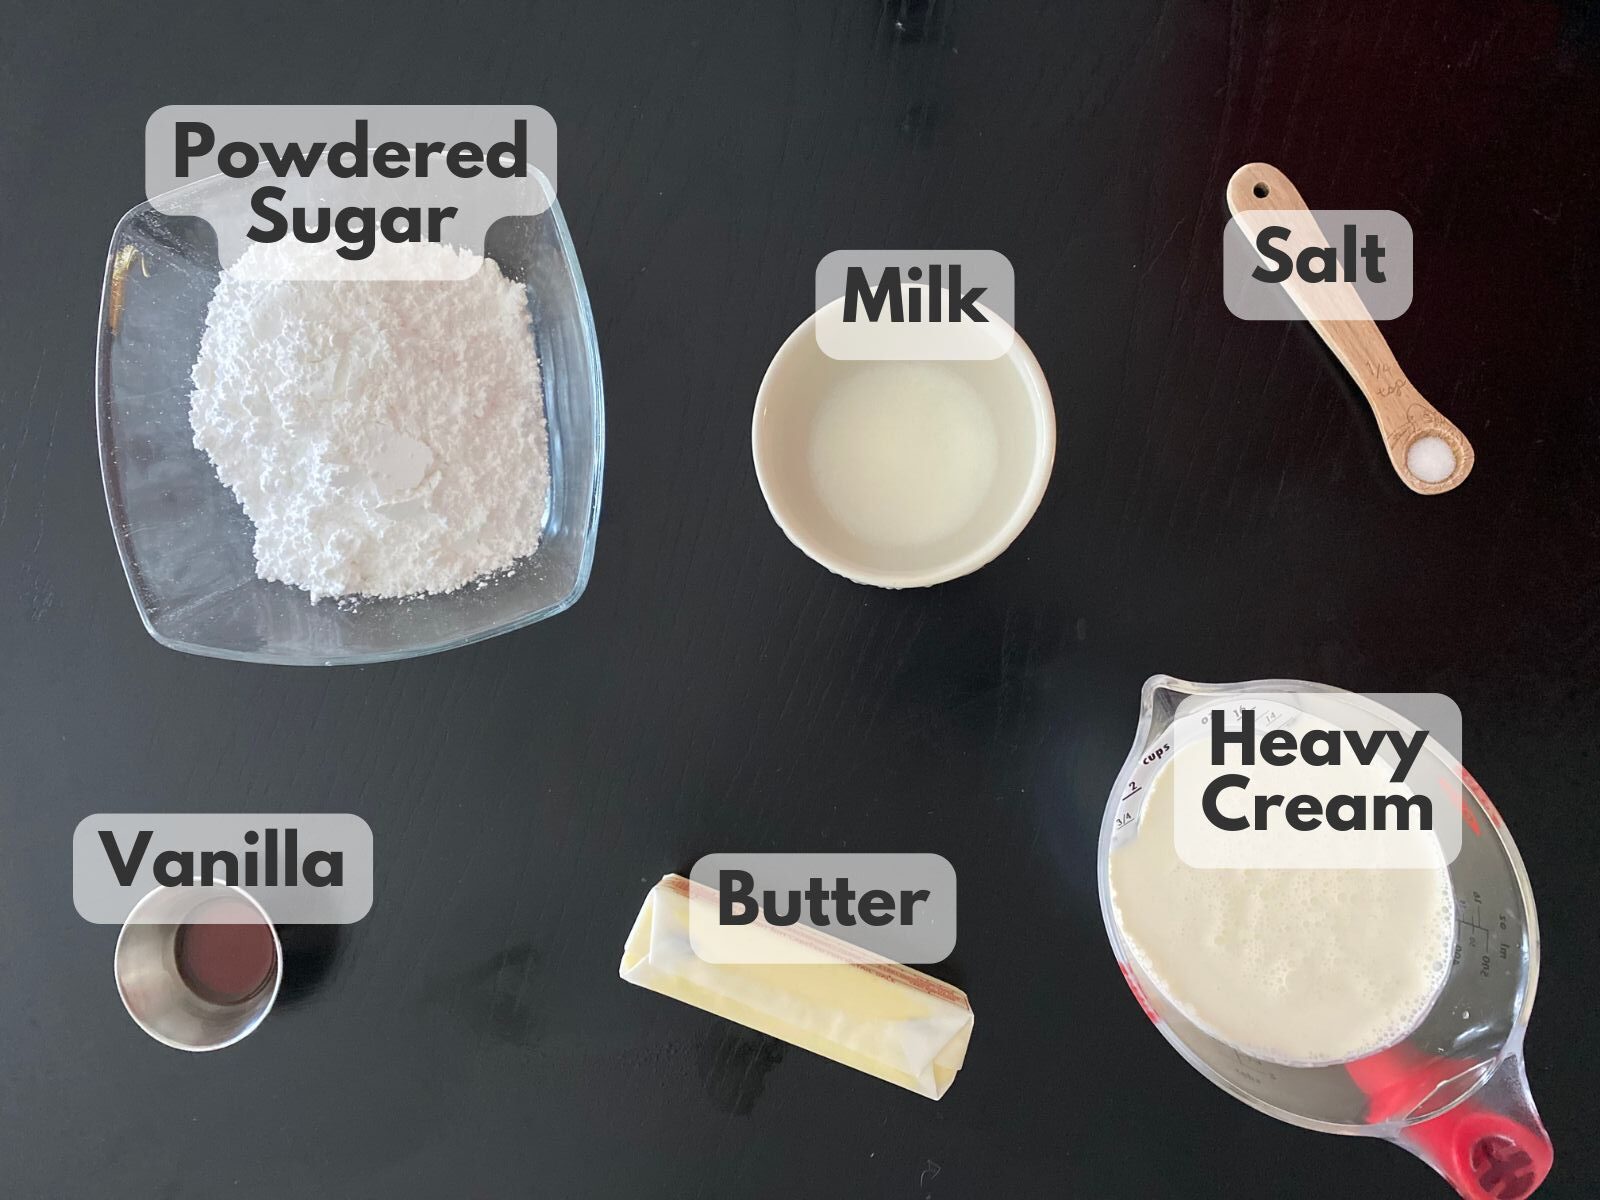
- ½ cup (1 stick) unsalted butter, softened
- 1 ½ cups powdered sugar
- 1 teaspoon vanilla extract
- 1–2 tablespoons heavy cream or milk (to thin as needed)
- Pinch of salt
For the whipped cream topping
- 1½ cups heavy whipping cream
- ¼ cup powdered sugar
- 1 teaspoon vanilla extract
How to Make Christmas Poke Cake
1. Preheat and prepare the pan.
Preheat your oven according to the cake mix instructions and grease a 9×13-inch pan.
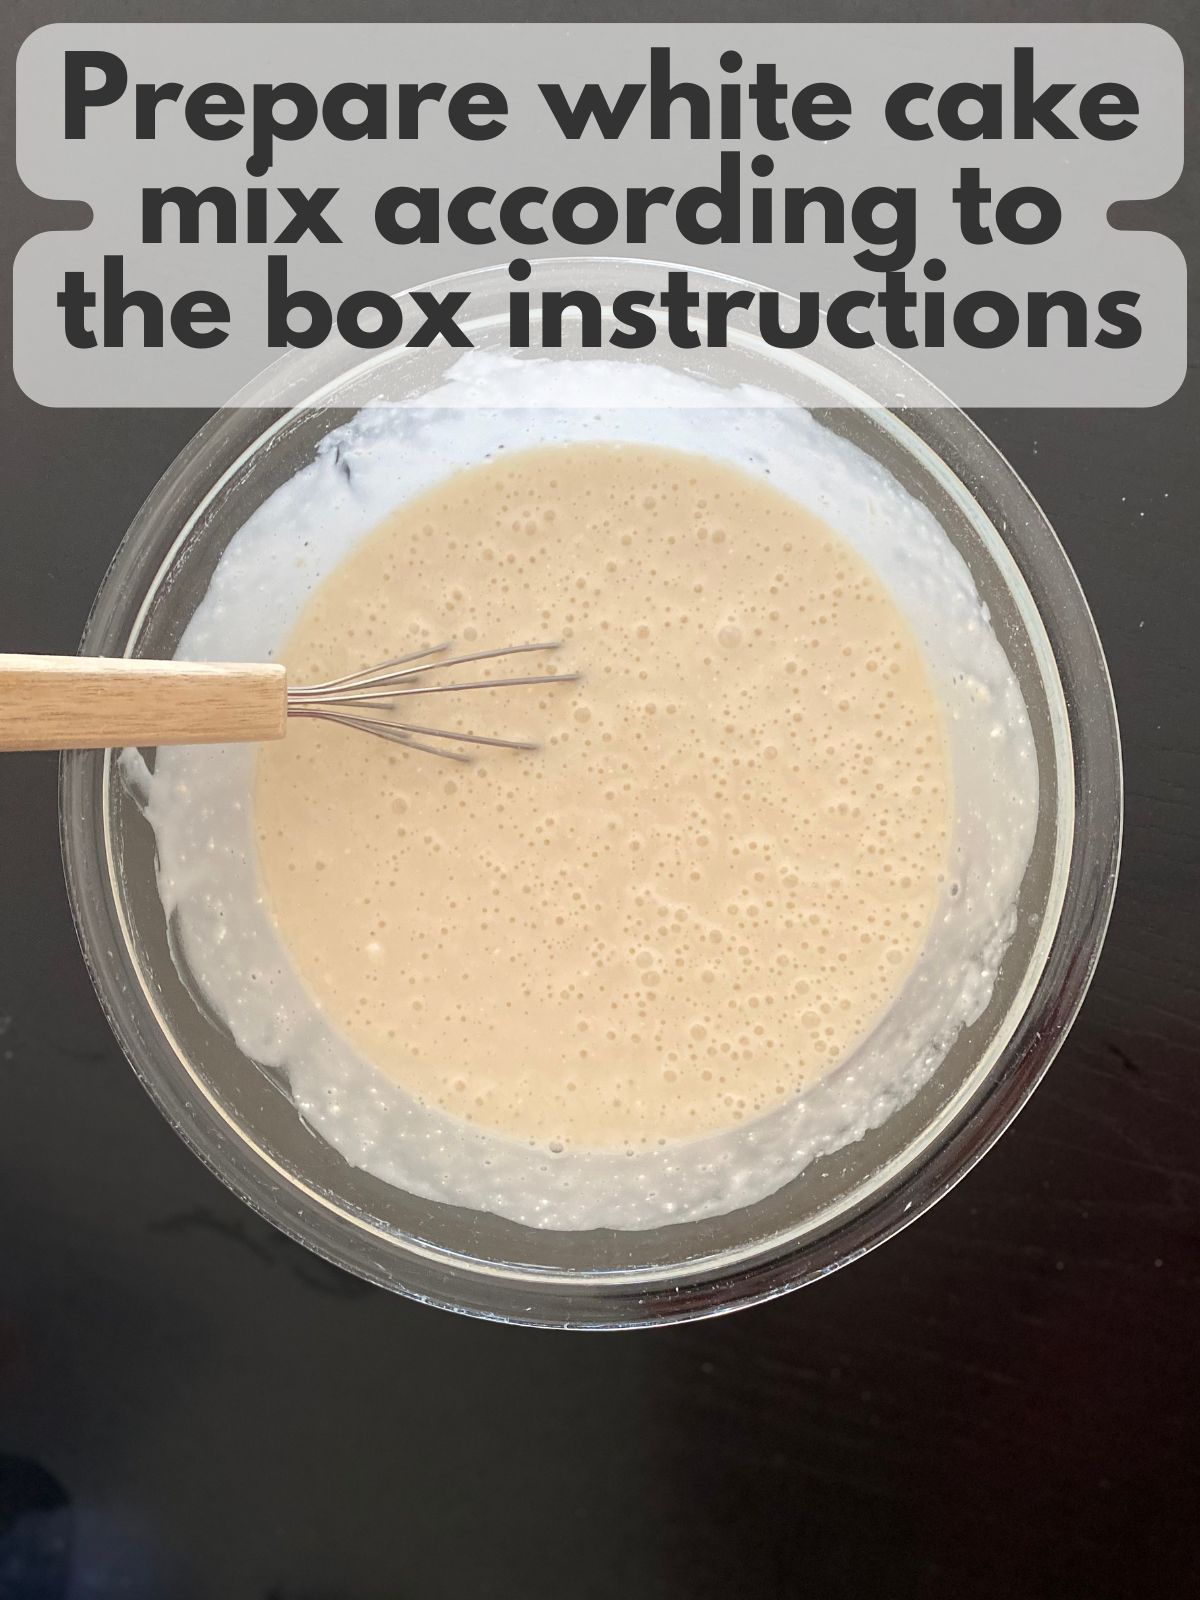
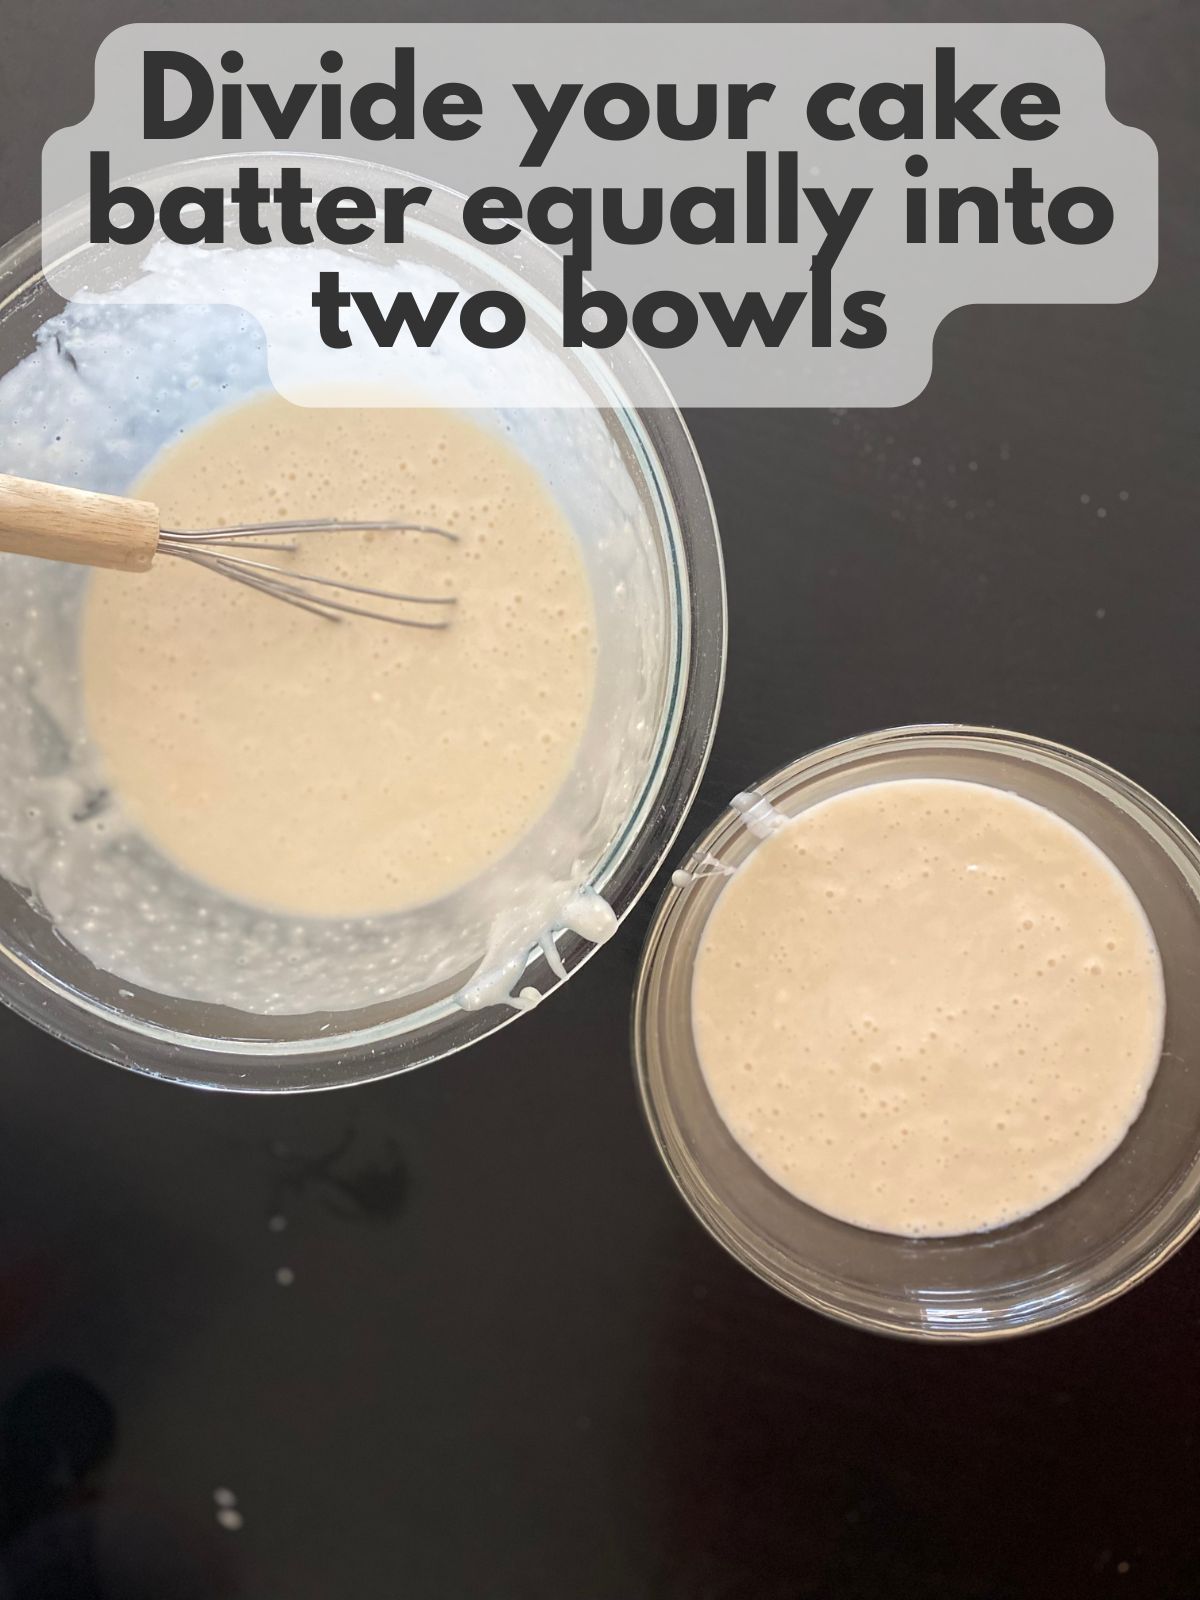
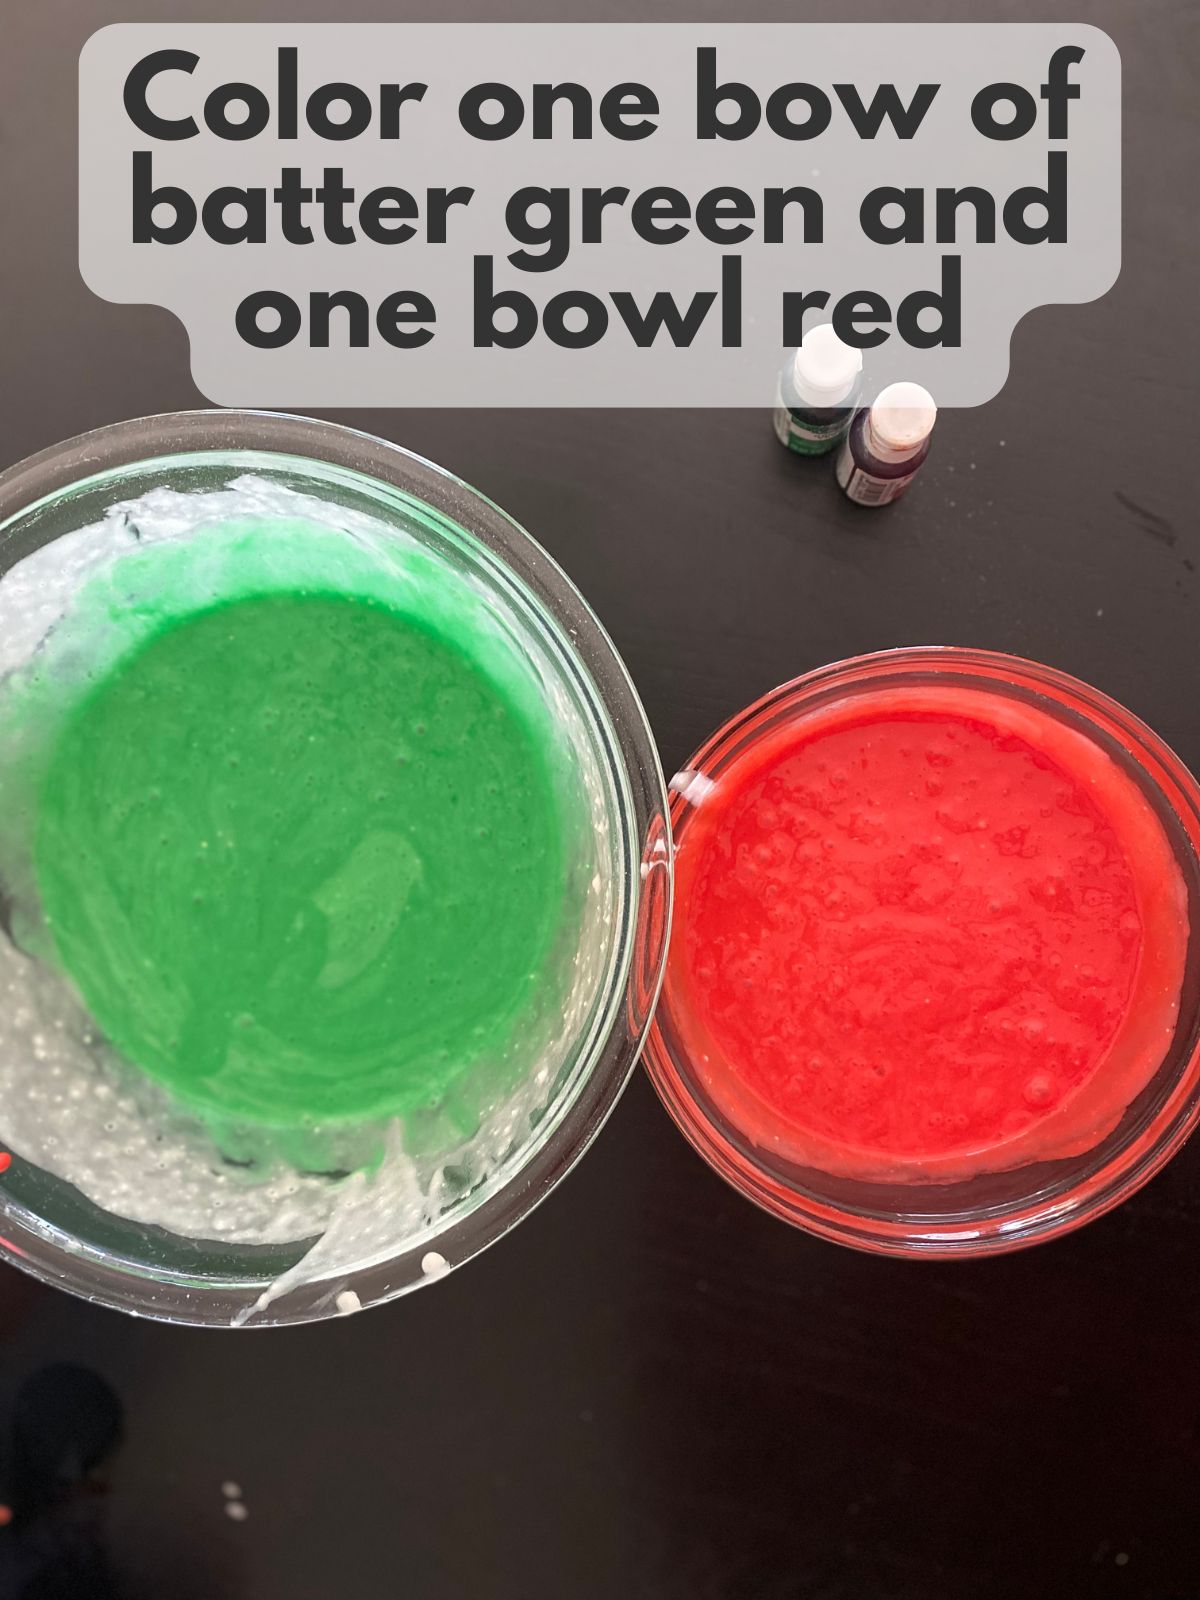
2. Make and color the batter.
Prepare the cake batter as directed on the box. Divide it evenly into two bowls.
Tint one bowl red and the other green with gel food coloring until you get the shades you love.
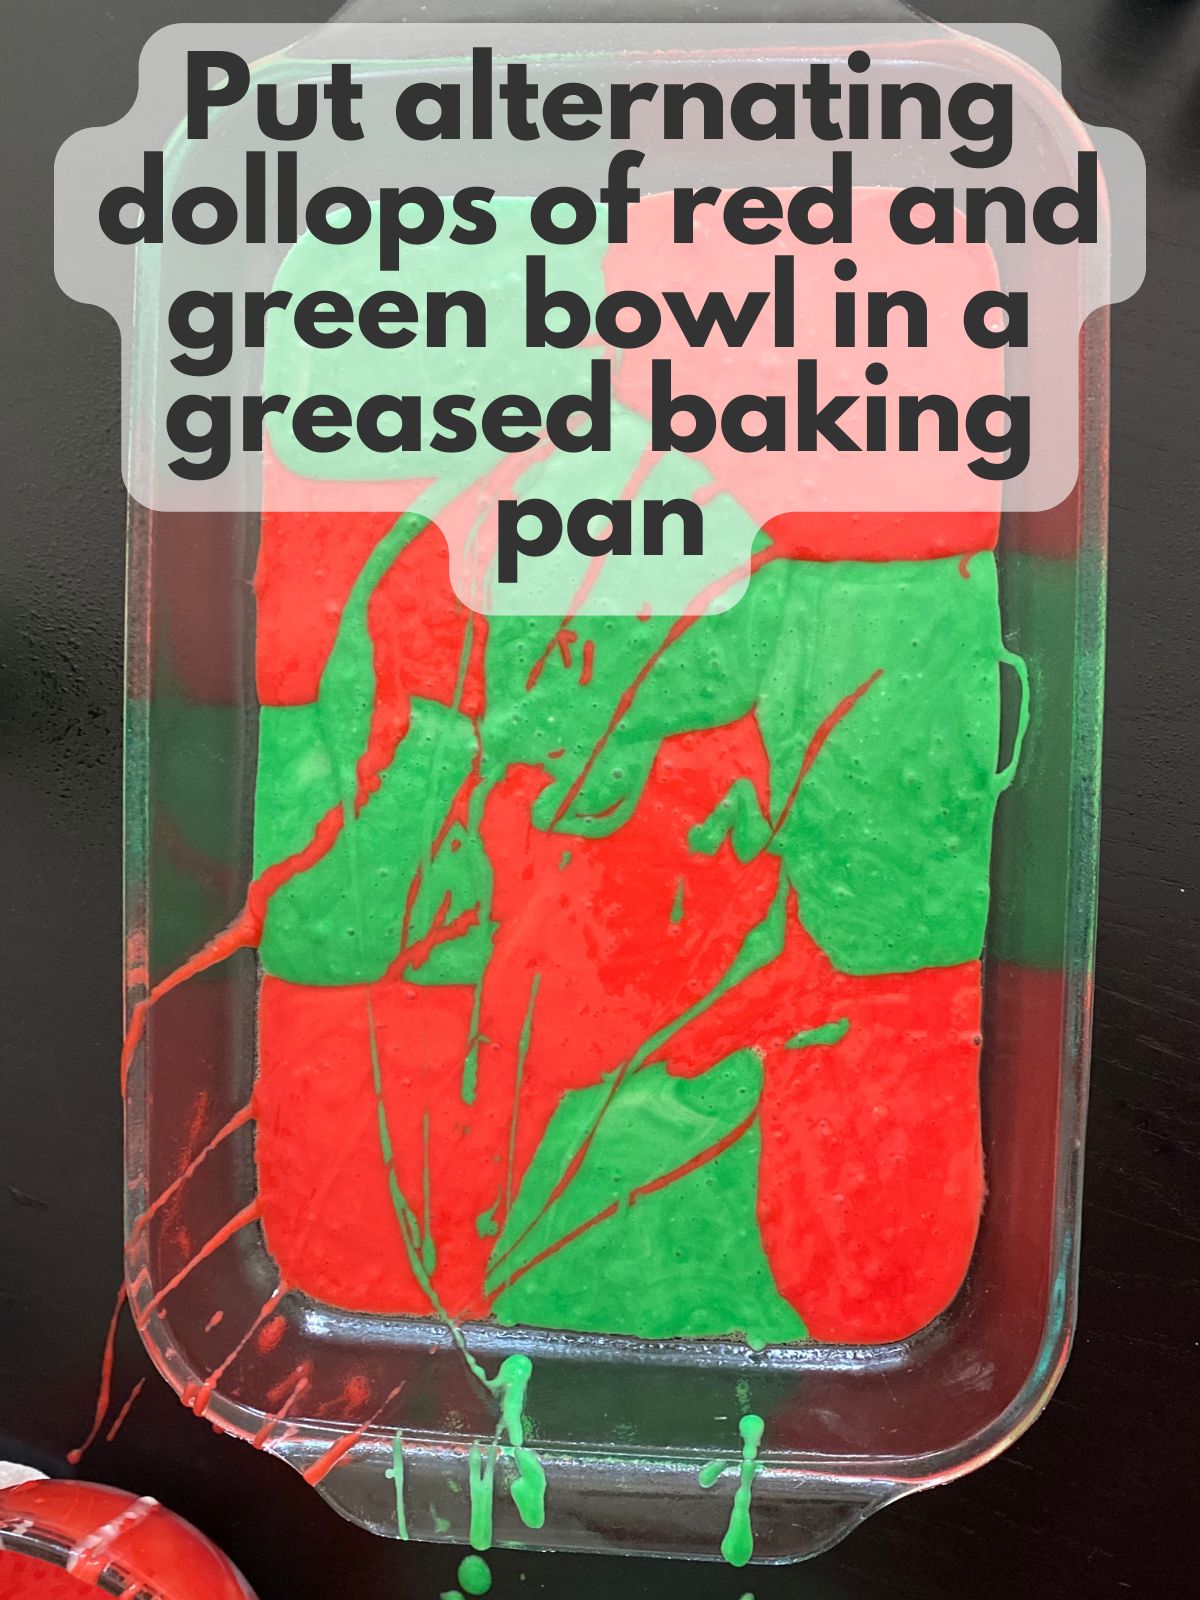
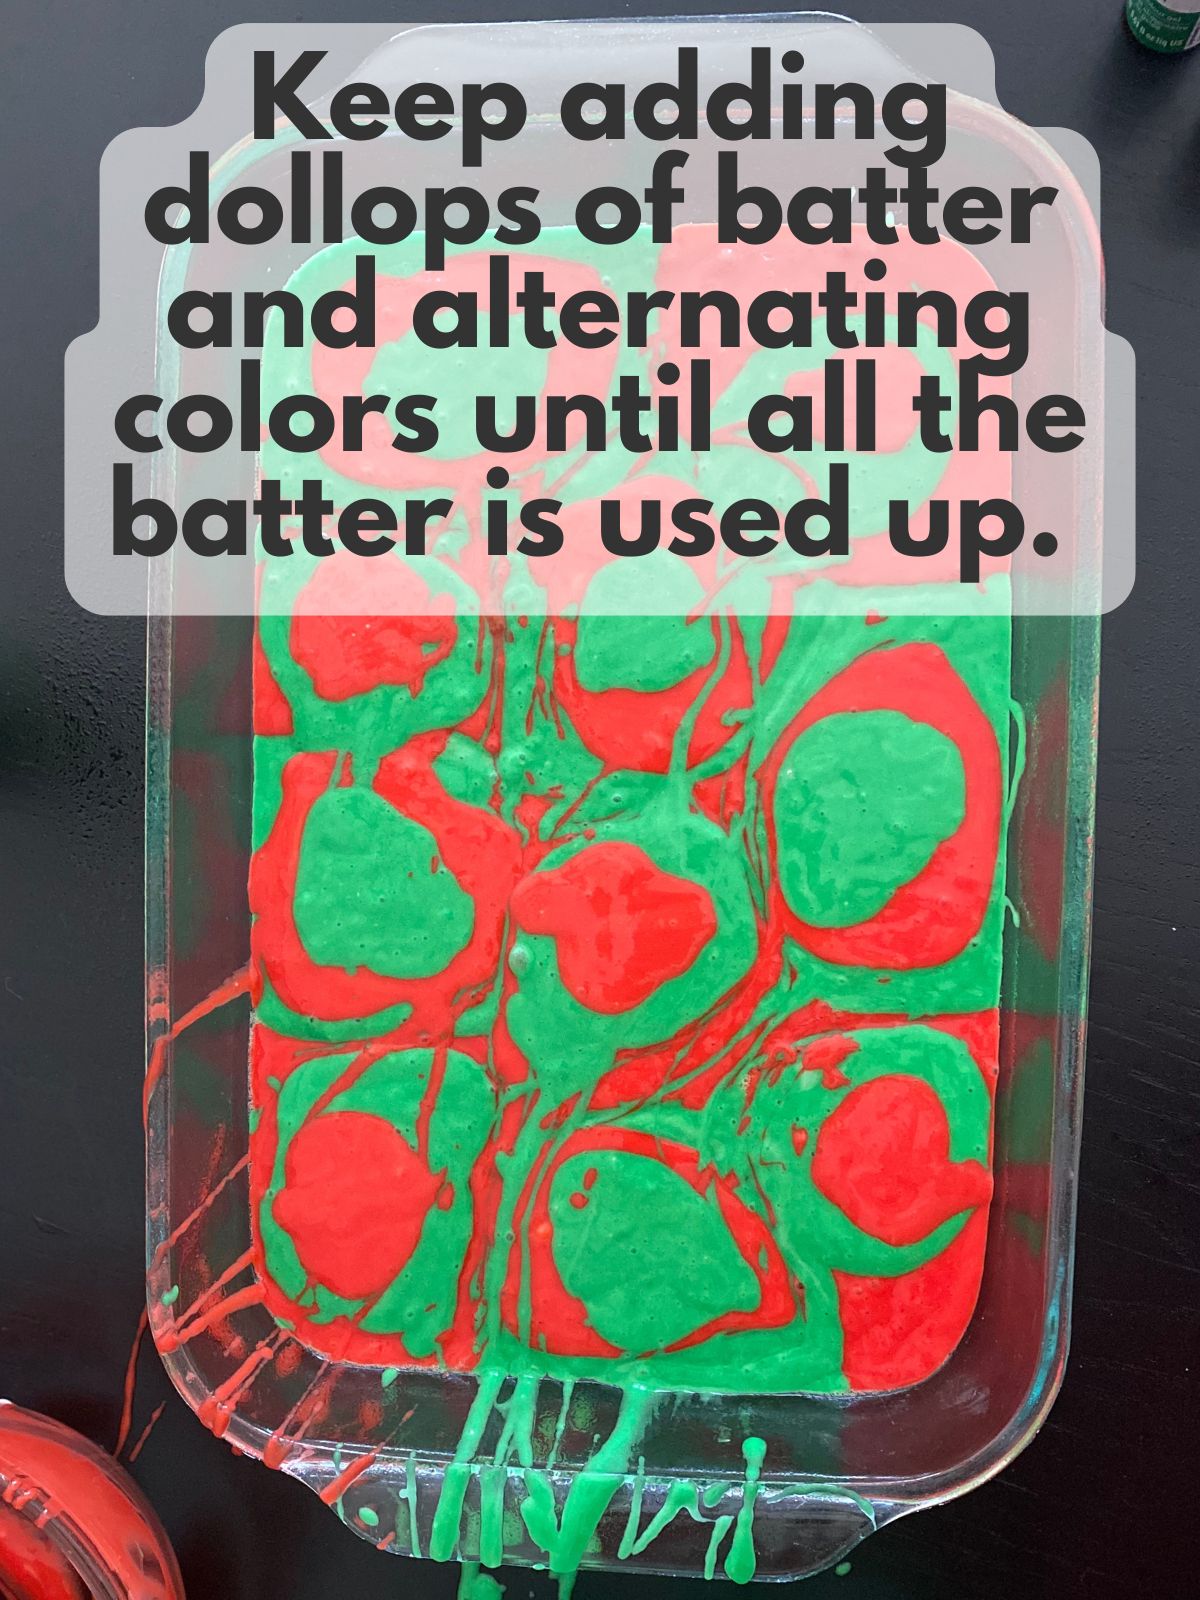
3. Marble the cake
Spoon alternating dollops of red and green batter into the pan. Once filled, swirl a butter knife through the top just once or twice to create a marbled pattern — no overmixing!
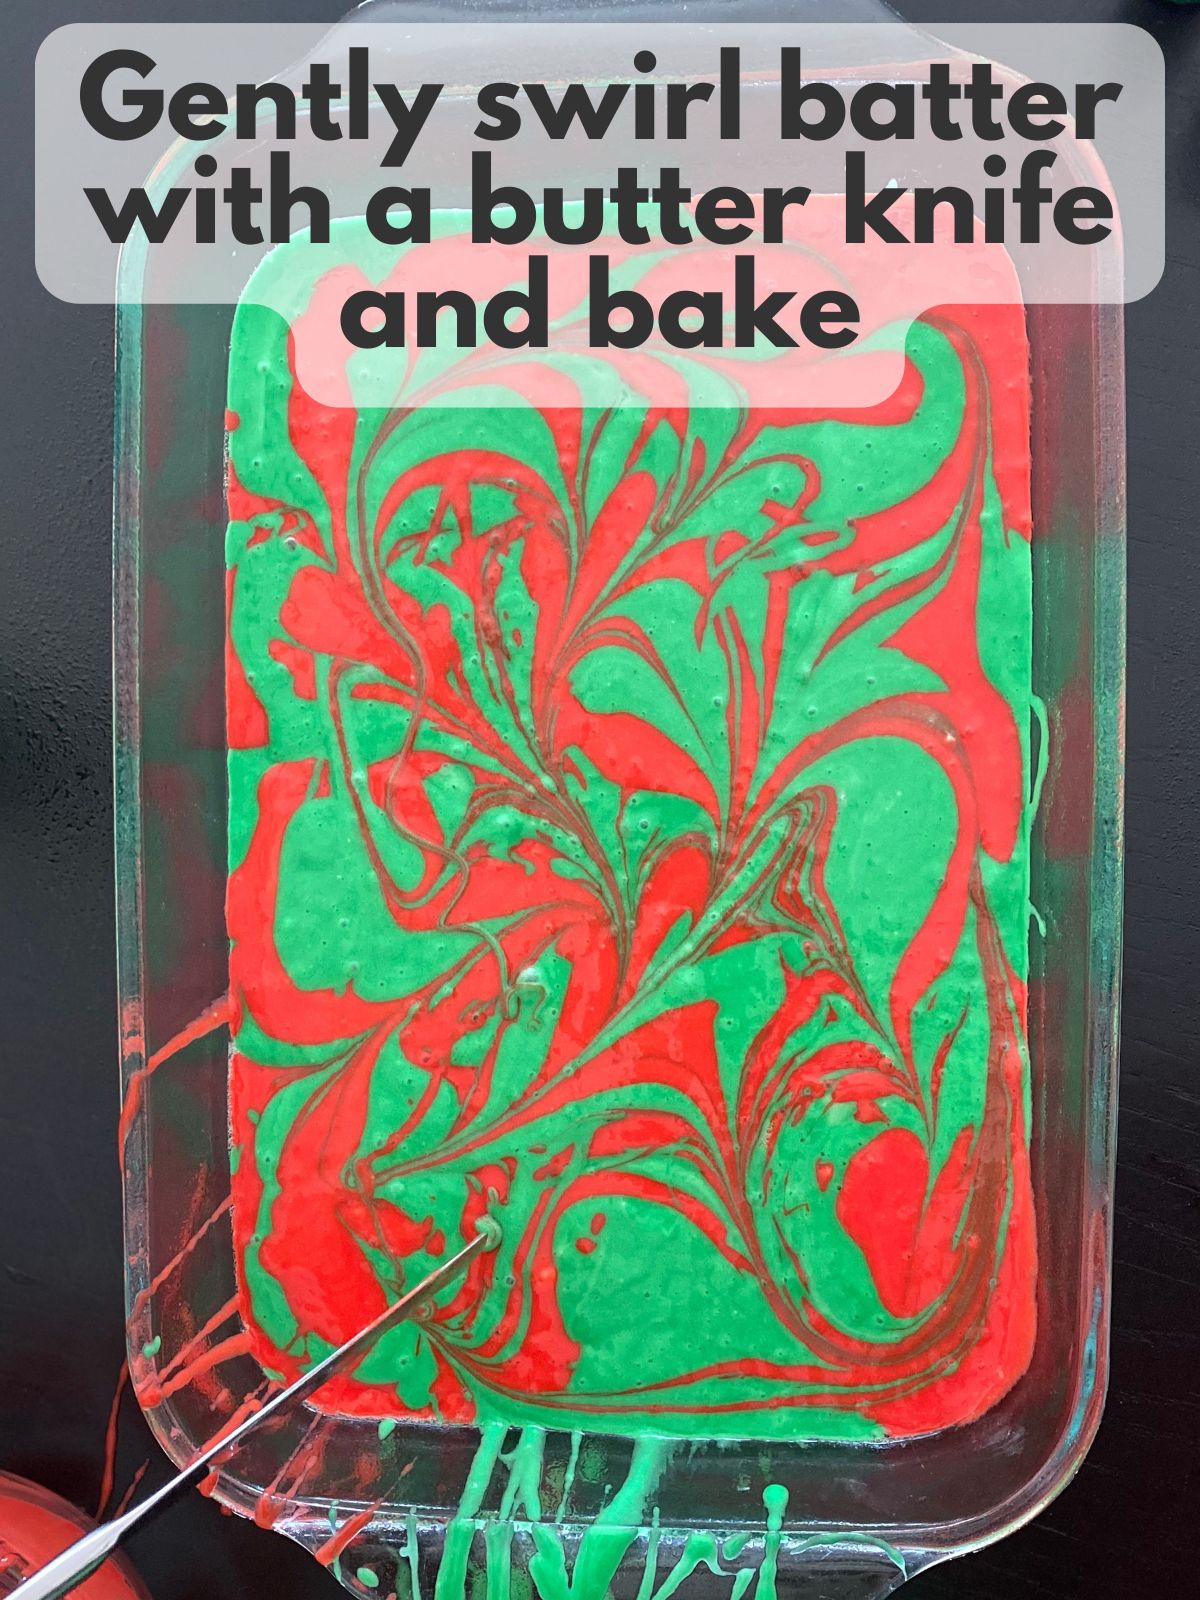
4. Bake
Bake according to the box directions until a toothpick inserted in the center comes out clean. Let the cake cool in the pan for about 10 minutes.
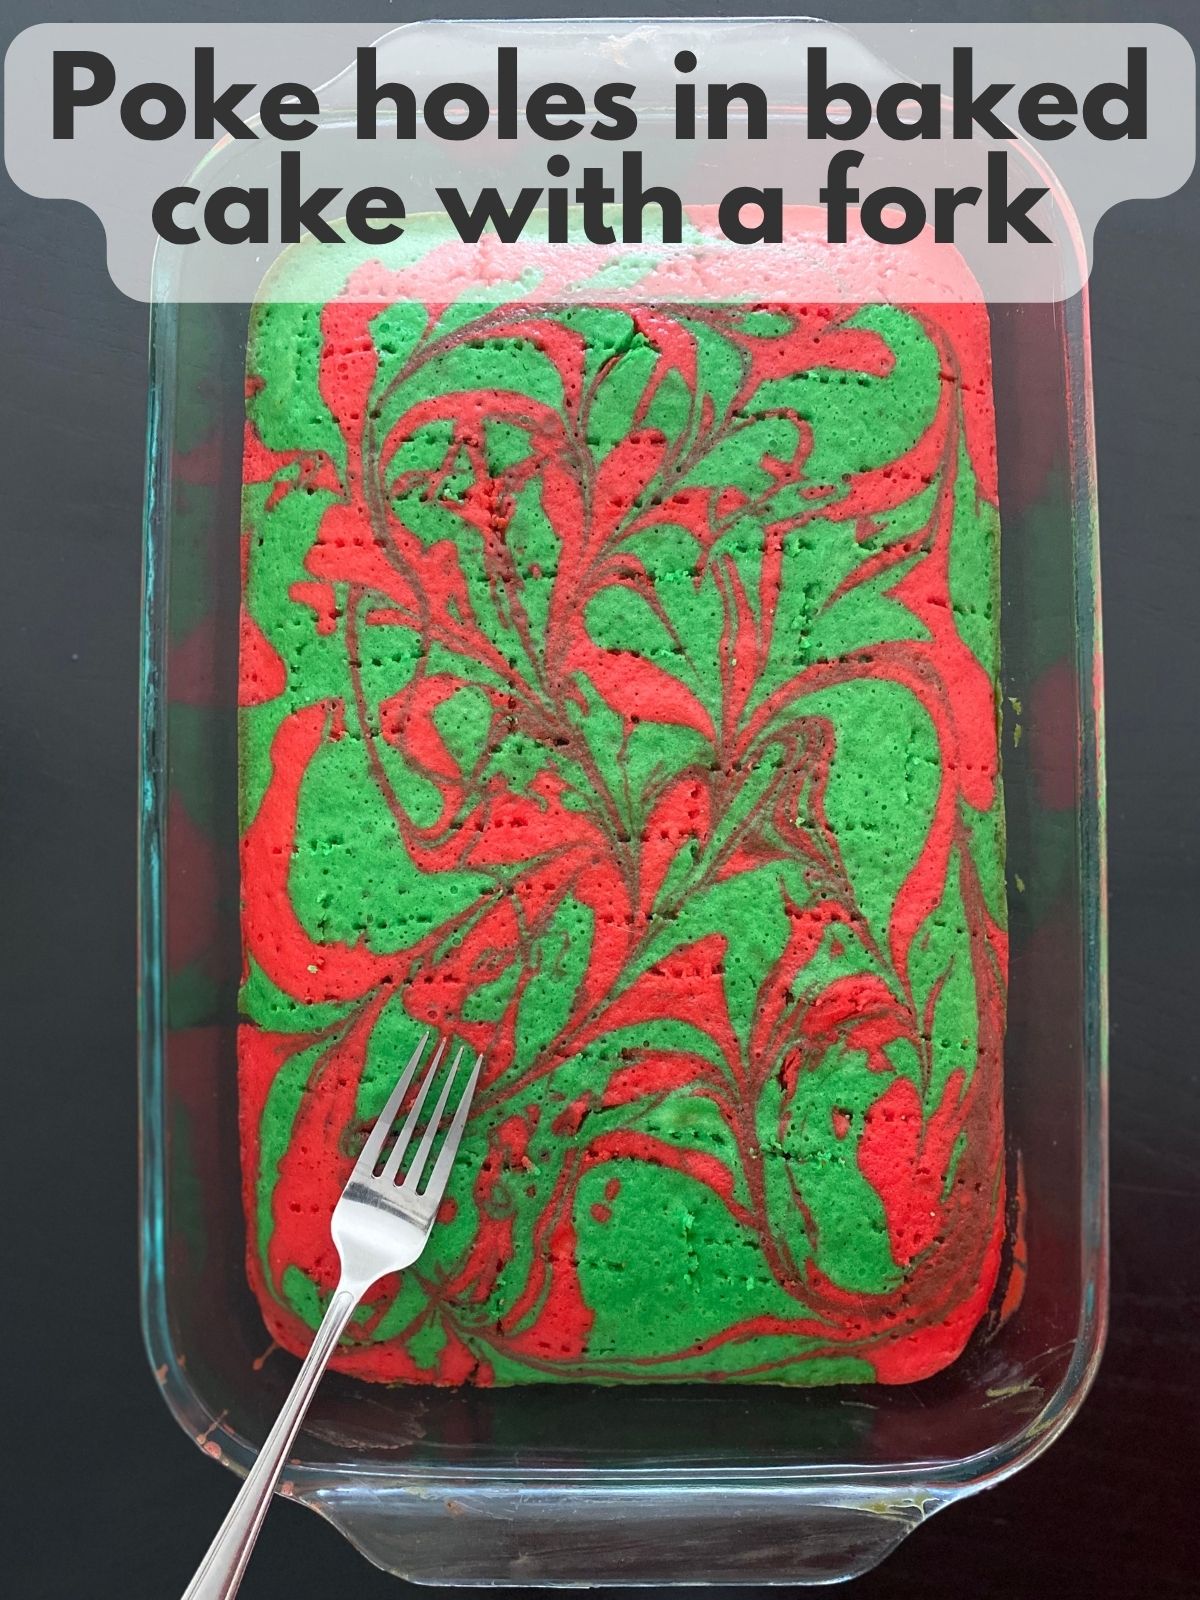
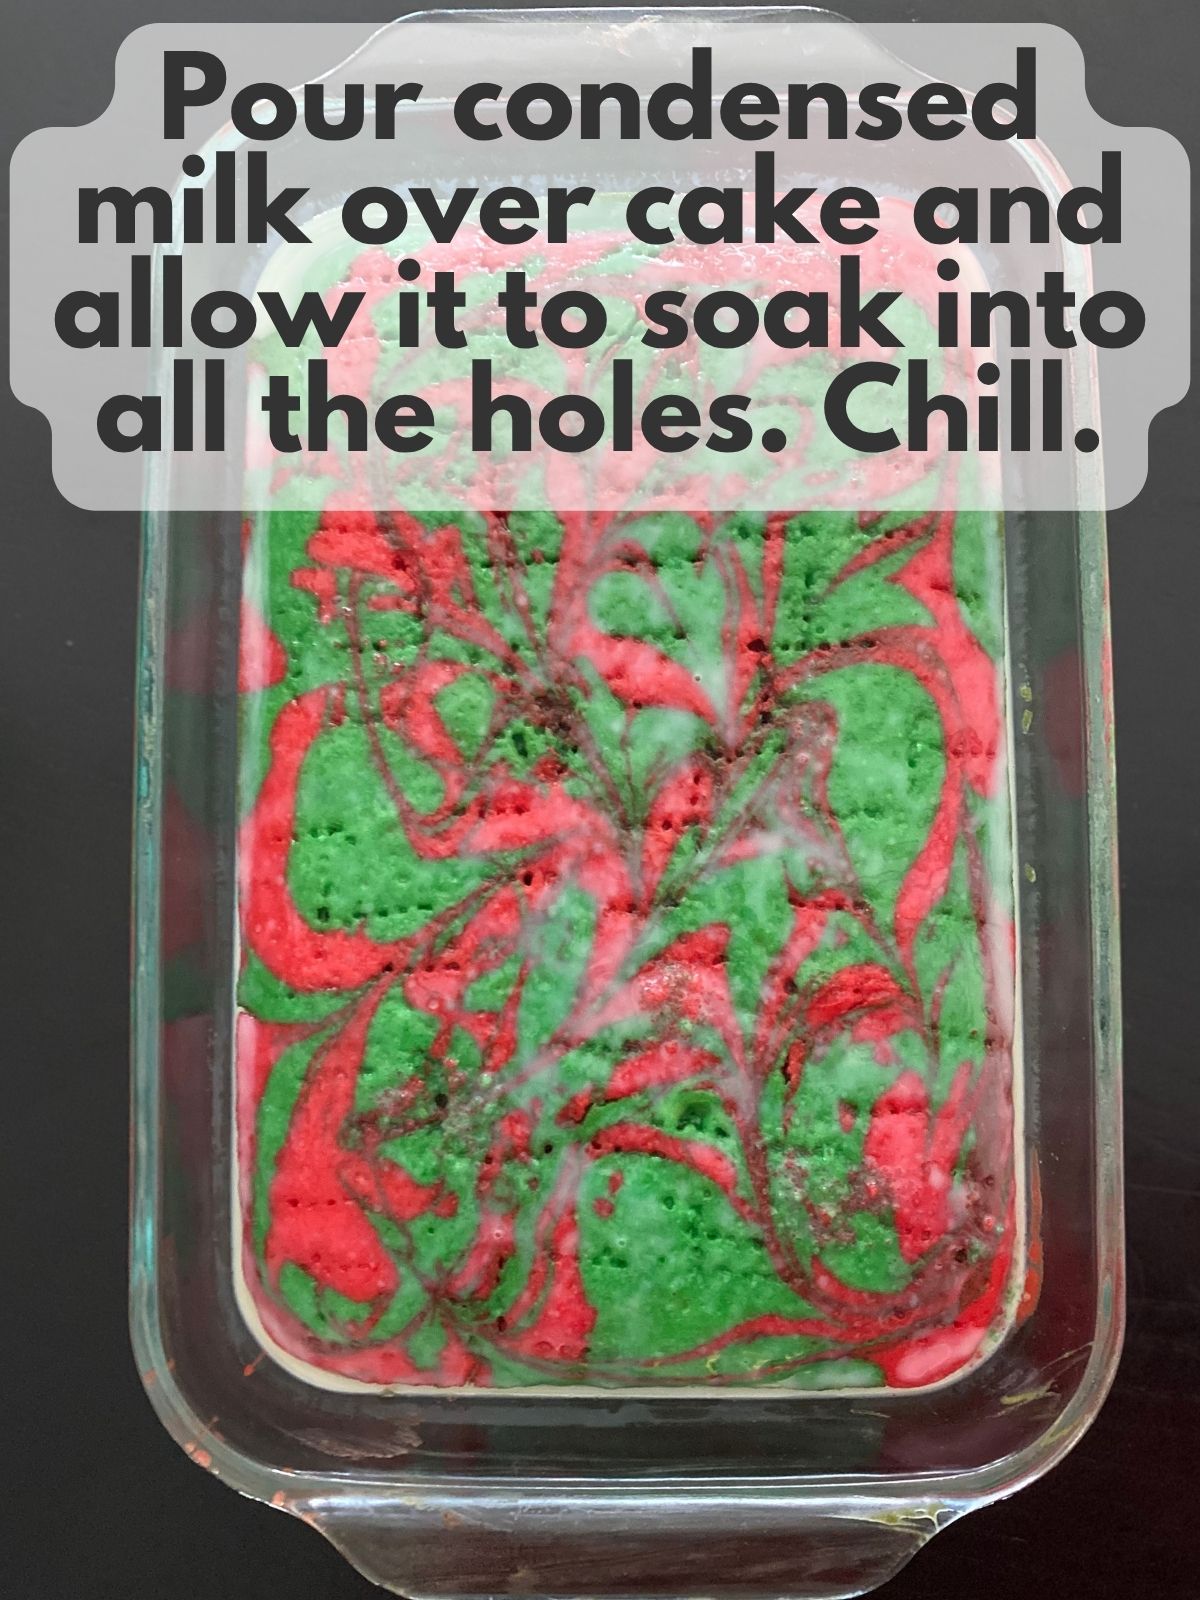
5. Poke and add sweetened condensed milk.
Use the handle of a wooden spoon or a fork (I like fork, but to each his own with poke cakes!) to poke holes all over the cake. Slowly pour the sweetened condensed milk evenly on top, letting it sink into all those little holes. Refrigerate for at least 1 hour to set and cool completely.
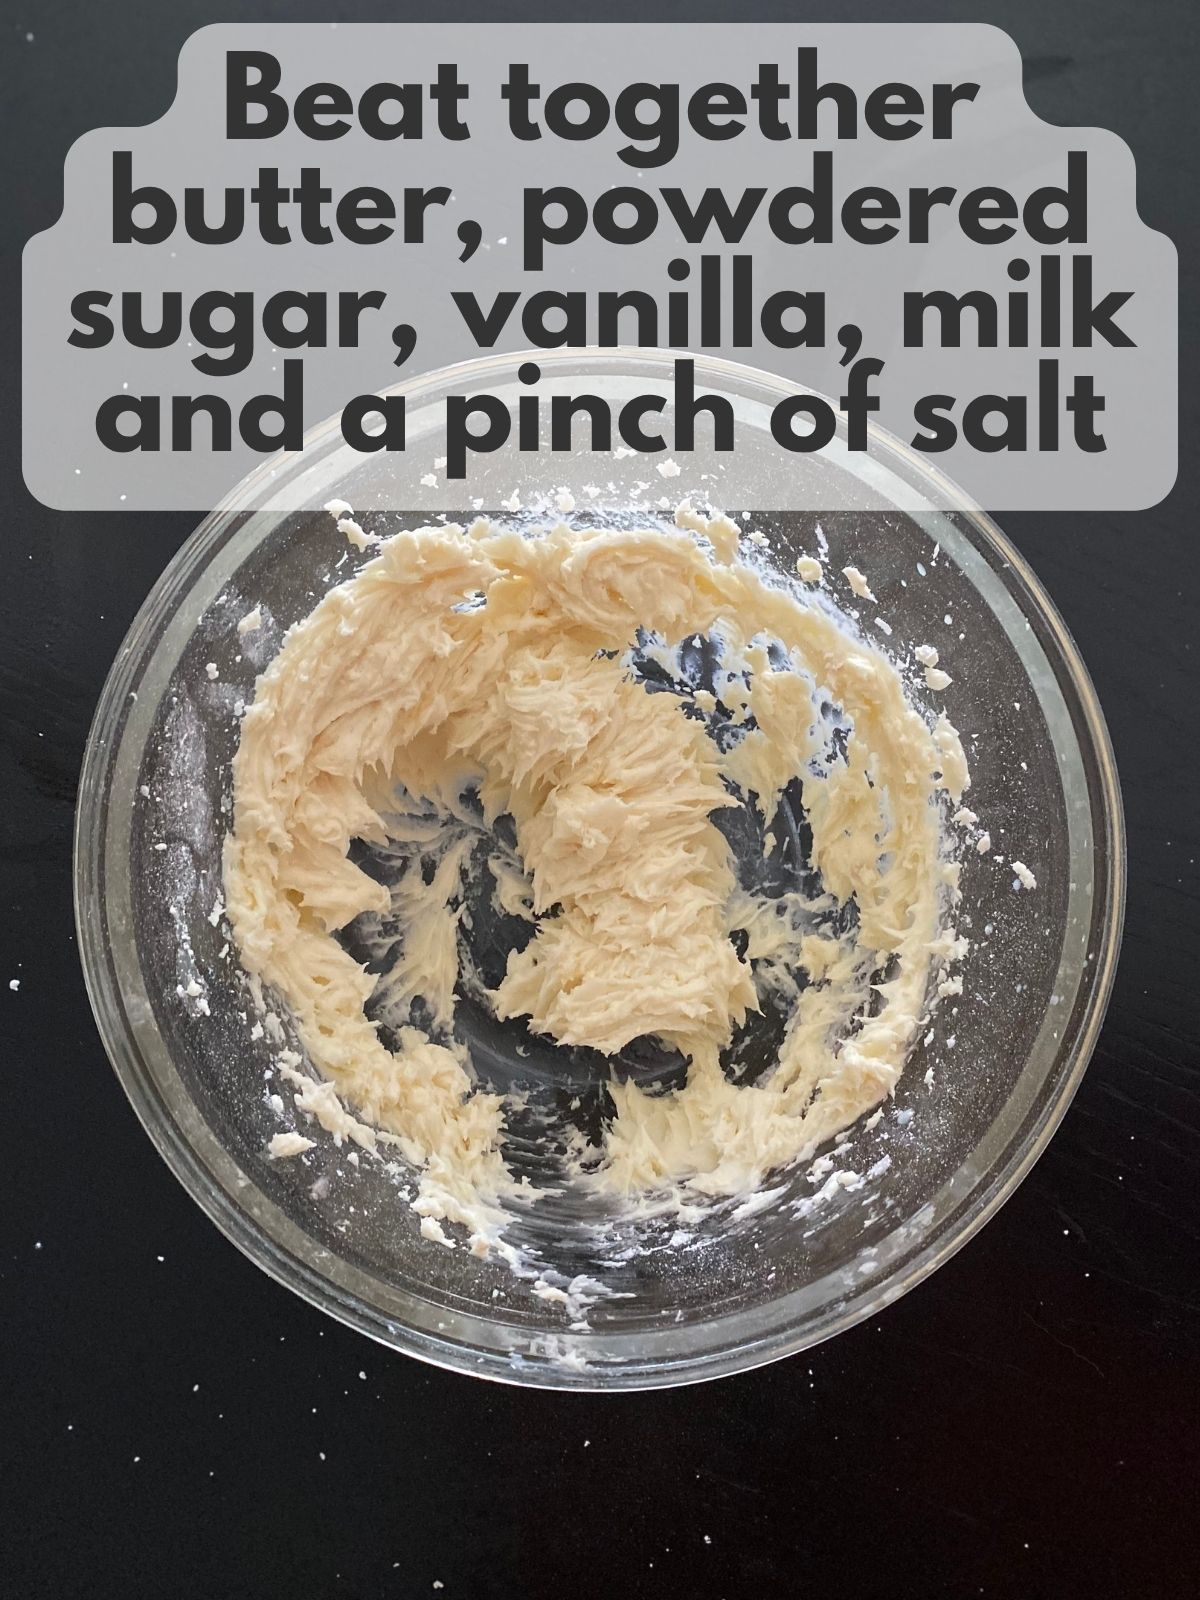
6. Make the buttercream.
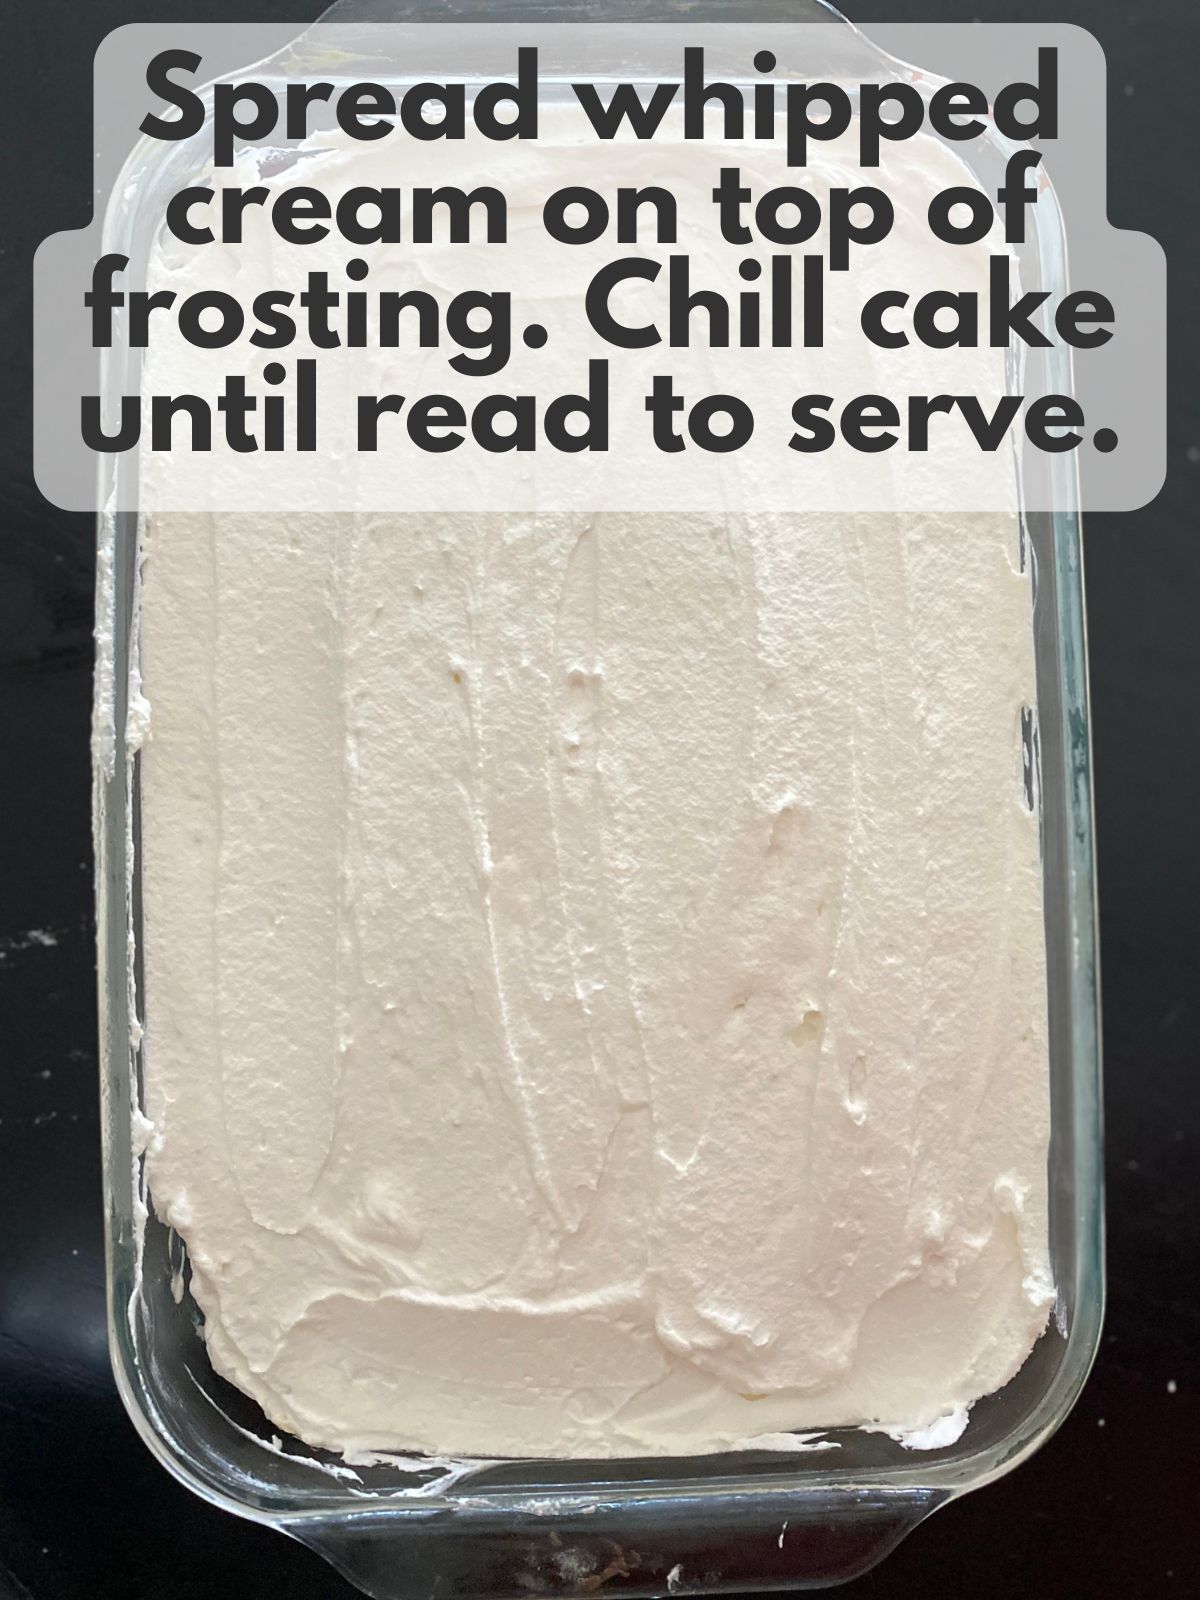
In a medium bowl, beat softened butter until light and fluffy. Add powdered sugar, vanilla, salt, and 1 tablespoon of heavy cream. Beat until smooth and spreadable, adding more cream if needed. Spread a thin, even layer (about ¼ inch thick) of buttercream over the chilled cake.

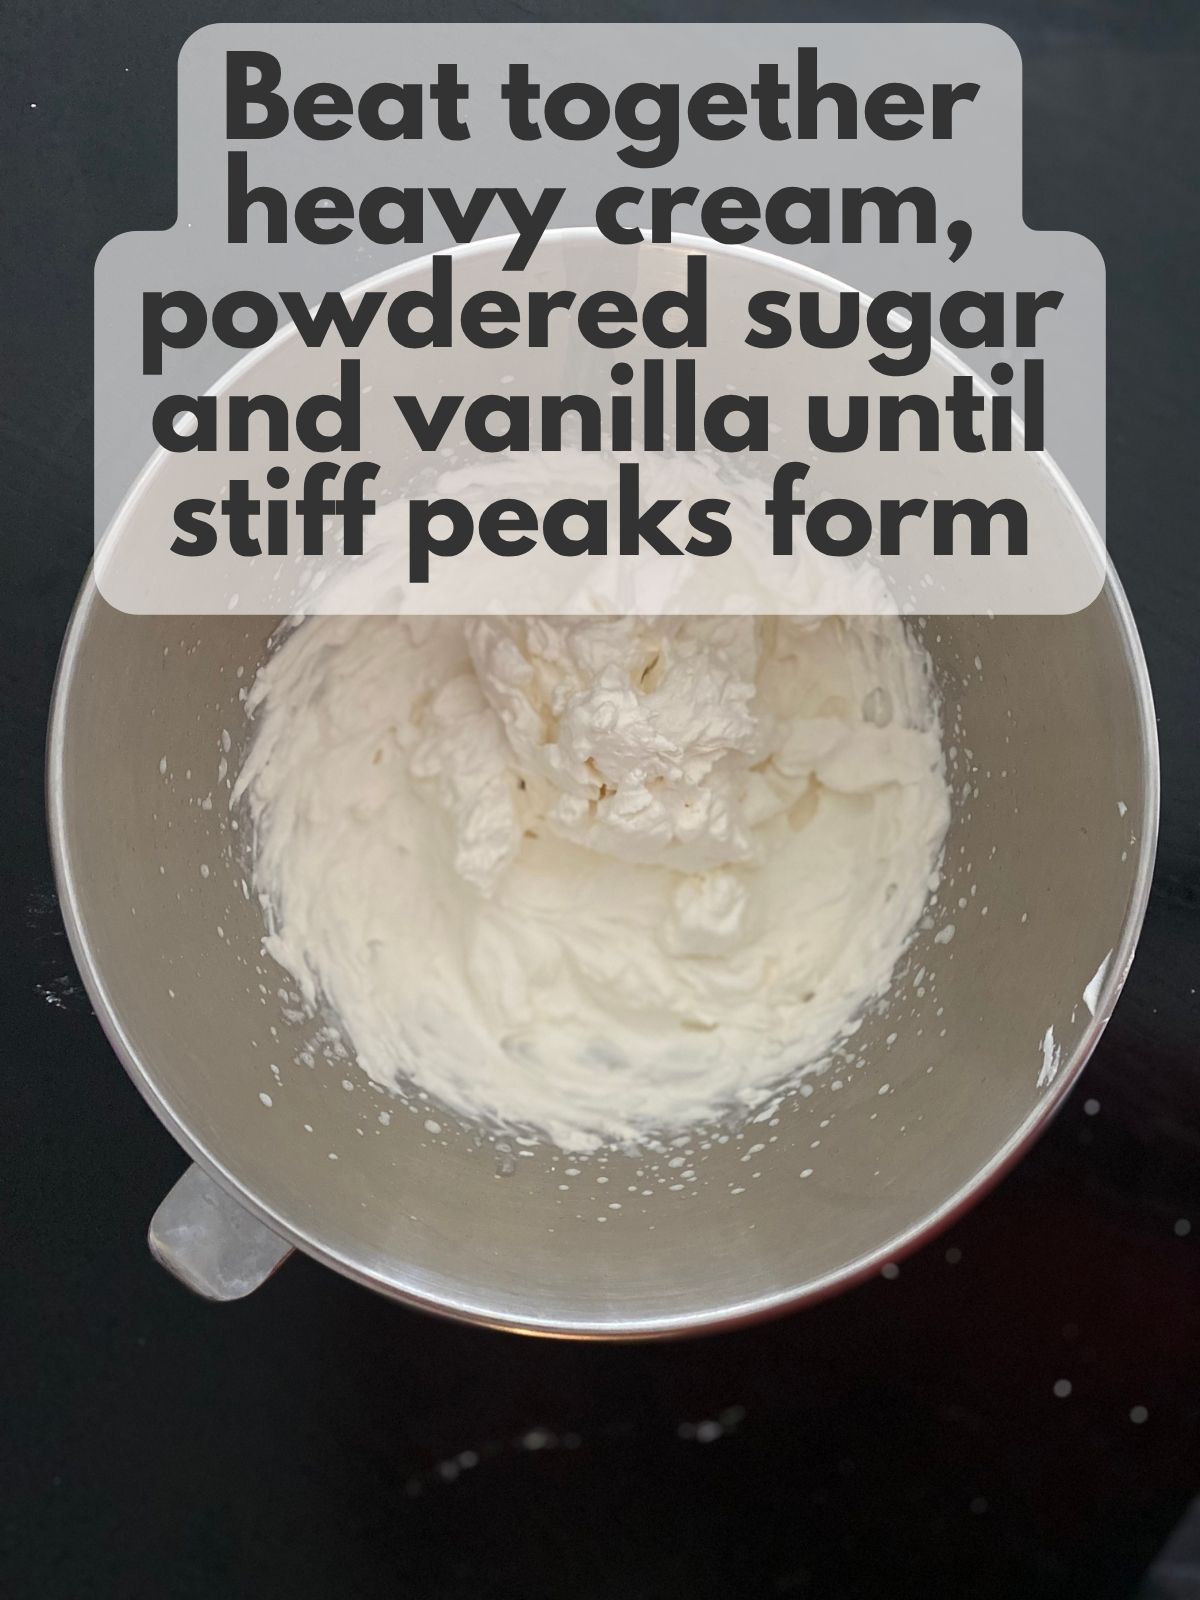
7. Whip up the topping.
In a clean, cold bowl, beat the heavy cream, powdered sugar, and vanilla until stiff peaks form. Spread the whipped cream evenly over the buttercream layer. You can also skip this step and use Cool Whip for an easy shortcut!
Pro Tips
- Use gel food coloring for bright red and green tones that won’t water down your batter. I like the “deep red” and “deep green” from Michael’s. They look far too dark in the bottle, but really just a drop or two of those deep colors is actually quite vibrant when you add them to white cake batter.
- Go easy on the swirl. Just a couple of gentle motions create the perfect marble without blending the colors together. Also, try to make sure your oven’s ready to go by the time your batter’s getting in the pan. You don’t want the batter sitting waiting for your oven to preheat because the colors might run together.
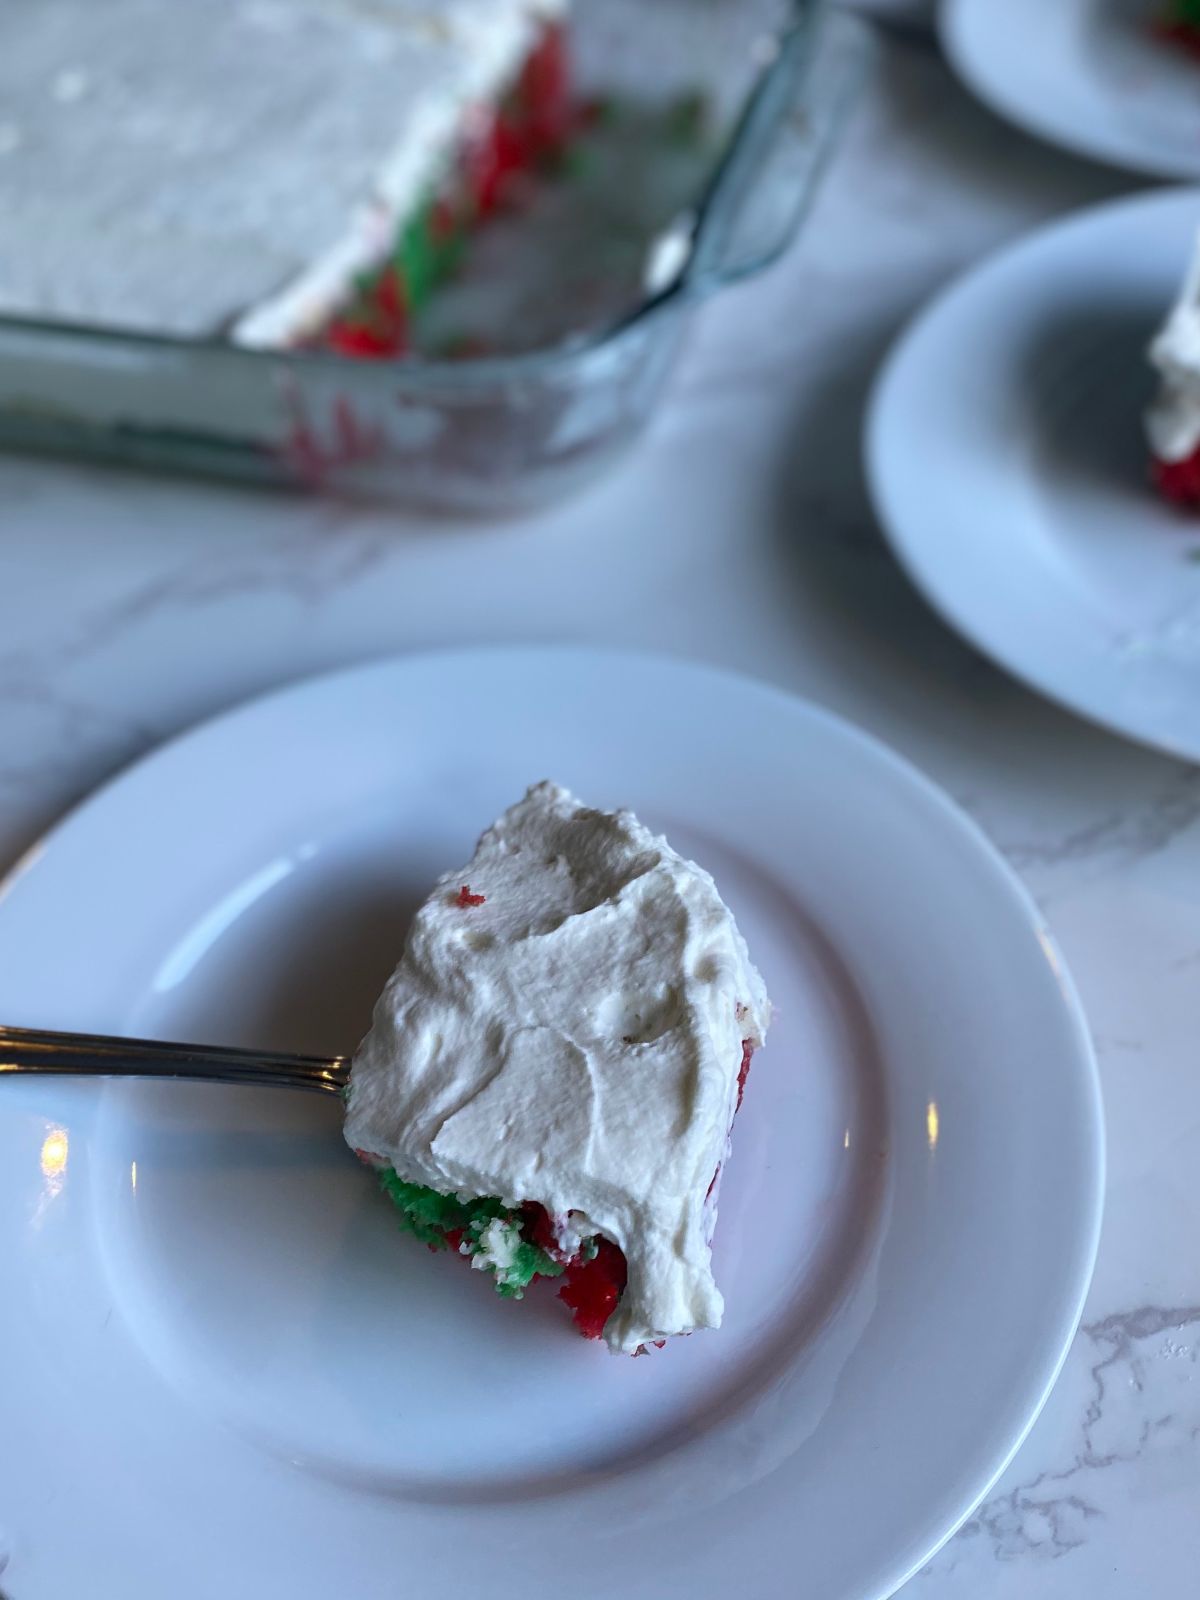
- Chill before slicing. It helps the layers set and gives you those clean, picture-perfect slices.
- Make it ahead. Bake and soak the cake a day before, then add the buttercream and whipped topping right before serving. It’s the best way to stay stress-free during busy holiday weeks!
FAQs
Can I make this without food coloring?
Yes, you definitely could! If you have a kiddo that doesn’t react well to food dye or even if you just don’t want to use it, you can definitely just use a white cake mix and call it a day. If you want a bit of a pop of color, you could try some red and green sprinkles, but make sure they’re jimmies, as other kinds of sprinkles might bleed their colors into your batter.
Can I use Cool Whip instead of fresh whipped cream?
Absolutely. Cool Whip is easy, stable, and delicious. Honestly, I had fully intended to write this recipe with Cool Whip! But somehow, I forgot to buy Cool Whip when I went grocery shopping and I didn’t feel like going back, so whipped cream it was.
How long should I chill the cake before serving?
At least 1 hour after adding the sweetened condensed milk, plus another 30 minutes after frosting and topping for clean slices.
Can I make this ahead?
Yes! Bake and soak the cake up to a day in advance. Add the buttercream and whipped topping the day you plan to serve for the freshest look. This Christmas poke cake also stores beautifully in the fridge for at least 5 days if you have leftovers.
This Christmas Poke Cake is the perfect mix of festive, creamy, and colorful. It’s everything a holiday dessert should be. With its marbled layers of red and green cake, silky filling, and whipped cream topping, it’s an instant showstopper that’s still incredibly easy to make. Bring it to a Christmas party, slice it up for a holiday dinner, or make it ahead for stress-free entertaining. However you serve it, it’s guaranteed to spread a little extra holiday cheer!
Christmas Poke Cake
Equipment
- 1 9x13 baking pan
- mixing bowls
- Whisk
- wooden spoon or fork
Ingredients
For the Cake
- 1 box white cake mix
- all the other ingredients your cake mix calls for in their respective quantities usually egg whites, oil and water, but check your box
- red and green gel food coloring
For the Filling
- 1 can sweetened condensed milk 14 oz
For the Vanilla Buttercream
- 1/2 cup (1 stick) unsalted butter softened
- 1 1/2 cups powdered sugar
- 1 tsp vanilla
- 1-2 Tbsp milk or heavy cream
For the Whipped Cream
- 1 1/2 cups heavy whipping cream
- 1/4 cup powdered sugar
- 1 tsp vanilla
Instructions
Make the Red and Green Marbled Cake
- Preheat your oven according to the cake mix instructions and grease a 9×13-inch pan
- Prepare the cake batter as directed on the box. Divide it evenly into two bowls.
- Tint one bowl red and the other green with gel food coloring until you get the shades you love.
- Spoon alternating dollops of red and green batter into the pan. Once filled, swirl a butter knife through the top just once or twice to create a marbled pattern.
- Bake according to the box directions until a toothpick inserted in the center comes out clean. Let the cake cool in the pan for about 10 minutes.
Poke and Add Filling
- Use the handle of a wooden spoon or a fork (I like fork, but to each his own with poke cakes!) to poke holes all over the cake.
- Slowly pour the sweetened condensed milk evenly on top, letting it sink into all those little holes. Refrigerate for at least 1 hour to set and cool completely.
Add Frosting and Whipped Cream
- In a medium bowl, beat softened butter until light and fluffy.
- Add powdered sugar, vanilla, salt, and 1 tablespoon of milk. Beat until smooth and spreadable, adding more milk if needed.
- Spread a thin, even layer (about ¼ inch thick) of buttercream over the chilled cake.
- In a clean, cold bowl, beat the heavy cream, powdered sugar, and vanilla until stiff peaks form. Spread the whipped cream evenly over the buttercream layer. You can also skip this step and use Cool Whip for an easy shortcut!
- Store covered in the fridge