Last updated on April 14th, 2025 at 09:44 pm
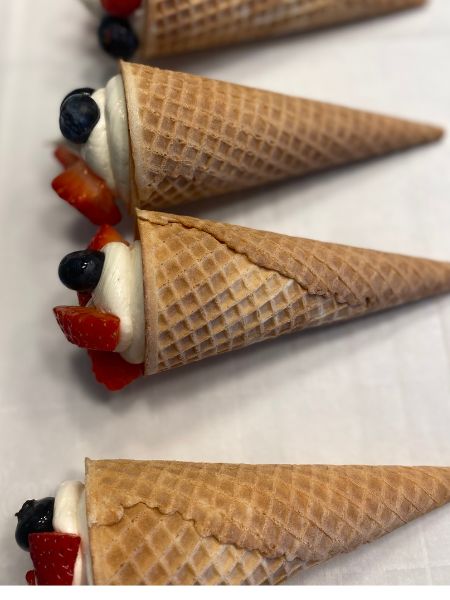
 If you’re looking for a quick, no-bake treat that’s as cute as it is delicious, these Berry Cheesecake Cones are it. I love with how easy they are to throw together—perfect for last-minute summer parties, baby showers, or just a sweet little weeknight dessert.
They’re basically everything I love in a summer dessert: creamy no-bake cheesecake, fresh berries, and simplicity. You get the flavor of cheesecake without turning on the oven. And the best part? You can make a whole batch in under 20 minutes. Yes, please!
These cute bites are fun to serve and super easy to customize. I hope you enjoy these handheld treats as much as I did!
Jump to Recipe
Ingredients for Berry Cheesecake Cones
Here’s everything you need to make these no-bake beauties:
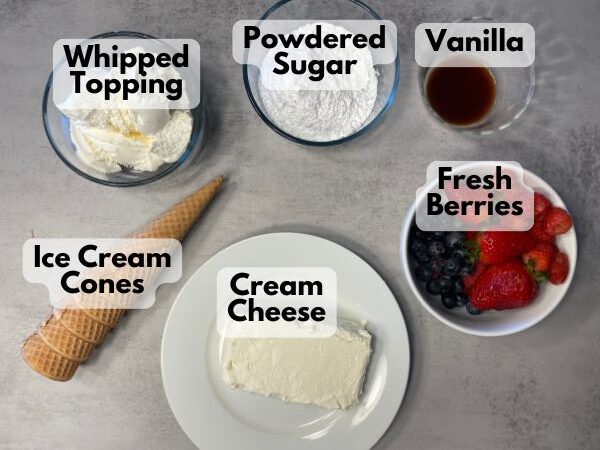
- Ice Cream Cones – I used full-sized sugar cones. Even better, if you can find mini waffle cones, you can get many, many bite-sized servings that would look absolutely adorable.
- No-bake cheesecake filling
- 8 oz cream cheese, softened
- 1/2 cup powdered sugar
- 1 tsp vanilla extract
- 1 cup whipped topping or whipped cream (like Cool Whip or homemade)
- Fresh fruit for topping
- Diced strawberries
- Blueberries
- Raspberries
- Optional: add red/white/blue sprinkles for festive flair or a chocolate drizzle
How to Make No-Bake Berry Cheesecake Cones
These come together in just a few simple steps:
- Make the filling:
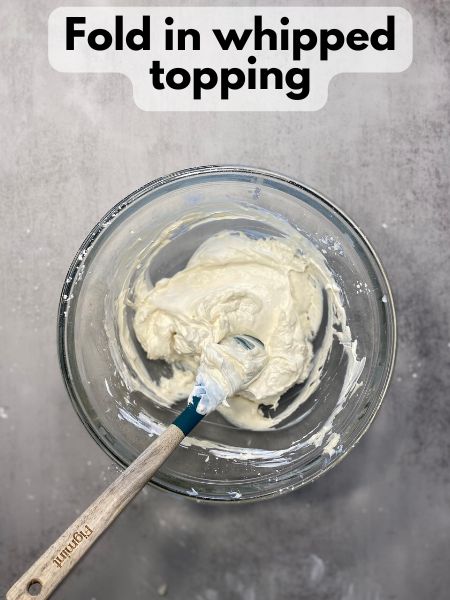
In a bowl, beat the softened cream cheese until smooth. Add powdered sugar and vanilla extract, then beat again until fluffy. Gently fold in whipped cream or whipped topping until the mixture is light and creamy.
- Prep the filling:
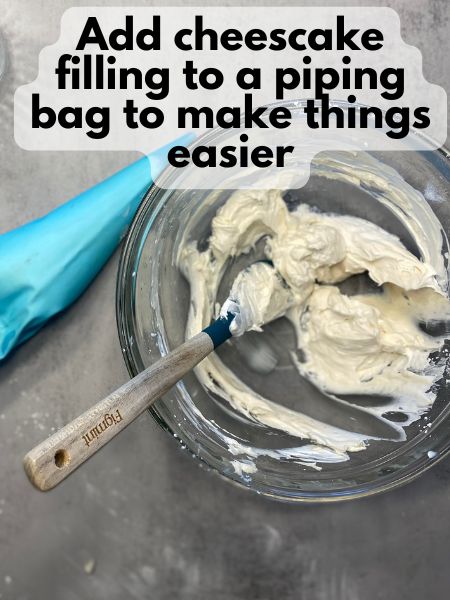
To make things easier, put your cheesecake filling in a piping bag. This makes it easier to add to the narrow cone, and it allows you to add a pretty swirl to the top of your cone. Also, if you’re going to dip your cone in chocolate, do that and allow the chocolate to harden before adding filling. - Fill the cones: There are two ways to do this, depending on the size of your ice cream cone.
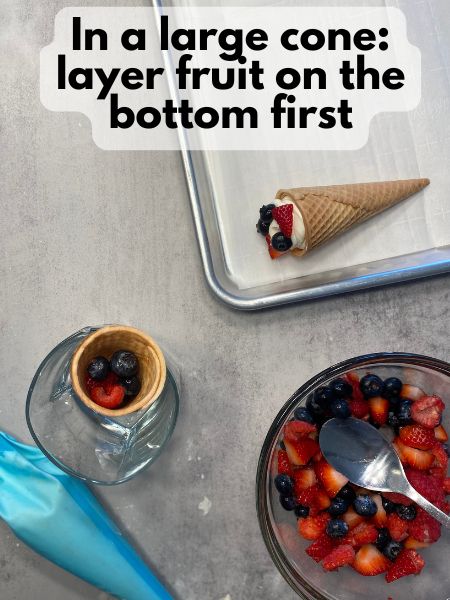
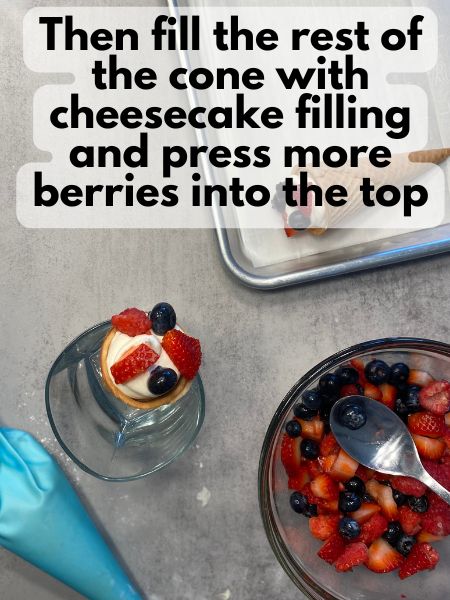
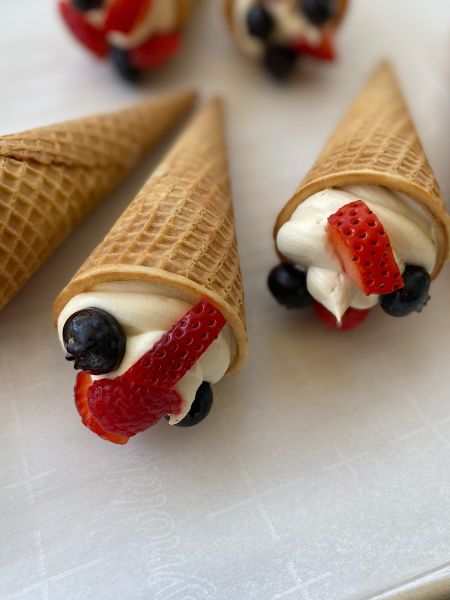
- For full-sized cones: Add a little bit of fruit to the bottom of your large cone. Then, pipe some cheesecake filling in the middle up to about the top of the cone. Add a swirl of filling to the top, and press more fruit into the top swirl of cheesecake filling
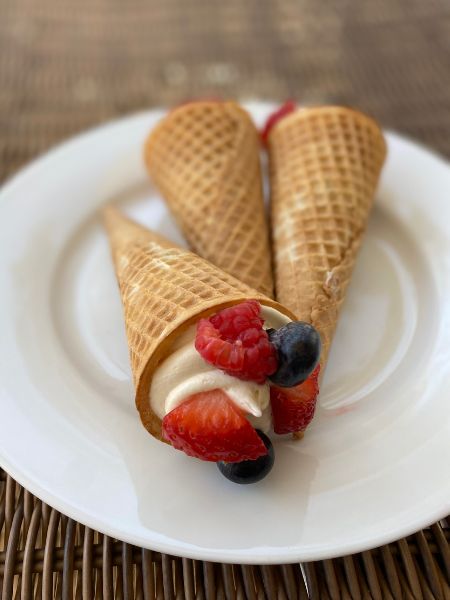
- If you have mini cones, just add some cheesecake filling right away and top with fruit. I like using a mix of raspberries, strawberries and blueberries for that red-white-and-blue summer vibe, but any fruit works really!
- Chill and Store
Chill for 10–15 minutes if you want them a little firmer—or serve right away! For storage, you can carefully store these on a plate in the fridge until you’re ready to serve them. For best results, definitely eat these within a couple hours, or your cones will get soggy. They are meant to be eaten right away.
Pro Tips
- Mini cones = perfect portion: This recipe works great with bite-sized with mini waffle cones, but you can totally use full-size cones if that’s all you have. I couldn’t find mini cones at the store, so I went with full-sized sugar cones. If you want to go with regular-sized waffle cones, that would work too, but just note that you might get less in the end because waffle cones are pretty large and you’ll end up using a lot of cheesecake filling.
- Layer your toppings in a full-sized cone: If you do have a full-sized cone, I would suggest you layer your cones like this: fruit on the bottom, cheesecake filling in the middle with a swirl on top, press more berries into the top. This way, you spread out your berry flavor and don’t use a ton of cheesecake filling just filling up one full-sized ice cream cone.
- Make ahead: You can prep the cheesecake filling a day in advance and store it in the fridge in a covered container. Just fill the cones right before serving so they don’t get soggy.
- Keep it cool: These are best served cold, so pop them in the fridge until party time. If you’re bringing them to a picnic, keep them in a cooler until you’re ready to serve.
- Customize it: Try diced peaches, blackberries, or even kiwi! You can also swap the vanilla for lemon or almond extract to mix up the flavor.
FAQs
Does it matter what kind of whipped topping I use?
I really don’t think it would matter too much. I used Cool Whip, but you could also use homemade whipped cream by beating heavy whipping cream with a bit of powdered sugar and vanilla for stability. I’m not as confident in the whipped cream you buy in a can, because that goes liquid-y and flat pretty quickly and might make your cheesecake filling runny. However, if anyone tries it and it works, please let me know in the comments! I love hearing about everyone’s dessert-making adventures!
Can I use frozen berries?
Fresh is best for texture and appearance, but if you only have frozen, thaw and dry them really, really well to avoid sogginess. Alternatively, if you don’t have fresh berries, really any fresh fruit would taste lovely on these. If it can be a type of cheesecake, it can go in here! If you’re wondering about bananas, I think they would be good. I have a banana Nutella cheesecake that I love for summer.
How long do they last?
Once filled, the cones are best eaten within 2–3 hours. The cheesecake filling can be made up to 24 hours in advance and stored in the fridge in an airtight. These are definitely a last-minute kind of dessert meant for no-fuss summer get togethers or chill summer evenings with friends.
What if I don’t have mini cones?
You can definitely use regular-sized ice cream cones! I did because I couldn’t find mini cones at the store, and I think they turned out wonderful. I would suggest you just layer some berries in the bottom of your cone, as well, to kind of fill some of the space so you’re not filling an entire full-sized ice cream cone with cheesecake filling. You should be able to get about 8-10 full-sized sugar cones, depending on how much fruit and cheesecake filling you put in each.

These Berry Cheesecake Cones are one of my favorite no-bake desserts to whip up when I want something cute, quick, and totally crowd-pleasing. Whether you’re making them for a brunch spread, baby shower, or just a sweet little weekday treat, they’re always a hit.
Let me know if you give them a try—I’d love to hear what fruit combos you go with!

Berry Cheesecake Cones
Ingredients
- 6 full-sized sugar cones or about 20 mini waffle cones if you can find them
No-Bake Cheesecake Filling
- 8 oz cream cheese softened
- 1/2 cup powdered sugar
- 1 tsp vanilla
- 1 cup whipped topping like Cool Whip or homemade whipped cream
Fres Fruit for Topping
- Diced strawberries
- Raspberries
- Blueberries
Instructions
Make the Cheesecake Filling
- In a bowl, beat the softened cream cheese until smooth. Add powdered sugar and vanilla extract, then beat again until fluffy.
- Gently fold in whipped cream or whipped topping until the mixture is light and creamy.
- To make the next step easier, I recommend adding your filling to a piping bag with no tip or a large round tip.
Fill the Cones
- For full-sized cones: Add fruit to the bottom of your large cone. Then, pipe some cheesecake filling in the middle up to about the top of the cone. Add a swirl of filling to the top, and press more fruit into the top swirl of cheesecake filling.
- If you have mini cones, just add some cheesecake filling right away and top with fruit.
Chill and Store
- Chill for 10–15 minutes if you want them a little firmer—or serve right away! For storage, you can carefully store these on a plate in the fridge until you're ready to serve them. For best results, definitely eat these within a couple hours.

