Last updated on October 24th, 2024 at 09:30 pm
 Today, I’m going to share with you a super yummy, easy recipe for Vegan Apple Cinnamon Scones that will have you coming back for seconds (and maybe even thirds!). With simple ingredients and easy-to-follow instructions, you’ll be whipping up a batch of these delectable scones in no time.
Imagine walking into a cozy kitchen filled with the irresistible aroma of freshly baked vegan apple cinnamon scones. The perfect combination of sweet apples, warm cinnamon, and flaky scone goodness is enough to make anyone’s mouth water. Whether you’re a seasoned baker or a newbie in the kitchen, these scones are sure to become a favorite in your household.
So, grab your apron and let’s get baking!
Jump to Recipe
Ingredients for Vegan Apple Cinnamon Scones
To make these scrumptious Vegan Apple Cinnamon Scones, you’ll need the following ingredients:
For the Apple Cinnamon Scones:
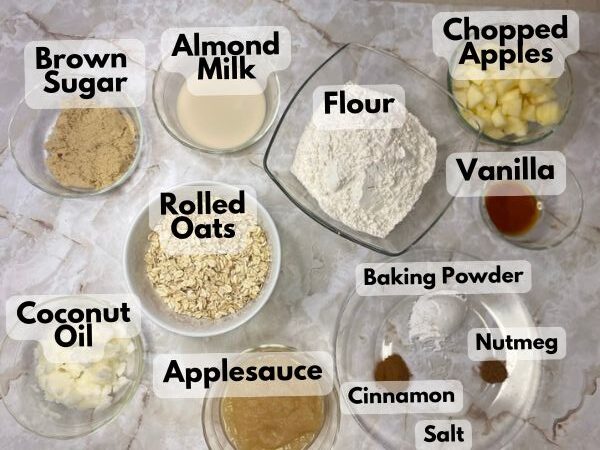
- 1 1/2 cups all-purpose flour
- 1 cup rolled oats
- 1/4 cup brown sugar
- 1 tablespoon baking powder
- 1/2 teaspoon ground cinnamon
- 1/4 teaspoon ground nutmeg
- 1/4 teaspoon salt
- 1/2 cup coconut oil (solid)
- 1/2 cup unsweetened applesauce
- 1/4 cup non-dairy milk (almond, soy, or oat milk work well)
- 1 teaspoon vanilla extract
- 1 cup peeled, cored, and finely chopped fresh apples (about 1 medium apple)
- Optional: 1/4 cup chopped nuts (walnuts or pecans) or raisins
For the Vanilla Glaze:
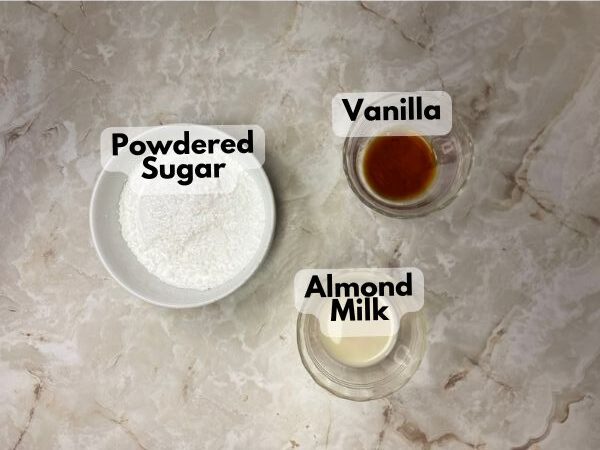
- 1 cup powdered sugar
- 1 teaspoon vanilla
- 1-2 Tablespoons vegan-friendly milk (start with 1 and then add a bit more to adjust for texture)
Video – How to Make Vegan Apple Cinnamon Scones
How to Make Vegan Apple Cinnamon Scones
Now that you have all your ingredients ready, it’s time to start baking! Follow these easy steps to make your Vegan Apple Cinnamon Scones:
1. Preheat and Prepare:
– Preheat your oven to 400°F (200°C). OR wait until your scone dough is chilling before your turn your oven on. That’s what I do so that my oven isn’t on for so long.
– Line a baking sheet with parchment paper.
2. Mix Dry Ingredients:
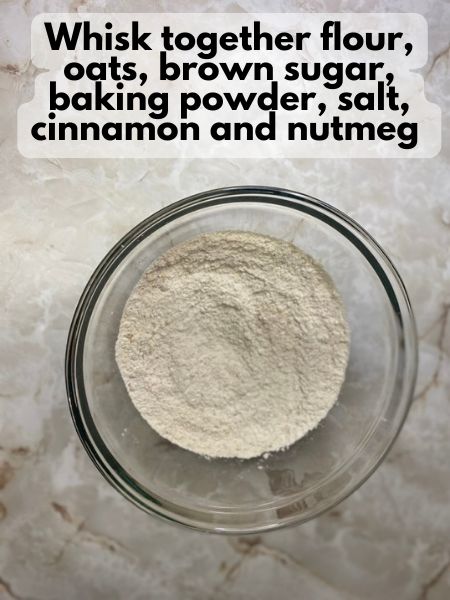
– In a large bowl, combine the flour, oats, brown sugar, baking powder, cinnamon, nutmeg, and salt.
3. Cut in Coconut Oil:
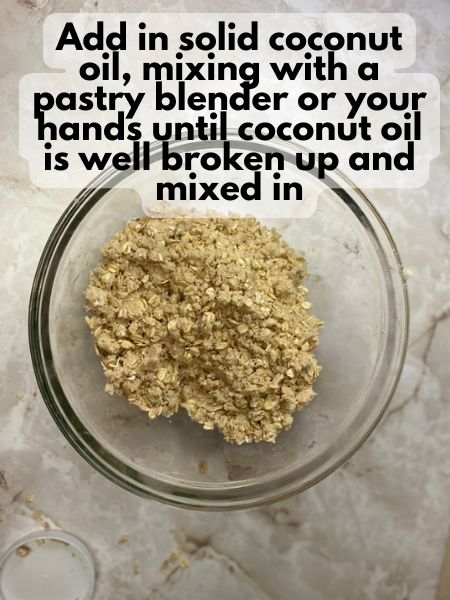
– Add the solid coconut oil to the dry ingredients. Use a pastry cutter or fork (or your hands! I like to just use my hands) to cut the coconut oil into the dry mixture until it resembles coarse crumbs.
Really, you just want to make sure the coconut oil is pretty well broken up in your mixtures so that no huge chunks of it are in there. It’s okay–and even preferred–if there are some smaller chunks of coconut oil still in your dough.
4. Add Wet Ingredients:
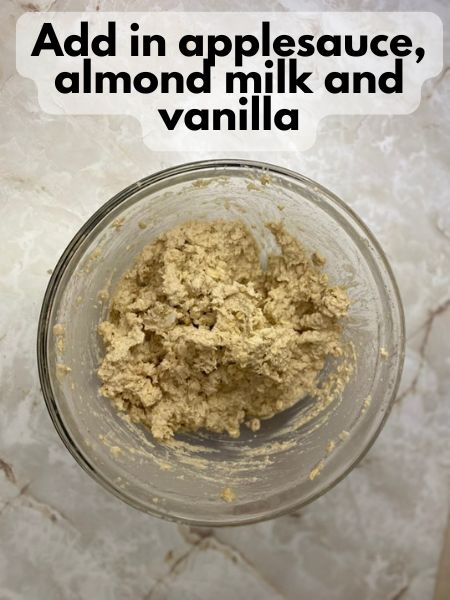
– Pour the wet ingredients into the dry ingredients and stir until just combined.
5. Fold in Apples:
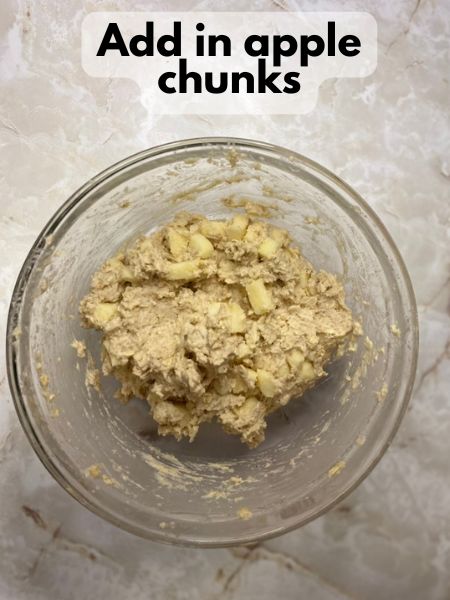
– Fold in the chopped apples and any optional add-ins like nuts or raisins.
6. Shape Scones:
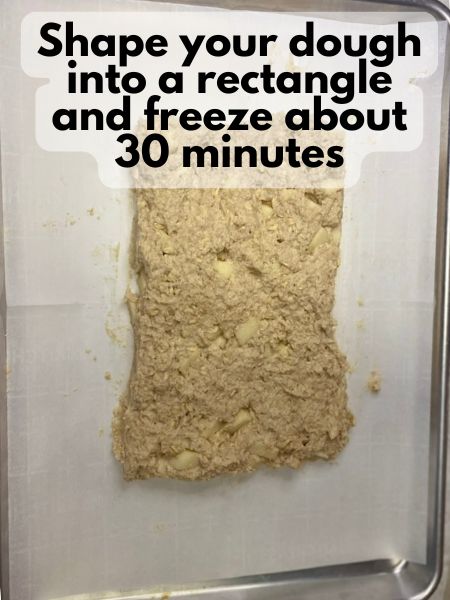
– Turn the dough out onto a clean surface (I use a cookie sheet lined with parchment paper) and pat it into a rectangle. Some people like to shape their scones into circles, and that’s fine too! I go with a rectangle because it’s just easier for my brain to cut the dough that way.
7. Chill and Cut:
-Chill your scone dough in the freezer for about 30 minutes. You can even chill it longer if you want to, but I would recommend at least 30 minutes so your dough is a little firm and not-so-mushy when you pull it out.
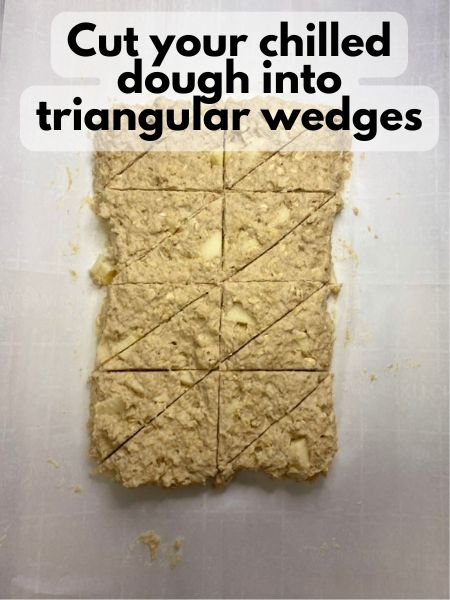
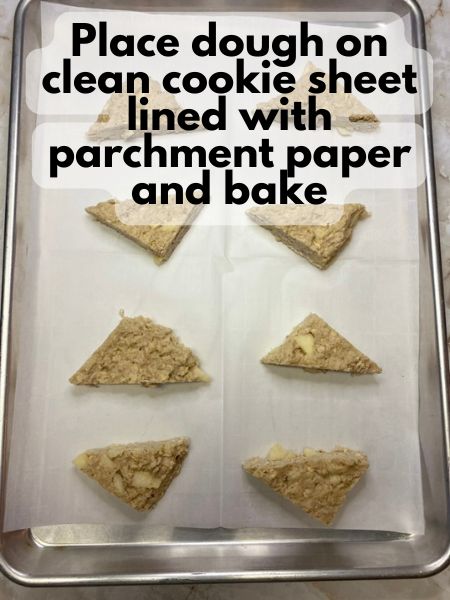
-Cut your chilled, firmed-up dough into triangular wedges. Transfer the wedges to a clean cookie sheet lined with parchment paper.
8. Bake:
– Bake for 15-20 minutes, or until the scones are lightly golden brown on the bottoms and around the edges. It’s a little hard to tell if scones are done, but I usually look at the bottom of my scones. If the bottoms are browning a bit, they’re done. If you wait until the tops are brown, your scones might come out dry.
Also, make sure the top of your scones look pretty “set” and not jiggly. Then they’re done.
9. Cool and Glaze:
– Allow the scones to cool slightly on the baking sheet before adding glaze.
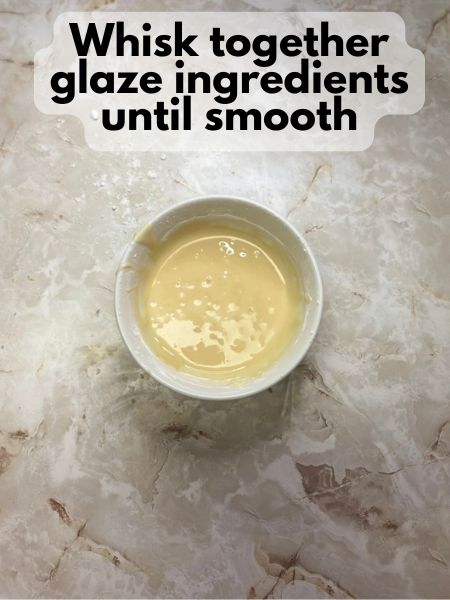
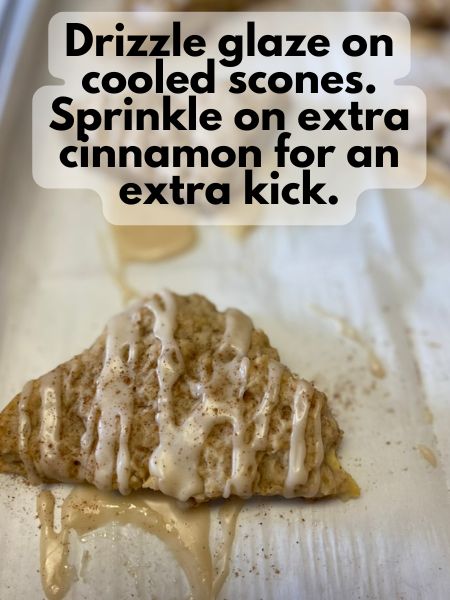
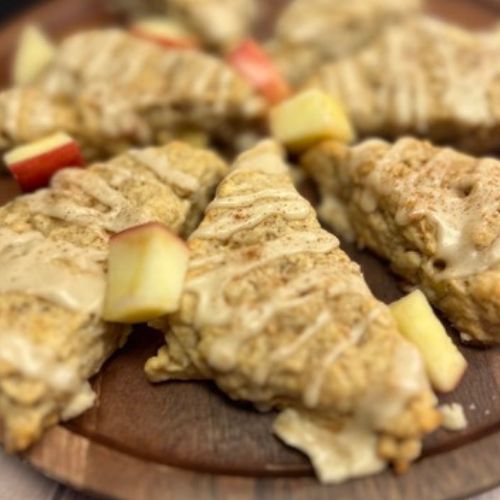
-Whisk together all glaze ingredients until smooth. Using a spoon or a squeeze-top bottle, drizzle glaze on cooled scones.
-Optional (but good!): Sprinkle a little extra cinnamon on top of your wet glaze for some added flavor and spice.
Pro Tips
Want to take your Vegan Apple Cinnamon Scones to the next level? Here are some pro tips to ensure your scones turn out perfectly every time:
- Definitely chill your dough! I know, I know. It’s yet another step to take and you just want to bake your scones and be done. I get it. But your scones will be waaaayyy better if you chill your dough first. In fact, I usually bake my scone dough when it’s pretty much frozen. The dough is easier to handle and it keeps its shape while baking that way.
- Chop up your apples right before you add them. If you leave apple chunks sitting out for too long, they may go brown on you by the time you get to add them to your dough and bake them. For best results, chop them up right before you add them to your dough. You shouldn’t have trouble with them going brown on your if you chill your dough in the freezer, too (at least, I didn’t!).
- Always bake your scones on a clean baking sheet lined with fresh parchment paper. Scones are kind of picky about when they want to be baked and when they just burn. There’s a pretty thin line of time where perfectly baked quickly becomes burnt to a crisp when baking scones. I find that it always helps to put your chilled scone dough on a clean piece of parchment paper when baking. It definitely stinks to not be able to reuse the parchment paper you used for chilling, but I think it affects how well your scones turn out in the end.
- For an extra burst of flavor, consider adding a handful of chopped nuts or raisins to the dough. Really, the sky’s the limit with these! I could even see adding some white chocolate chips and/or adding a caramel drizzle rather than the vanilla one I used. Just make sure you buy vegan-friendly chocolate and/or caramel!
- Store any leftover scones in an airtight container at room temperature for up to 3 days, or freeze them for longer storage. You can also freeze scone dough (wrap it tight in some plastic wrap first!) for a month or so and then bake them fresh if you think you can’t eat all your scones at once.
FAQs
Q: Why is my dough so sticky?
A: Don’t worry if the dough is a bit sticky—it’s supposed to be so you have moist, soft scones in the end! You can flour your hands and surface lightly to make handling the dough easier. I recommend shaping your dough on a cookie sheet lined with parchment paper, and then just sticking them in the freezer until they’re nice and solid (My hands are definitely coated in dough by the end of the shaping!). When they’re frozen, you can cut them easily and bake them from their mostly-frozen state. You can also bake them from frozen-solid state if you adjust your baking time a bit.
Q: Can I make these scones gluten-free?
A: Absolutely! Just substitute the all-purpose flour with a good-quality gluten-free flour blend. You may need to add a bit more liquid, so adjust accordingly.
Q: Can I substitute the coconut oil with vegan butter?
A: Yes, you can definitely swap coconut oil for vegan butter, but keep in mind that it may alter the flavor slightly.
Q: Can I make these scones ahead of time?
A: Yes, you can prepare the dough ahead of time and freeze it overnight. Simply shape the scones, wrap them in plastic wrap and store them flat in the freezer so they don’t get misshapen. I like to freeze mine on a cookie sheet first, and then you can slice them or move them, and they won’t lose their shape. You can even keep them wrapped and frozen for up to a month-ish! I haven’t tested this myself, because we always eat our scones. But I would imagine these would stay good for at least a month!
Q: Can I use a different type of fruit?
A: Definitely! Pears or blueberries would be delicious alternatives. Just make sure the fruit is ripe but firm, so it doesn’t add too much moisture to the dough. I would not use apples made for apple pie filling unless you rinsed them and patted them really dry first. All of the syrup that those apples come in will mess up the wet-dry ratio or the dough and make your dough too liquid-y.
If You Liked These Vegan Apple Cinnamon Scones, Check Out:
Dairy-Free Matcha Scones with Lavender Glaze
Vegan Lemon Poppy Seed Raspberry Muffins
Vegan Blackberry Lemon Scones
Vegan Lemon Poppy Seed Scones
Vegan Apple Cinnamon Scones
Ingredients
Vegan Apple Cinnamon Scones
- 1 1/2 cups flour
- 1 cup rolld oats
- 1/4 cup brown sugar packed
- 1 Tbsp baking powder
- 1/2 tsp ground cinnamon
- 1/2 tsp ground nutmeg
- 1/4 tsp salt
- 1/2 cup coconut oil solid
- 1/2 cup unsweetened applesauce
- 1/2 cup non-dairy milk I used almond, but soy or oat work too
- 1 tsp vanilla
- 1 cup peeled, cored and finely chopped fresh apples
Vanilla Glaze
- 1 cup powdered sugar
- 1 tsp vanilla
- 1-2 Tbsp non-dairy milk Start with 1 tablespoon and then add more to adjust for texture
Instructions
- Line a baking sheet with parchment paper. Preheat your oven to 400°F (I usually wait to actually preheat my own until my scone dough is chilling. That way, the oven isn't on for as long).
- In a large bowl, combine the flour, oats, brown sugar, baking powder, cinnamon, nutmeg, and salt.
- Add the solid coconut oil to the dry ingredients. Use a pastry cutter or fork (Or your hands! I prefer to use my hand, actually) to cut the coconut oil into the dry mixture until it resembles coarse crumbs.
- Pour the wet ingredients into the dry ingredients and mix until just combined.
- Fold in the chopped apples and any optional add-ins like nuts or raisins.
- Turn the dough out onto a clean surface (I use a cookie sheet lined with parchment paper) and pat it into a rectangle. Some people like to shape their scones into circles, and that’s fine too!
- Chill your scone dough in the freezer for about 30 minutes.
- Preheat your oven to 400°F if you didn't already.
- Cut your chilled dough into triangular wedges.
- Place your wedges on a cookie sheet lined with parchment paper, leaving room for some spreading. Bake for 15-20 minutes, or until the scones are lightly golden brown on the bottoms and around the edges and the top/middle region looks "set" and not jiggly.
- Allow scones to cool before adding glaze.
- Whisk together all your glaze ingredients until smooth and drizzle glaze on top of cooled scones.
- For some extra flavor: sprinkle a dash of cinnamon on top of wet glaze. Allow glaze to set 30-60 minutes.

