
Last updated on May 4th, 2024 at 07:44 pm
Hey there, cake enthusiasts! I don’t know about you, but I don’t always have the patience to perfectly decorate layer cakes. Especially around the sides of the cake! I always end up taking off the frosting and starting over, and then getting impatient and ending up with a cake that looks less-than-stellar.
This is the easiest way to decorate layer cakes that doesn’t make me want to rip my hair out. It’s called a semi-naked cake. It looks elegant and simple for sure, and they are rather simple to make once you get the hang of it! In this blog post, I’ll be sharing my secrets on how to decorate a semi-naked cake. And the best part is: They don’t have to look perfect and the frosting doesn’t have to be perfectly even! Let’s get started!
1. What is a Semi-Naked Cake?
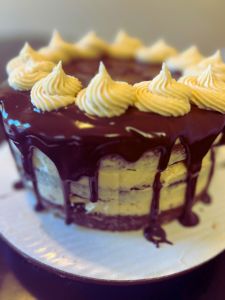
Before we get into the nitty-gritty of decorating, let’s start with the basics. What exactly is a semi-naked cake? Well, it’s a cake that is almost bare on the outside, but is fully frosted on the inside. Think of it as a tasteful peek-a-boo for your cake layers. The result is a rustic, slightly unfinished look that’s incredibly chic and easier to make than any other type of cake I’ve tried to decorate!
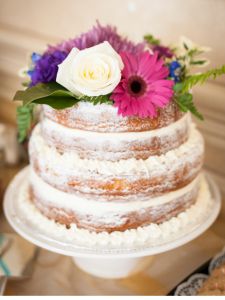
Semi-naked cakes typically have a thin layer of frosting on the outside, just enough to cover the cake but the actual cake part still peeks through. It’s like minimalism meets cake decorating. Semi-naked cakes look good and professional without all the fuss of putting the bells and whistles on the outside of the cake.
If you keep reading, I’ll share some of my easy hacks to make a semi-naked cake a little less naked, if the lack of frosting on the outside really perturbs you!
2. What Tools Do You Need for Decorating Success?
Cake decorating is, unfortunately, one of those things that takes time, patience and practice. I’ve made many an ugly cake in my day, and I won’t deny it. But, I also don’t want you to get frustrated if your cake doesn’t turn out like you hope it will. If you follow some of these tips and gather the right tools, hopefully your cake decorating will be minimally frustrating!
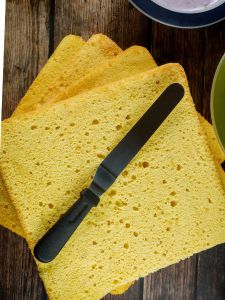
Parchment paper cut to the shape or your pan
You really, really want to line the bottom of your pan with parchment paper and grease your pan as well. It absolutely sucks to go through the effort of baking a delicious cake, and then having it fall apart when you try to get it out of the pan. To prevent this, grease and parchment paper together. I usually spray the pan to grease it, and then lay the parchment paper in the bottom.
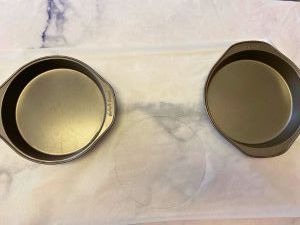
You also want your parchment paper cut to fit your pans. If you don’t want to buy parchment paper in that particular shape, just place your pan on top of a sheet of regular parchment paper and lightly trace around the bottom with a pencil. Then, use scissors to cut out the part you traced and voila: parchment paper that’s the right size and shape
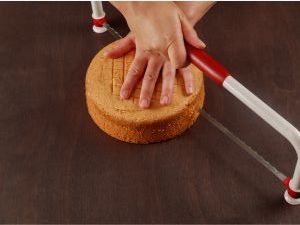
Cake Leveler
This is a tool that you can kind of use as a “saw” to cut off the top, rounded portion of your cake layers. You want those layers nice and flat! If your layers aren’t perfectly even, you risk your cake being lopsided when it’s all done.
Fillings
Prepare your cake fillings of choice – buttercream, ganache, fruit preserves, or even a flavored syrup. I am a huge, huge fan of buttercream frosting! To simplify this tutorial, I used buttercream frosting and no additional fillings.
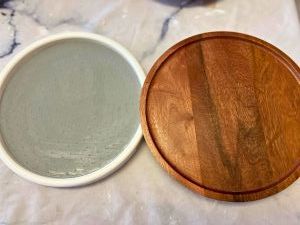
Cake Board
If you don’t want to spring for a cake stand (see below), I would highly recommend you get a cake board. You can buy them at most craft stores for pretty cheap. The board is like the foundation that you will build your cake up on. You want a firm and perfectly flat foundation for your cake, and a cake board is the easiest way to achieve that. If you have a perfectly flat and firm plate that is big enough for your cake, you could also try that, but beware that cakes do sometimes slip and slide on certain surfaces if you’re not careful.

Cake Stand and Lazy Susan
A cake stand paired with a lazy susan (Sometimes you can buy these two items together in a fancy contraption like this) is fantastic for easy access to all sides of your cake while decorating. I won’t say it’s “necessary,” but it’s pretty useful! I have a cheap lazy susan that I just stick my cake stand on, and it works fine.
Offset Spatula
An offset spatula is your best friend for spreading frosting smoothly and evenly. I usually refer to it as a “flat spatula,” but the better term is “offset.” If you search for “flat spatula,” you may get something that is completely flat, and you definitely want one that’s not essentially a butter knife for frosting a cake.
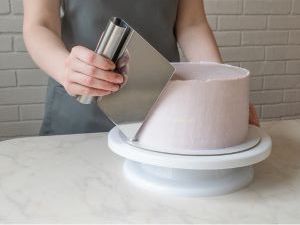
Bench Scraper
A bench scraper helps achieve that perfect semi-naked finish by removing excess frosting and creating a clean edge around the outside of your cake. You could use your offset spatula for this, but please learn from my mistakes! I put off buying a bench scraper for years because I thought the offset spatula would be enough. It’s just not. The bench scraper saves you time and frustration!
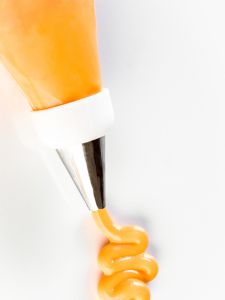
Piping Bags and Tips
If you plan to add decorative elements like rosettes or swirls, you’ll need piping bags and tips. They’re also handy for adding extra filling between the layers. I use a plain circle tip for filling in the center, and then a star tip for decorating the outside (If I feel like decorating the outside with frosting, which isn’t required for this kind of cake).
Decorations (Optional)
To elevate the beauty of your cake, consider using fresh flowers, edible flowers, or other decorations for the top and outside of your cake. I’ve also used ganache for the top, with a simple ring of buttercream swirls around the edge (more on that to come!)
Video Showing How to Decorate a Semi-Naked Cake with a Ganache Drizzle and Frosting Swirls On Top
3. How to Decorate a Semi-Naked Cake
Sorry, I know that’s a lot of tools to keep in mind! Now, we’re finally ready to decorate that cake!
Step 1: Level Your Cake Layers
Start by leveling your cake layers to be all the same height. You can play with the height of the blade of your cake leveler to make sure you’re removing minimal cake. Then, kind of like a saw, you wiggle your cake leveler across the top of your cake layer, while holding the cake firmly in place (without squashing it!)
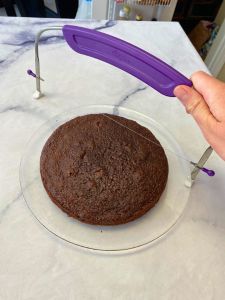
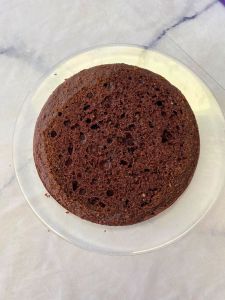
Do this for each level of cake to make sure they’re all even and flat.
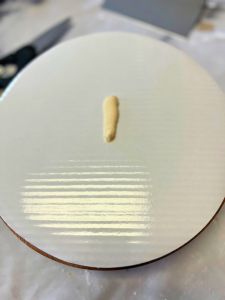
Step 2: Prepare Your Cake Board
Fill your piping bag with a plain tip and some frosting. Put a little dab of frosting in the middle of your cake board. The frosting will act as some glue to hold your cake in place while you decorate and add layers.
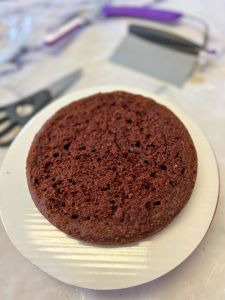
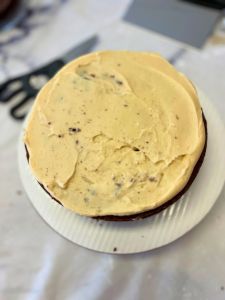
Step 3: Layer Up
Place your bottom layer of cake on top of your frosting “glue dot.” Then, pipe frosting all around the outer edge of that cake layer.
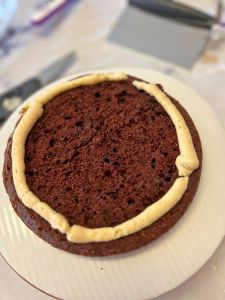
After this, you’ll want to fill in the layer with frosting. There are a couple ways to do this. I made a spiral going inwards with my frosting, and then used my offset spatula to spin the cake and smooth it out into a nice, flat layer. I did have to add a little extra frosting, because I didn’t pipe enough into my spiral. As long as your layer is filled in and the frosting is flat, you’re good to go.

An important note: You don’t want to press into the cake with your offset spatula while you’re smoothing. Try to apply minimal pressure that’s just enough to flatten your frosting without digging into the cake below. If your spatula is touching the cake below, you’ll have to add more frosting. I like to have at least ¼ inch of frosting between my cake layers.
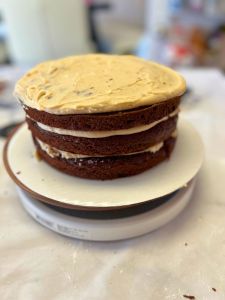
![]() Place your next layer on top and repeat this process with filling in the frosting. Do this for all the layers.
Place your next layer on top and repeat this process with filling in the frosting. Do this for all the layers.
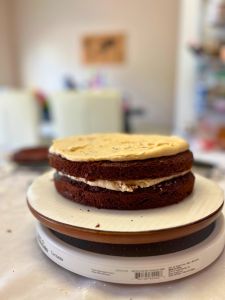
Finally, place your top layer of cake on top and give it a nice, flat layer of frosting, just as you did for the middle layers. This is the hardest part! Congratulations! You made it through!
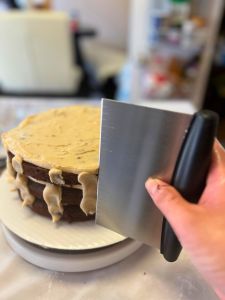
Step 4: Crumb Coat
Pipe little lines of frosting down the side of your cake at approximately even intervals.
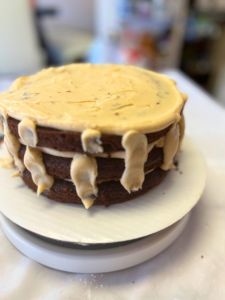
Taking your bench scraper, hold it perpendicular to the side of your cake and scrape the frosting into a thin, even layer around the sides of your cake. The cake will and should show through! Again, you do not want to press too hard so that your scraper goes into the cake. You just want to lightly scrape off the frosting from the sides, leaving a very thin layer of frosting. You’ll definitely have some extra frosting on your scraper that you can dispose of (or eat!)
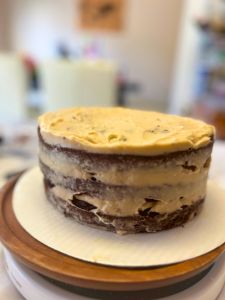
Step 5: Chill
Pop your crumb-coated cake into the fridge for about 20-30 minutes to firm up the frosting. This makes it easier to work with in the next steps.
You can stop here if you would like. You have officially make a semi-naked cake! Great job!
Extra Decorations
Here’s where your creativity can shine! You can use your piping bags and tips to add decorative elements like rosettes, swirls, or a border around the top edge.
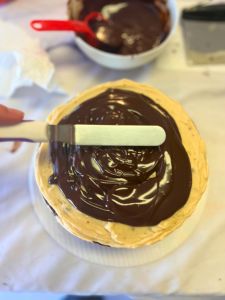
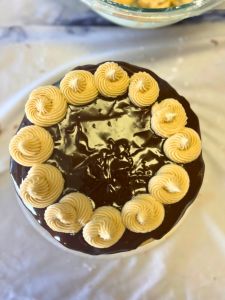
What I did was make a chocolate ganache (You can see what kind of ganache I used here). Then, I spread the ganache on the top layer of the cake just until it was slightly dripping over the edge of the cake. After the ganache was placed, I put the cake back in the fridge to chill for another 30 minutes.
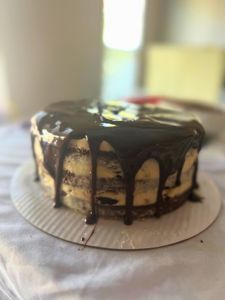
Finally, I put some more frosting in a piping bag with a Wilton 4B tip, and piped little swirls around the edge of the top layer of cake. And voila! A fancy-looking cake that didn’t really require a ton of fancy decorating.
You could also add flowers, fruits, etc. to your cake if you would like. Google and Pinterest have tons of beautiful cake images that you can use for your own inspiration!
There you have it – a guide to decorating a semi-naked cake that’s as easy as it is beautiful. I hope you found this guide helpful and not overwhelming. Cake decorating really does take some practice, but hopefully these tips take away some of the guess work for you. Happy baking!