
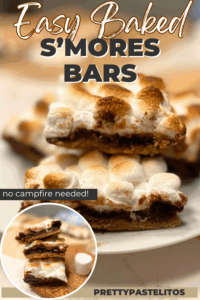
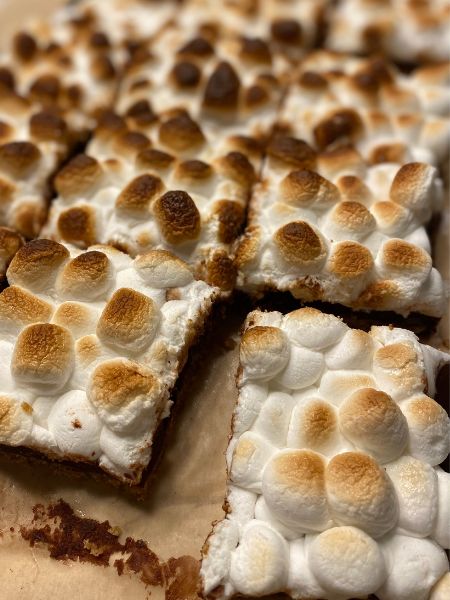
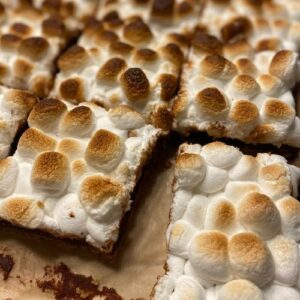
 There’s something about the cozy combo of graham crackers, chocolate, and toasted marshmallows that feels like fall. Whether you’re snuggled up on the couch or hosting a festive gathering, these S’mores Bars bring all the nostalgic flavor of classic campfire treats—without needing a fire pit. They’re one of my go-to easy fall desserts when I want something sweet, gooey, and completely irresistible.
With a buttery graham cracker crust, rich chocolate ganache, and a gooey golden marshmallow topping, these bars are simple to make and totally crave-worthy. I love bringing them to potlucks, Halloween parties, or even just enjoying them as an after-dinner treat. If you’re on the hunt for fun fall desserts that are crowd-pleasing and low-effort, this one definitely deserves a spot on your list.
Jump to Recipe
Ingredients for S’mores Bars
You only need a handful of ingredients to whip up these s’mores bars, and you probably have most of them in your pantry already!
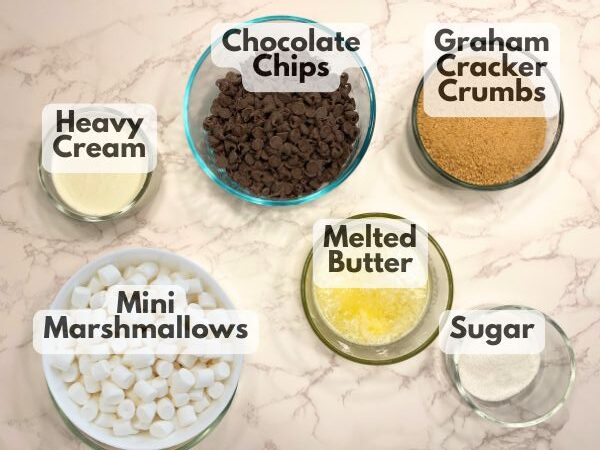
- 1 1/2 cups graham cracker crumbs (about 8 full sheets)
- 1/4 cup granulated sugar
- 1/2 cup unsalted butter melted
- 3/4 cup heavy whipping cream
- 2 cups chocolate chips (I used semi-sweet, but milk chocolate works too)
- 10 oz mini marshmallows
How to Make S’mores Bars
1. Preheat oven to 350°F (175°C)
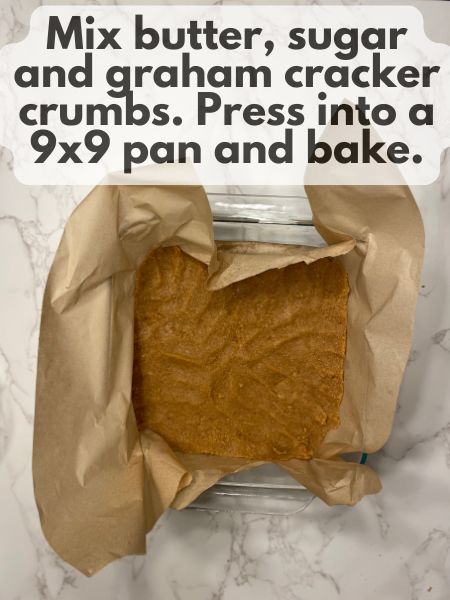
2. Make the Crust: Mix crushed graham crackers, sugar, and melted butter. Press firmly into a greased or parchment-lined 9×9-inch pan.
3. Bake the crust for 8-10 minutes, or until lightly golden.
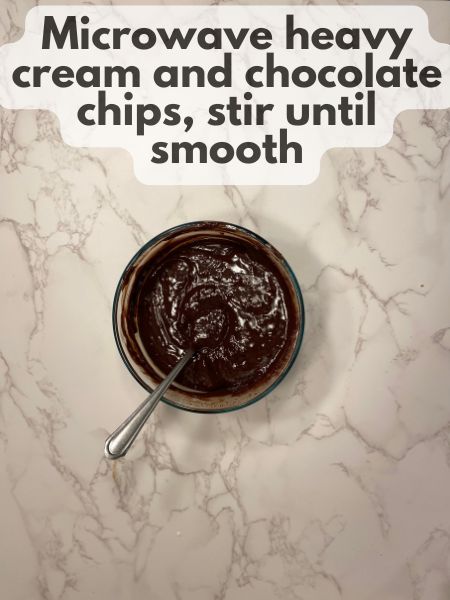
4. Make Ganache: In a microwave-safe bowl, heat the heavy cream and chocolate chips in 30 second increments, stirring in between each round in the microwave. Stir until the chocolate has dissolved into the cream and everything is smooth and glossy.
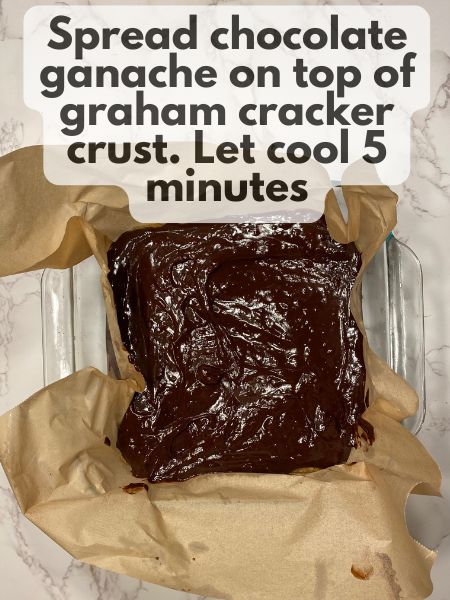
5. Assemble Layers: Pour the chocolate ganache over the baked graham cracker crust, spreading it evenly. Let it cool for 5-10 minutes at room temperature to slightly set.
6. Top with Marshmallows: Sprinkle the marshmallows in an even layer on top of the ganache.
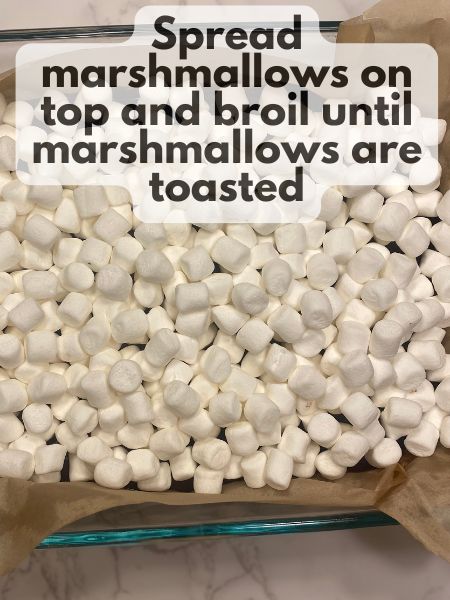
7. Broil for Gooey Marshmallows: Set your oven to broil and place the pan on the middle rack. Broil on low for 3-4 minutes, watching carefully, until the marshmallows are golden and gooey. Actual time being broiled may depend on your oven.
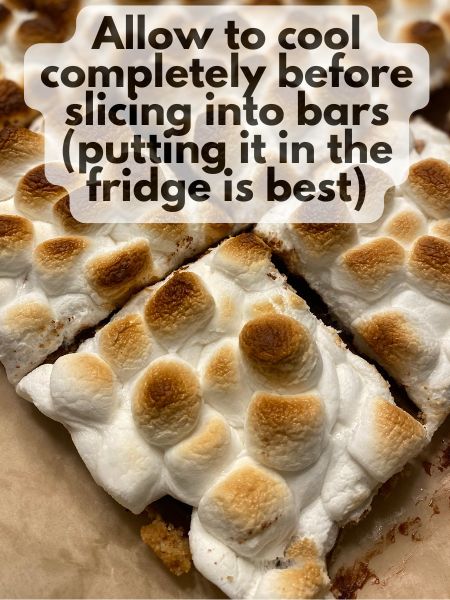
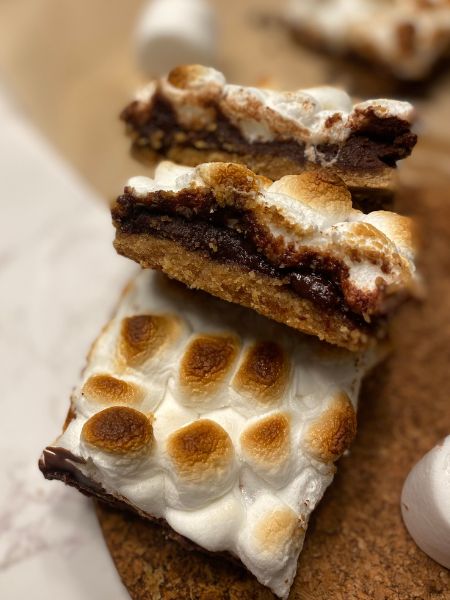
8. Cool and Eat: Allow your s’mores bars to cool before digging in. You can eat them warm, or set them in the fridge to firm up a bit. If you let them cool in the fridge, they’re easy to cut into bars. I like to let mine set in the fridge for a while until they’re actually rather cold.
9. Store: Store leftovers in the pan you baked them in, covered in the fridge. To serve fresh s’mores bars, slice a bar off and microwave it on a plate for 5-10 seconds to warm it up.
Pro Tips
Here are some of my favorite tips to make your s’mores bars even better:
- Stir that ganache. Ganache can be a little confusing to make in the microwave if you’ve never made it before. It takes quite a few stirs to get that chocolate to dissolve into the heavy cream. I usually only have to microwave your chocolate and cream once for about 30 seconds. After that, make sure you really, really keep stirring and eventually that ganache will form. You only want to re-microwave things if you still see large chunks of chocolate floating around, then you’ll want to melt those chunks of chocolate and keep stirring some more after that.
- Chill after broiling. Be patient and let everything cool before you slice it into bars. Honestly, my husband and I both liked these s’mores bars straight up cold. They taste great warm, too, but even cold they’re awesome! To make it super easy to slice them into bars, chill them until they’re cold in the fridge. If you slice them when they’re still hot you’ll probably end up with a gooey mess (not that that’s a bad thing!).
- Watch the broiler! When you’re toasting your marshmallows, don’t walk away. It takes just seconds to go from golden brown to full-on burned.
- Make them ahead. These bars are perfect for making a day ahead. You can quickly heat individual bars in the microwave for 5 seconds before serving if you want really gooey s’mores bars.
- Customize it! Add chopped peanuts or crushed pretzels to the ganache layer for extra texture and flavor. Or try flavored marshmallows for a fun twist! I made Peeps s’mores bars for Easter, and they were festive and delicious.
FAQs
Can I double this recipe?
Absolutely! You can double the recipe and use a 9×13-inch pan. Just keep an eye on the crust when baking and give it a few extra minutes if needed.
How should I store these s’mores bars?
Store them in an airtight container in the fridge for up to 5 days. They’ll last at room temperature for 2 days if you don’t have room in your fridge.
Do I have to toast the marshmallows?
You don’t have to, but I highly recommend it! Toasting brings out that classic s’mores flavor. If you skip it, the bars will still taste delicious—just more like chocolate-marshmallow bars.
Can I use large marshmallows instead of mini?
Mini marshmallows are ideal for even coverage, but you can use large ones sliced in half if that’s what you have on hand. Just place them cut-side down for best results.
Are these bars messy?
They’re delightfully gooey, especially when served at room temperature. If you want cleaner slices, chill them before cutting and wipe your knife between each cut. But, yes, they can be a bit messy.
If you love s’mores but don’t want to brave the cold or mess with a fire, these bars are the perfect solution. They’re everything you want in a fun fall dessert—gooey, chocolatey, and just a little nostalgic.
So next time you’re craving something sweet and cozy, skip the campfire and whip up a batch of these easy s’mores bars. Whether you serve them cold from the fridge or warm and melty, they’re sure to be a hit.
Happy fall baking! 🍂
S'mores Bars
Ingredients
- 1 1/2 cups graham cracker crumbs about 8 full sheets
- 1/4 cup granulated sugar
- 1/2 cup unsalted butter melted
- 3/4 cup heavy whipping cream
- 2 cups chocolate chips I used semi-sweet, but milk chocolate would work too
- 10 oz mini marshmallows
Instructions
- Preheat oven to 350°F (175°C)
- Make the Crust: Mix crushed graham crackers, sugar, and melted butter. Press firmly into a parchment-lined 9x9-inch pan.
- Bake the crust for 8-10 minutes, or until lightly golden.
- Make Ganache: In a microwave-safe bowl, heat the heavy cream and chocolate chips in 30 second increments, stirring in between each round in the microwave. Stir until the chocolate has dissolved into the cream and everything is smooth and glossy.
- Assemble Layers: Pour the chocolate ganache over the baked graham cracker crust, spreading it evenly. Let it cool for 5-10 minutes at room temperature to slightly set.
- Top with Marshmallows: Sprinkle the marshmallows in an even layer on top of the ganache.
- Broil for Gooey Marshmallows: Set your oven to broil and place the pan on the middle rack. Broil on low for 3-4 minutes, watching carefully, until the marshmallows are golden and gooey. Actual time being broiled may depend on your oven.
- Cool and Eat: Allow your s'mores bars to cool before digging in. You can eat them warm, or set them in the fridge to firm up a bit. If you let them cool in the fridge, they're easy to cut into bars.
- Store: Store leftovers in the pan you baked them in, covered in the fridge. To serve fresh s'mores bars, slice a bar off and microwave it on a plate for 5-10 seconds to warm it up.