
Last updated on April 26th, 2025 at 07:38 am
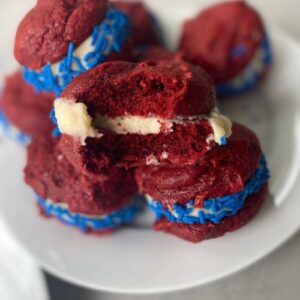
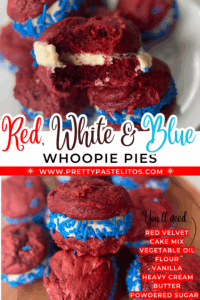 Is there anything more fun than a handheld dessert that’s festive and delicious? These red velvet whoopie pies are one of my favorite Fourth of July treats to make — they start with a red velvet cake mix (because shortcuts!), get filled with a fluffy vanilla cream, and then are rolled in blue sprinkles to bring all the red, white, and blue vibes. It’s the kind of dessert that looks party-ready but comes together with minimal effort.
Whether you’re heading to a cookout, hosting a backyard picnic, or just looking for easy 4th of July desserts to whip up with your kids, these red velvet whoopie pies are guaranteed to be a hit. Plus, they’re so cute and portable — no forks or plates required!
Jump to Recipe
Ingredients for 4th of July Red Velvet Whoopie Pies
You only need a few basic ingredients to make this red velvet dessert idea come to life:
For the Whoopie Pies:
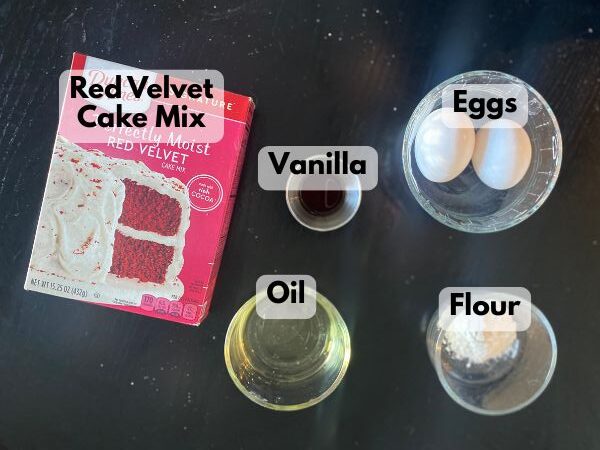
- 1 box red velvet cake mix
- 1/3 cup vegetable oil + 1 tablespoon
2 large eggs - 1 tablespoon flour (to help them keep their shape)
- 1 teaspoon vanilla extract (optional, but boosts flavor)
For the filling:
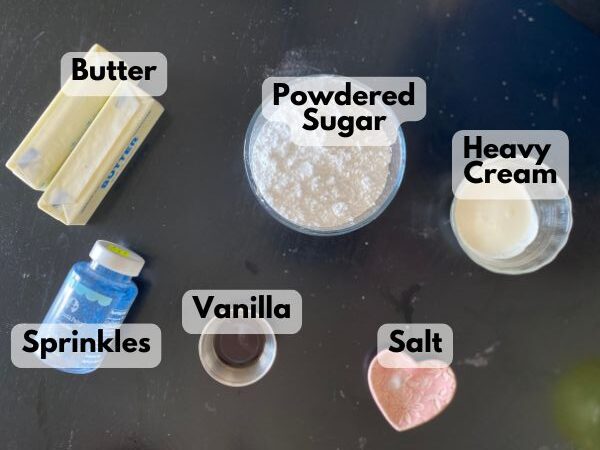
- 1 cup (2 sticks) unsalted butter, softened
- 2 ½ cups powdered sugar
- 1 1/2 teaspoon vanilla extract
- 1–2 tablespoons heavy cream or milk
- Pinch of salt
- Blue sprinkles (jimmies work best, but sanding sugar could work too!)
How to Make Red Velvet Whoopie Pies
This recipe is so simple — perfect if you’re juggling a full party prep list or just want a quick 4th of July dessert to throw together last minute.
Step 1: Bake the Whoopie Pies
Preheat your oven to 350°F and line two baking sheets with parchment paper.
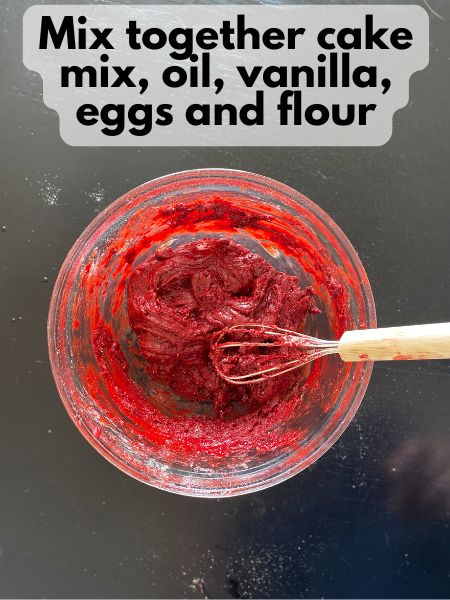
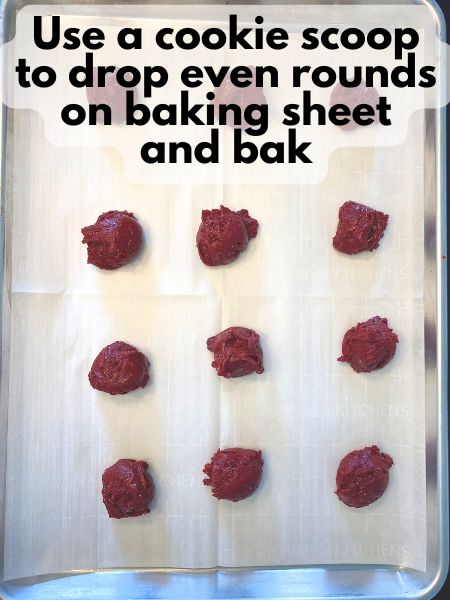
1. In a mixing bowl, stir together the red velvet cake mix, oil, eggs, flour, and vanilla extract until a thick dough forms. It’ll be stiffer than cake batter — more like cookie dough.
2. Use a small cookie scoop or tablespoon to portion out the dough into even rounds. Place them a couple of inches apart on your baking sheets. Bake for 8 to 10 minutes, or until the cookies are puffed and set.
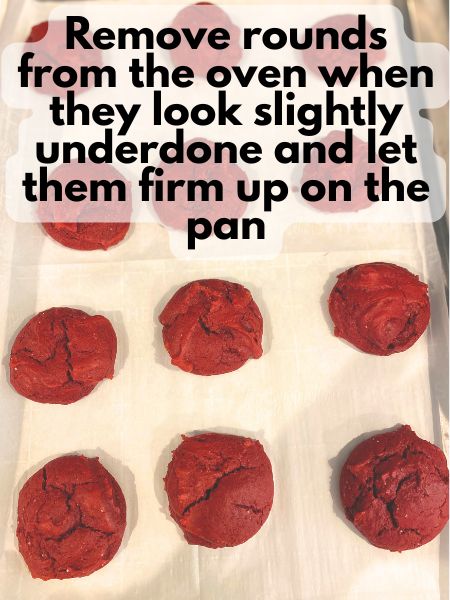
3. They might look slightly underdone when they’re actually done, but ket them cool completely on the tray — they’ll firm up as they cool.
Step 2: Make the Filling
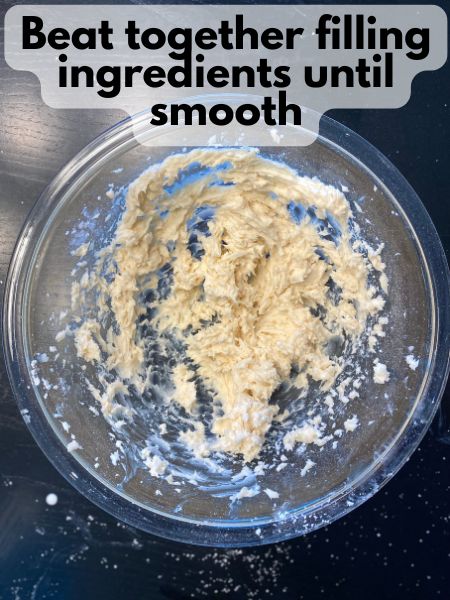
While the cookies cool, beat the softened butter until light and fluffy. Add powdered sugar, vanilla, and salt, then mix until combined. Drizzle in the cream or milk and beat until the mixture is smooth and spreadable. If it’s too thick, add a little more cream to get that perfect whoopie pie texture.
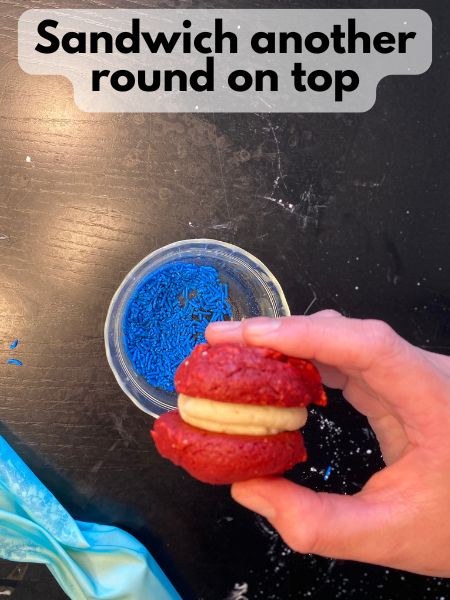
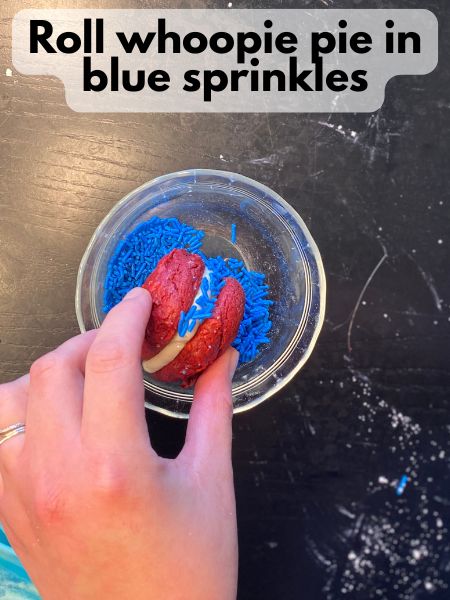
Step 3: Assemble and Decorate
Once the red velvet rounds are cool, flip half of them upside down. Pipe or spread the filling onto the flat side of each, then top with another round to make a sandwich.
Here comes the fun part: gently roll the sides of each whoopie pie in blue sprinkles so they stick to the creamy filling. If the filling has firmed up too much, just press the sprinkles on by hand — they’ll still look great.

Pro Tips for Perfect Red Velvet Whoopie Pies
- Use a cookie scoop to make sure your whoopie pies are uniform in size for easy sandwiching.
- Chill the dough for 10–15 minutes before baking if it feels too sticky to handle.
- Don’t overbake your whoopie pie rounds: They will look slightly gooey in the middle when they’re actually done. If you leave your rounds on the baking pan to cool down, they’ll firm up and be just right!
- Be generous with your filling: This recipe might give you just a bit too much filling (unless you’re like me and love to pile on the filling). You can definitely be generous in filling your whoopie pies with it! If you’re worried it’s going to be too much, you could make half of the recipe for filling at first and see how far you get!
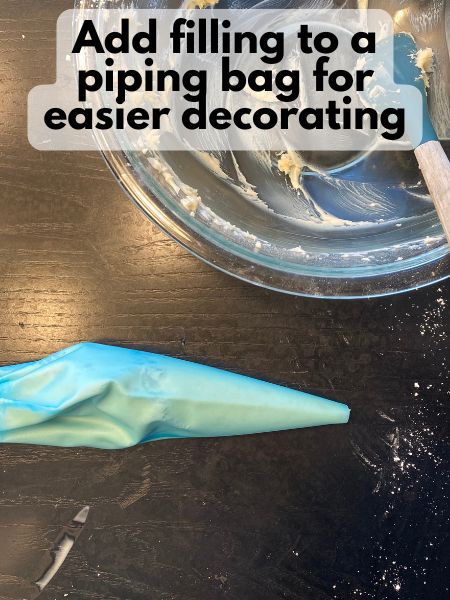
- Use a piping bag for neat filling distribution. To get pretty and even filling in the middle of your whoopie pies, I would use a piping bag with no tip or a plain round tip to pipe a swirl of filling on your whoopie pie rounds.
- Store in the fridge if you’re making ahead, but let them come to room temp before serving for the best texture.
FAQs
Can I use homemade red velvet cake batter instead of a mix?
Absolutely! I love the ease of a boxed mix, but if you have a go-to red velvet recipe, you can definitely use that instead. Just make sure the batter is thick enough to hold its shape on a baking sheet. You probably want less liquid overall and maybe a bit extra flour or even cornstarch to help your rounds keep their shape.
How far in advance can I make these?
These whoopie pies can be made a day or two in advance and stored in the refrigerator in an air tight container. Just let them sit at room temp for 20–30 minutes before serving so the filling softens up.
What kind of sprinkles work best?
Jimmies work best in my opinion. I’ve had mixed results with sanding sugar for things like this. Sometimes, if your filling is on the liquid-y side, it can cause the sanding sugar to dissolve and bleed its color. However, if you don’t mind it dissolving, sanding sugar could be an alternative.
How many whoopie pies does this recipe make?
That definitely depends on how big you make your whoopie pie rounds. I used my smallest cookie scoop and got about 32 rounds, which makes 16 whoopie pies. Each round was about 3 inches in diameter when baked. However, if I had bigger rounds, I definitely would have gotten less whoopie pies overall.
Can I use cream cheese frosting?
For sure! I think cream cheese frosting is more “traditional” for red velvet anyway. If you want cream cheese filling, I would replace one of the sticks of butter with 6-8 ounces of softened cream cheese. Cream cheese filling might be a bit more fluid than the vanilla frosting I used, so your whoopie pies may shift a bit, but they’ll still taste delicious.
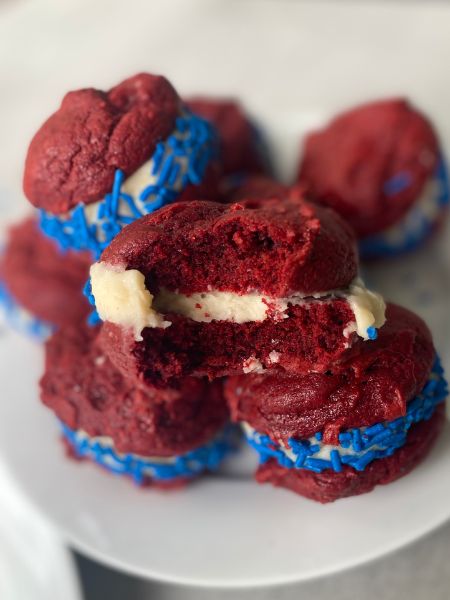
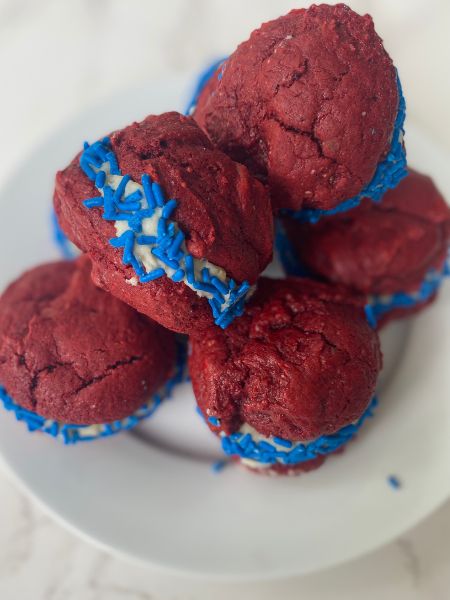
These red velvet whoopie pies are one of the easiest (and cutest!) red velvet dessert ideas to whip up for the holiday. With a chewy cookie-like shell, sweet vanilla filling, and a pop of blue sprinkles, they’re everything you want in a Fourth of July treat — festive, fun, and totally irresistible.
Whether you’re putting together a spread of 4th of July desserts or just want a special treat to enjoy while watching fireworks, these little sandwiches are a guaranteed crowd-pleaser. Make a double batch — they disappear fast!
Red Velvet Whoopie Pies for 4th of July
Ingredients
Red Velvet Whoopie Pie Rounds
- 1 box red velvet cake mix
- 1/3 cup + 1 Tbsp vegetable oil
- 2 eggs
- 1 Tbsp flour
- 1 tsp vanilla
Vanilla Filling
- 1 cup unsalted butter softened
- 2 1/2 cups powdered sugar
- 1 1/2 tsp vanilla
- 1-2 Tbsp heavy cream or milk
- 1 pinch salt
Instructions
Bake Red Velvet Whoopie Pie Rounds
- In a mixing bowl, stir together the red velvet cake mix, oil, eggs, flour, and vanilla extract until a thick dough forms. It’ll be stiffer than cake batter — more like cookie dough.
- Use a small cookie scoop or tablespoon to portion out the dough into even rounds. Place them a couple of inches apart on your baking sheets.
- Bake for 8 to 10 minutes, or until the cookies are puffed and set.
- They might look slightly underdone when they’re actually done, but ket them cool completely on the tray — they’ll firm up as they cool.
Prepare Vanilla Filling
- Beat the softened butter until light and fluffy. Add powdered sugar, vanilla, and salt, then mix until combined. Drizzle in the cream or milk and beat until the mixture is smooth and spreadable.
- If it’s too thick, add a little more cream to get that perfect whoopie pie texture.
Assemble and Decorate
- Once the red velvet rounds are cool, flip half of them upside down. Pipe or spread the filling onto the flat side of each, then top with another round to make a sandwich.
- Gently roll the sides of each whoopie pie in blue sprinkles so they stick to the creamy filling.