
Last updated on January 3rd, 2024 at 03:05 pm
 I’m excited to share with you a mouthwatering recipe that will not only satisfy your sweet tooth but also add a dash of holiday magic to your celebrations – Oreo Christmas Ornament Balls! These delightful treats are not just yummy; they’re also a blast to make and share with loved ones. Today, I’ll walk you through the process, offer some pro tips for decorating, and even share my secrets for storing them so they stay fresh throughout the holiday season.
Jump to Recipe
Pro Tips for Decorating your Oreo Christmas Ornament Balls
Before we dive into the recipe, let’s talk about the art of decorating these Oreo Christmas Ornament Balls. After all, presentation is key when it comes to spreading holiday cheer with your homemade treats.
1. Gather Your Supplies
First things first, gather all your decorating supplies before you start. You’ll need:
– Oreo cookies (Double Stuf or the Christmas ones).
– Cream cheese.
– Melting chocolates
– A variety of colorful sprinkles and edible glitter for decorating
– Rolos wrapped in gold foil
– Parchment paper and a baking sheet to place the finished balls on.
2. Keep it Chill
One of the tricks to easy and successful decoration is to ensure your Oreo mixture is thoroughly chilled before shaping the balls. Pop it in the fridge for at least 30 minutes, or even better, the freezer.
There are actually three times you should stick these Oreo balls in the freezer. First, when you form the actual Oreo balls, you’ll chill them. Then, when you add the Rolos that are the top of your ornament Oreo balls, you chill them for a second time. Finally, when everything is said and done, I recommend you chill for a third time and then store your Oreo ornament balls in the fridge.
3. Use the Right Coating
When it comes to coating your Oreo balls, real candy melts are a must! Sometimes they are called candy coating or melting chocolate. I like the Sweet Tooth Fairy brand from Michael’s, especially for projects like this! You can buy your melting chocolate already colored red, green or other festive colors!

4. Use a Little Coconut Oil
This is kind of dependent on the melting chocolate you use. For me, the Sweet Tooth Fairy melting chocolate, while cheap and colorful, come out a little thick when melted according to the package instructions. When actually coating your Oreo balls, you want some of the excess chocolate to drip off naturally. To help with that, I add a little bit of coconut oil to mine. Not a ton, just a little bit to make the chocolate a little smoother.

5. Use Parchment Paper
After decorating, place your Oreo Christmas Ornament Balls on parchment paper to set. This not only prevents sticking but also makes for an easy cleanup.
I also line my counter with parchment paper for decorating with glitter and melted chocolate, because it gets everywhere (at least, if you’re as non-graceful as I am it does!).
How to Store Your Oreo Christmas Ornament Balls to Keep Them Fresh
Now that you’ve unleashed your creative genius and decorated your Oreo Christmas Ornament Balls, you’ll want to ensure they stay fresh and delightful for as long as possible. Here’s how:
1. Refrigeration is Key
Due to the cream cheese in the mixture, it’s crucial to store your Oreo Christmas Ornament Balls in the refrigerator. Keep them in an airtight container or on a covered plate. They’ll stay fresh for up to two weeks.
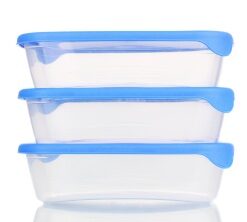
2. Freeze for Longevity
For an even longer shelf life, consider freezing your decorated Oreo Christmas Ornament Balls. Place them in a single layer on a baking sheet and freeze until firm. Then, transfer them to an airtight container or a resealable plastic bag, making sure to separate layers with parchment paper to prevent sticking. They can last for up to three months in the freezer. When you’re ready to enjoy them, simply let them thaw in the fridge for a few hours.
How to Make Oreo Christmas Ornament Balls
And now, the moment you’ve been waiting for – the step-by-step guide to making these delectable Oreo Christmas Ornament Balls!
Ingredients:
– 18 Double Stuf Oreos (You can also use the seasonal Christmas Oreos if you see them in stores!)
– 2 oz cream cheese, softened
– Melting chocolate (I used white and red, but you could use green or any other color you wanted!)
– Assorted sprinkles and edible glitter for decoration (Optional)
Instructions:
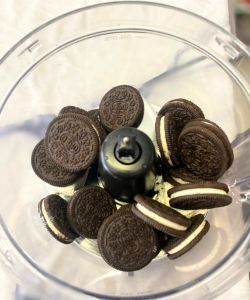
1. Start by placing your cream cheese and Oreos in a food processor. I recommend placing the cream cheese on the bottom. It just seems to mix in faster that way, in my opinion.
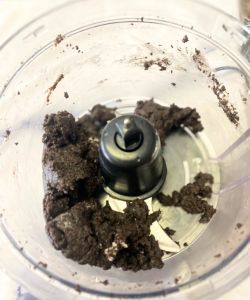
2. Pulse the Oreos and cream cheese until they form a dough. You really want a texture close to that of Play Dough. If your mixture doesn’t seem sticky enough, you can add in a bit more cream cheese.
3. Form your Oreo dough into balls and place on a cookie sheet or plate lined with parchment paper. I went for balls about the size of golf balls and got 12.
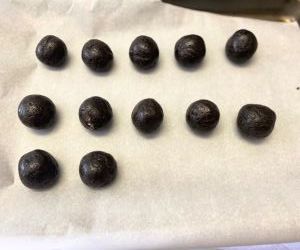
4. Chill your Oreo balls in the freezer for about 30 minutes.
5. After chilling your Oreo balls initially, you’ll add the Rolos wrapped in foil that will be the top of your Ornament Oreo balls. Melt some melting chocolate according to the package instructions. You won’t need a lot for this part! Just a little smidge for each Oreo ball.
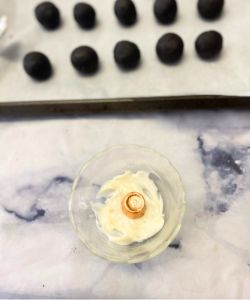
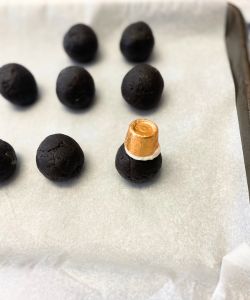
Place the bottom of the Rolo wrapped in foil in the melted chocolate, and use the chocolate to stick the Rolo to the top of an Oreo ball. Once all of your Oreo balls are topped, put them back in the freezer for at least 10-15 minutes to chill again.
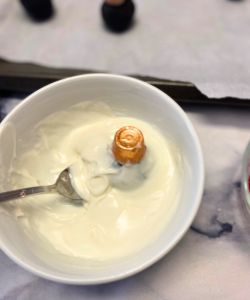
6. Melt more melting chocolate to coat your Oreo balls this time. If your chocolate seems pretty thick, add a little bit of coconut oil (see the note above).
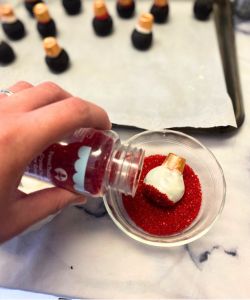
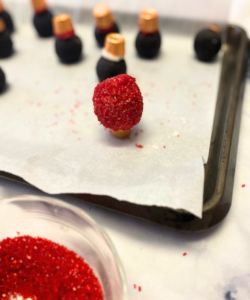
Holding the Oreo ornament ball by the Rolo top, dip the rest of the ball in the melted chocolate, coating the entire thing, and then letting the excess chocolate drip off. If you’re going to decorate your Oreo ornament ball with sprinkles or edible glitter, do it while the chocolate is wet.
7. Carefully (and I mean carefully!), flip your Oreo ornament ball upside down so the Rolo is resting on the baking sheet and your Oreo balls can dry. This is the hardest part of the process by far!
8. Once your outer coating is set, you can flip your Christmas Oreo ornament balls right side up and store them in the fridge so they stay fresh.
And there you have it – a scrumptious recipe for Oreo Christmas Ornament Balls that will add a delightful, festive touch to your holiday celebrations. Wishing you a joyous and delicious holiday season filled with love, laughter, and, of course, these mouthwatering Oreo Christmas Ornament Balls!
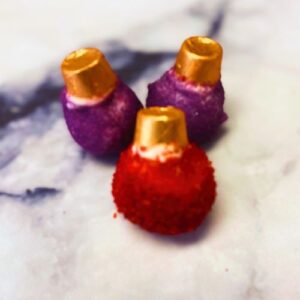
Oreo Christmas Ornament Balls
Ingredients
- 18 Double Stuf Oreos
- 2 oz Cream cheese softened
- 12 oz melting chocolate approximately
- 12 Rolos wrapped in gold foil
- Coconut oil optional
- Sprinkles, edible glitter optional
Instructions
- Place your Double Stuf Oreos and cream cheese in a food processor. Pulse until you get a mixture the consistency of Play Dough. If your mixture is dry/crumbly, add a little more cream cheese.
- Roll out your Oreo dough into balls. I went with balls a little smaller than golf balls and got 12. You can choose what size you think looks good.
- Place your Oreo dough balls on a cookie sheet lined with parchment paper. Chill in the freezer for at least 30 minutes.
- Melt a little bit of melting chocolate (according to the package instructions) to use as "glue" to attach a Rolo to the top of each of your Oreo balls.
- Remove Oreo balls from the freezer, dip the bottom of each Rolo in the melted chocolate and carefully stick the Rolo to the top of your Oreo ball.
- Chill the Oreo balls in the freezer again for another 10-15 minutes
- Melt a larger amount of melting chocolate to coat your Oreo balls (according to the package instructions).
- Remove Oreo balls from the freezer. Carefully, holding the Oreo ball by the Rolo on top, cover the rest of the Oreo ball in melted chocolate. You want the excess chocolate to kind of drip off. If you are not seeing that and your chocolate seems thick, add a little bit of coconut oil to make this easier.
- If you are going to coat your Oreo Ornament balls in sprinkles, do that while the chocolate is still wet.
- Still holding your Oreo ornament ball by the Rolo, carefully turn it upside down and place it to rest on the Rolo so that the chocolate on the bottom does not get messed up. If you chilled your Oreo balls sufficiently, they should not take long to set.
- Store your Oreo balls in the fridge to keep them fresh