 Imagine this: a burst of vibrant green and a rich, earthy taste that just melts in your mouth. Yes, I’m talking about matcha cake pops – a delightful twist on the traditional cake pop that incorporates the healthful and aromatic matcha green tea. These little bites of heaven not only make for perfect afternoon tea snacks or party snacks, but they also pack a punch of antioxidants. The allure of matcha cake pops doesn’t stop at taste alone. The versatility is unmatched – from vegan baking adaptations to gluten-free options, ensuring everyone gets a bite of this exquisite delight. Whether you’re looking for healthy desserts, kid-friendly desserts, or simply adore creative baking, these pops are the way to go. On this journey, you’ll dive into not just any matcha recipe but a tutorial that makes homemade cake pops accessible and enjoyable. Whether they’re for a birthday party, an elegant addition to your dessert ideas, or thoughtful edible gifts, mastering this matcha cake pop tutorial opens up a world of dessert possibilities. Get ready to transform your cake decorating and elevate your DIY cake pops with a green tea twist!
Jump to Recipe
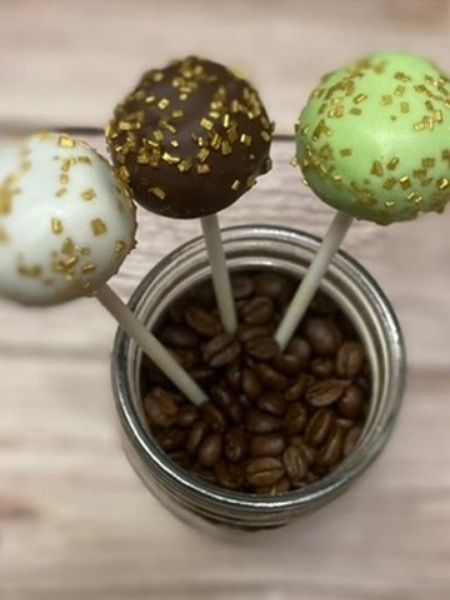
Ingredients for Matcha Cake Pops
If you’re set on diving into the world of easy baking with a delightful twist—matcha cake pops—you’re in for a treat! Crafting these green tea desserts begins with gathering the right ingredients. Right off the bat, let me tell you, the star of the show is the matcha powder. I got mine in a large bag at Costco, but just make sure your matcha is marked as okay for baking (or sometimes called “culinary grade”). So, let’s roll up our sleeves and list what we need to create these irresistible homemade cake pops.
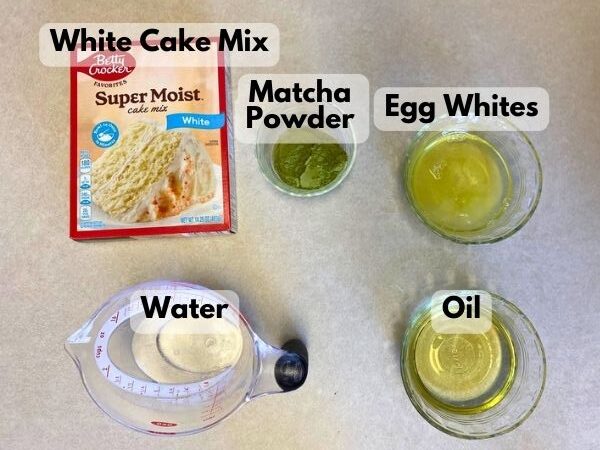
For the Cake:
-
- 1 box of white cake mix
- Ingredients required for the cake mix (eggs, oil, water)
- ¼ cup matcha powder
For the Frosting:
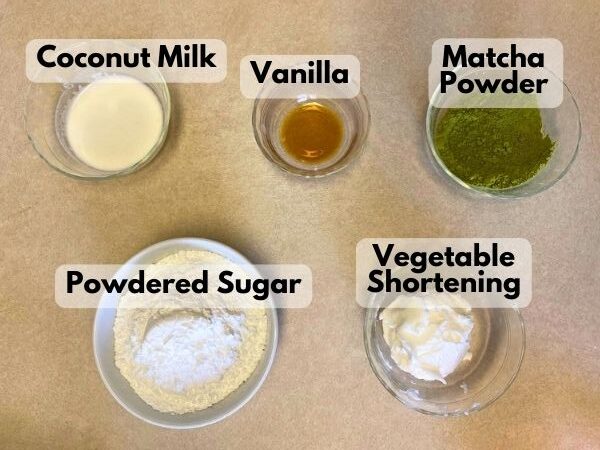
- ½ cup vegetable shortening (or butter)
- 1 ¾ cups powdered sugar
- 2 Tbsp matcha
- 1 tsp vanilla
- 2 Tbsp coconut milk (or other milk)
For Decoration and Assembly:
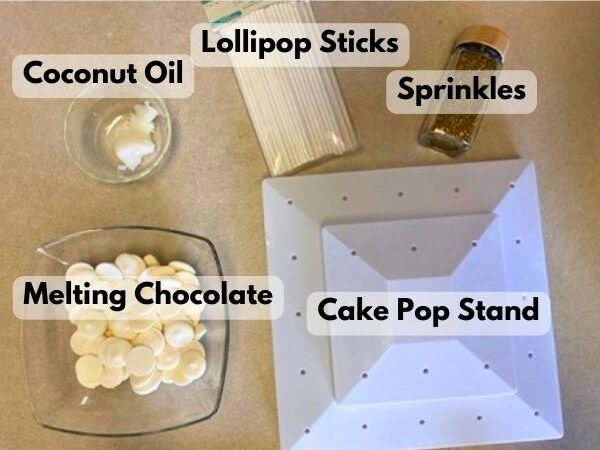
- Candy melts or white chocolate (Choose dairy-free versions if needed)
- Coconut oil (To thin the chocolate for a smoother coat)
- Sprinkles, crushed nuts, or additional matcha powder for decoration
- Lollipop sticks
- Cake pop stand (You can also use styrofoam blocks that you can buy at the craft store)
How to Make Matcha Cake Pops
Watch this Video on How to Make Matcha Cake Pops:
Let’s dive right into the heart of creative baking with these delightful matcha cake pops, perfect for everything from afternoon tea snacks to edible gifts. The lush green hue of matcha green tea not only offers a vibrant color but also infuses these treats with the earthy, soothing flavors that make matcha desserts genuinely stand out. Making matcha cake pops may sound daunting at first, but trust me, it’s an easy baking project you can enjoy, even if you’re new to the world of homemade cake pops.
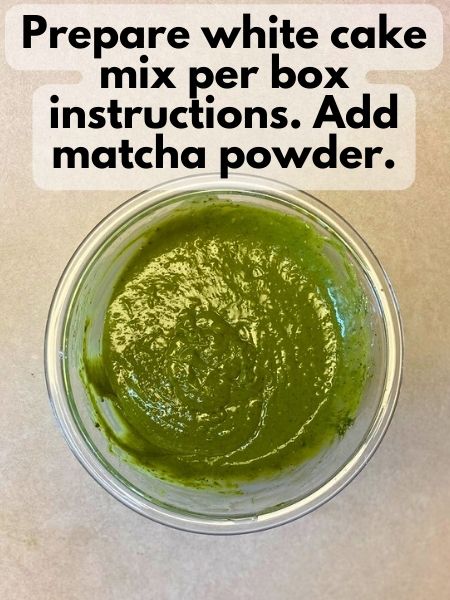
First up, you’ll need to whip up your matcha cake. Prepare your white cake mix as the box instructs you to. Add the amount of eggs and oil specified on the box mix. Then, add your matcha. Mix it all up really well until it’s smooth.
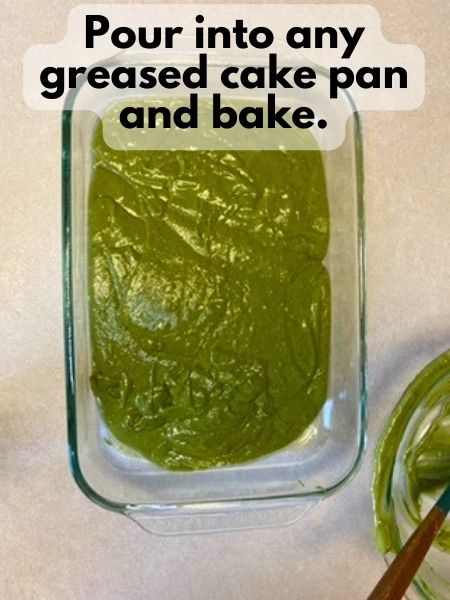
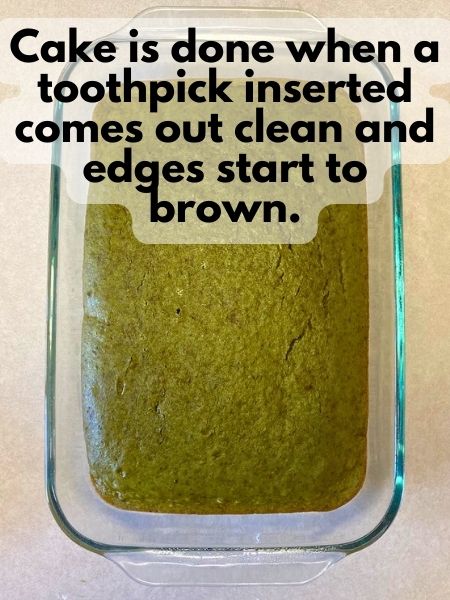
Pour your matcha cake into a greased baking dish and bake according to your box instructions. When a toothpick inserted in the middle of your cake pan comes out clean, your cake is ready. Make sure you let it cool completely before proceeding.
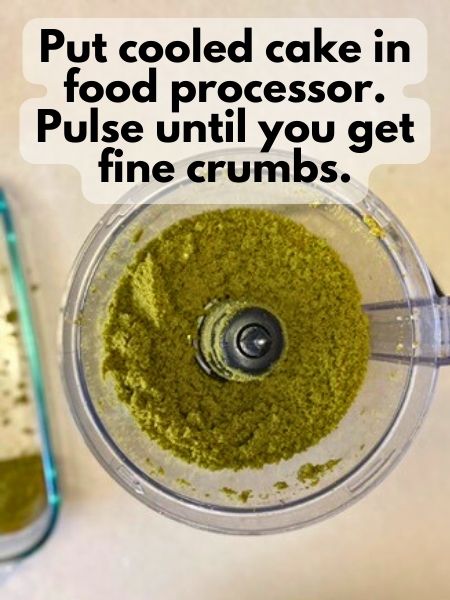
Once your cake is completely cool, carefully remove it from the pan and put it in a food processor. Pulse your cake (probably in batches, because this recipe makes a lot!) until you have fine crumbs. If you don’t have a food processor, you can also use your hands, but make sure you have fine crumbs in the end. Put your cake crumbs in a rather large mixing bowl (I used the biggest one I have!).
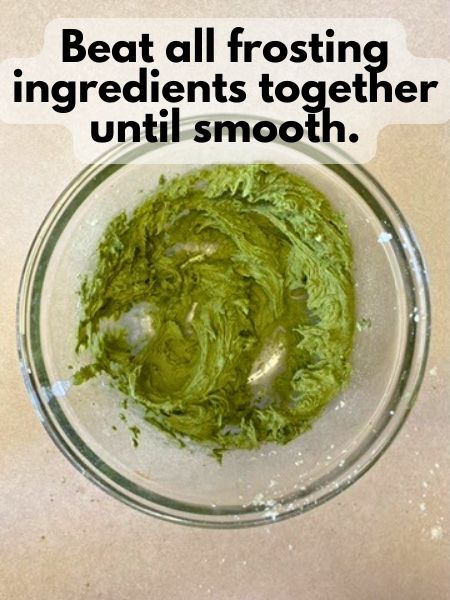
Next, it’s time to prepare your frosting. Just put all of your frosting ingredients in a large bowl (or stand mixer bowl) and beat with an electric mixer until it’s all smooth.
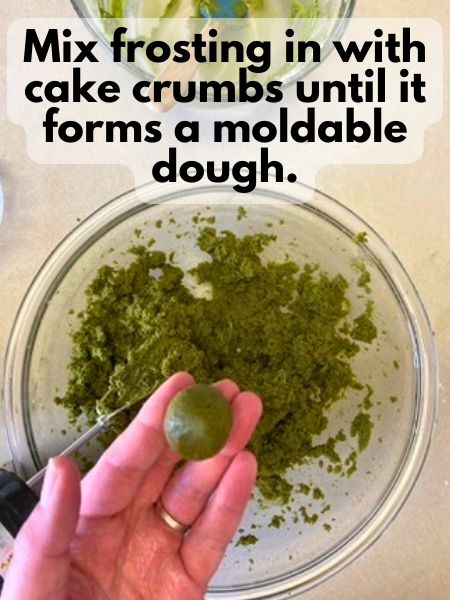
Start mixing your frosting into your cake crumbs using an electric or stand mixer. Start with about half your frosting and work your way up. Most likely, you will need all of the frosting, but you may not depending on how moist your cake crumbs are. Stop mixing every once your cake and frosting resembles a thick dough that can hold its shape when molded into a ball.
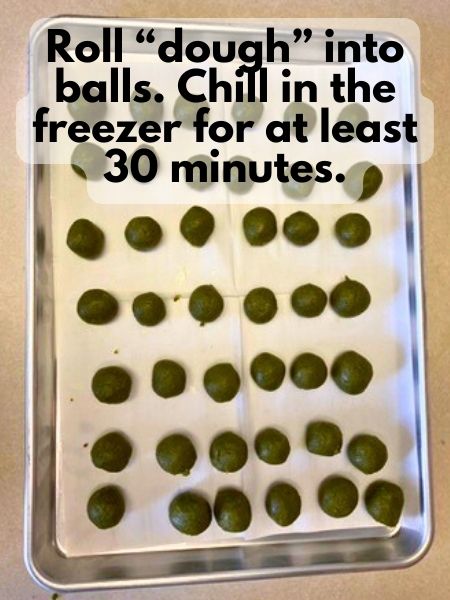
Now, it’s time to shape and create these little spheres of joy. Take a scoop of your cake mixture and roll it into balls, aiming for a smooth and even consistency. Place the balls on a cookie sheet lined with parchment paper. Place your cookie sheet in the freezer for at least 30 minutes to allow the cake balls to set.
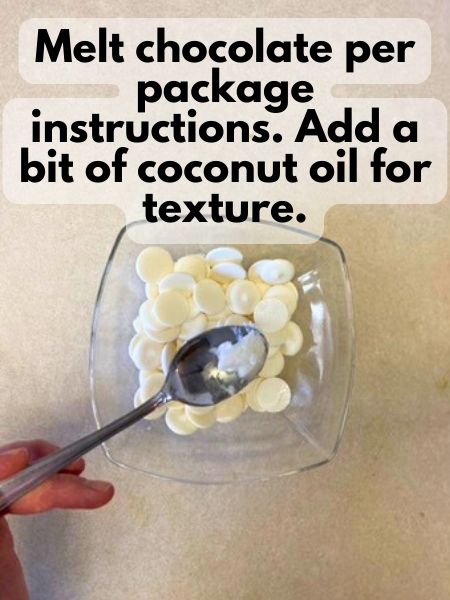
For the coating, melt chocolate or candy melts in a bowl according to the package instructions. Add a little bit (I don’t actually measure it, but about a teaspoon or two) of coconut oil to make your melted chocolate a little thinner and easier to work with.
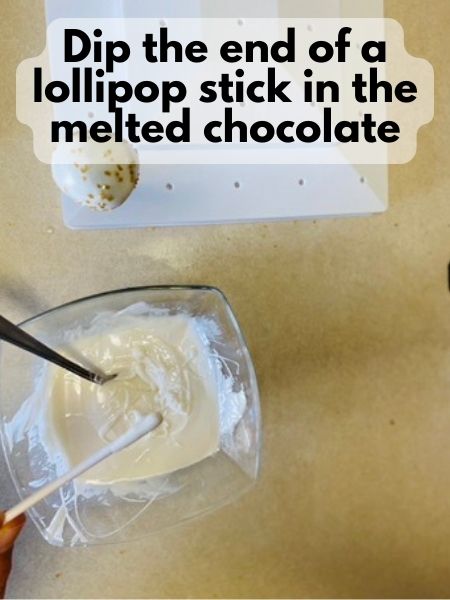
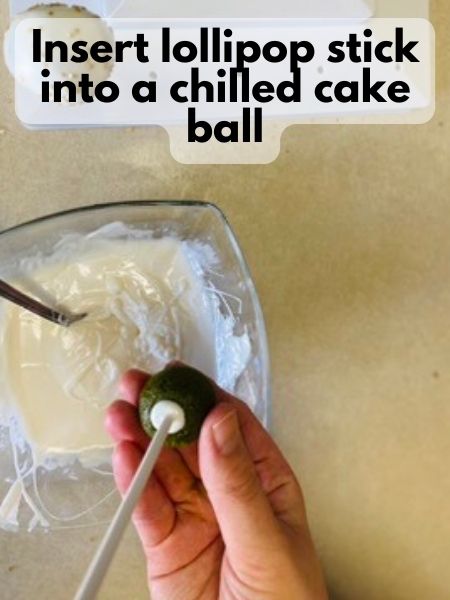
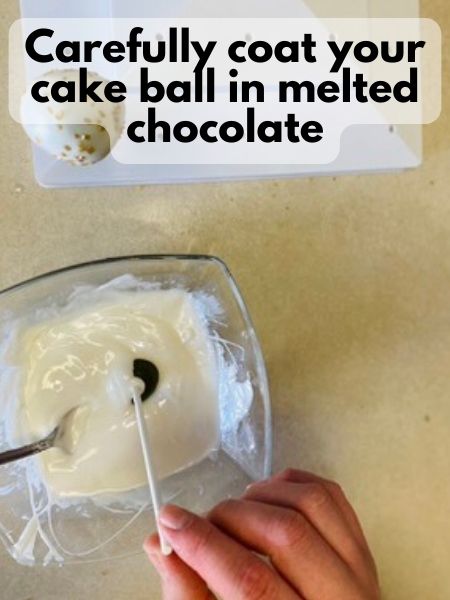
Then, dip the end of a cake pop stick into the melted chocolate before inserting it into a cake ball. Dip the cake pop into the chocolate, ensuring it’s fully covered.
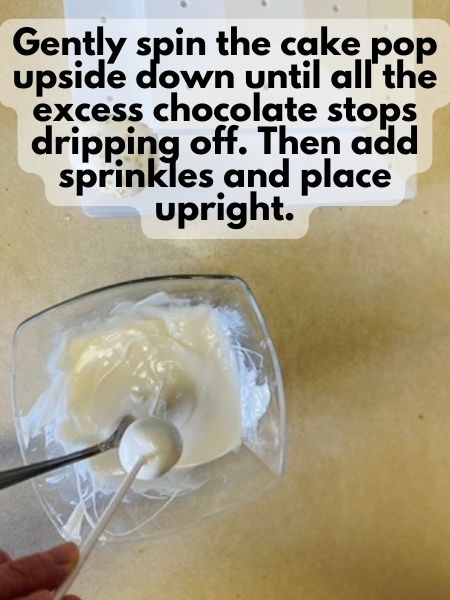
Carefully spin your cake pop around upside down to allow the excess chocolate to drip off. Then, carefully put the cake pop upright to dry.
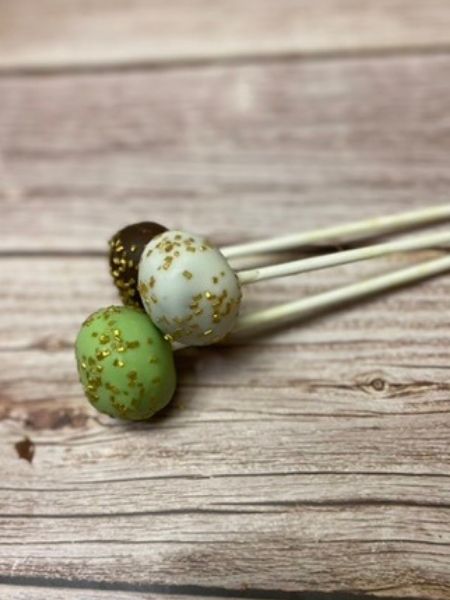
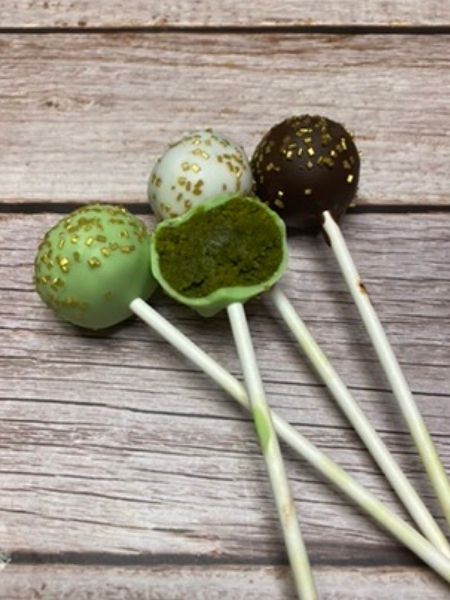
If decorating with sprinkles, make sure to do that while the chocolate coating is still wet. You could also sprinkle some matcha powder over the top for an extra punch of green tea flavor or simply drizzle with a green-colored chocolate. Let them set, and voilà, you’ve got yourself some matcha cake pops that are not only a feast for the eyes but also a testament to the joy of easy baking and creative baking combined.
Pro Tips for Making Matcha Cake Pops
As someone who loves both easy baking and creative baking, I’ve gathered a buffet of advice to help you craft these homemade cake pops to perfection. Let me walk you through some pro tips that I’ve picked up along my baking journey, which could turn your matcha cake pops from simply tasty to irresistibly gorgeous.
- Choosing the Right Matcha: The secret to incredibly flavorful matcha cake pops lies in the quality of matcha powder you use. A high-grade matcha green tea powder not only gives your desserts a vibrant color but also ensures that delectable matcha taste stands out. This is especially important for matcha recipes aimed at being both delicious and visually appealing.
- Smooth Consistency is Key: When crumbling up your matcha cake, make sure you end up with fine cake crumbs. If you have large cake crumbs, your cake pops could end up more chunky than you would want them to be.
- Patience with the Chocolate Coating: Carefully let any excess chocolate drip off of your cake pops. I recommend your hold your cake pop upside down and gently move it or spin it until the chocolate stops dripping off. Then, carefully turn your cake pop right side up. This process does take some time and patience, but it will result in beautiful, evenly-coated cake pops.
- Variations are Welcome: Don’t feel confined to the recipe. Experimenting with ingredients can lead to delightful discoveries. How about infusing the cake pops with a hint of citrus zest for a fresh twist? Or maybe adding a bit of raspberry extract for a fruit-infused variant? The world of matcha desserts is your canvas.
Whether you’re baking for a birthday party, or just in need of some healthy desserts, these tips will guide you toward making the best matcha cake pops. Remember, the essence of DIY cake pops is to have fun and enjoy the process. So, don your apron, and let’s fill the world with a little more green delight.
FAQs
Got questions about whipping up these delightful green tea treats? I hear you! Making matcha cake pops for the first time can seem daunting, but fret not. I’ve encountered every possible hiccup along the way, so let me share some quick tips.
- Can I Make Matcha Cake Pops Gluten-Free or Vegan? Absolutely! For gluten-free options, simply use a gluten free cake mix. To make them vegan, replace the eggs in this recipe with about ½ cup of applesauce and coat your cake pops in a vegan chocolate. You can use vegan chocolate chips and melt some coconut oil in with them to get the right texture.
- Which Matcha Powder Should I Use? The quality of matcha powder does affect the taste and color of your cake pops, making it pretty important! Opt for a culinary-grade matcha powder for a vibrant green color and a rich, smooth flavor that’ll make your homemade cake pops the talk of the party. Check the packaging of your match and see if it can be used for baking.
- How Can I Decorate My Matcha Cake Pops? Cake pop decorating is where you can let your creativity shine! Melted white chocolate is a classic coating that beautifully complements the matcha’s bitterness. For a touch of whimsy, sprinkle on some crushed pistachios or edible flowers. I like to go with some sugar sprinkles or a colored chocolate drizzle.
- My Cake Pops Keep Falling Off the Sticks. What Am I Doing Wrong? The key to keeping your cake pops secure is ensuring your cake mixture is moist enough to hold together. If they’re still falling apart, try chilling the cake balls before inserting the sticks and dipping them in chocolate. This step helps them firm up and adhere better.
- Can I Make These in Advance? Yes, matcha cake pops are fantastic make-ahead treats for any event. Once decorated, they can be stored in the refrigerator for up to a week. You can also store them in the freezer. Just ensure they’re well covered to avoid freezer burn and allow them to defrost a bit before serving them.
If you liked these Matcha Cake Pops, check out:
Funfetti Cake Pops
Chocolate Salted Caramel Cake Pops
Strawberry Cake Pops
Easy Red Velvet Cake Pops
Homemade Light Lemon Cake Pops
Salted Caramel Apple Cake Pops

Matcha Cake Pops
Equipment
- 50 Lollipop or cake pop sticks
- Cake pop stand Or styrofoam blocks, for drying
Ingredients
Matcha Cake
- 1 white cake box mix Any brand will do
- 3 egg whites Or however many eggs your cake mix calls for
- 1/2 cup oil Or however much oil your cake mix calls for
- 1 cup water Or however much water your cake mix calls for
- 1/4 cup matcha powder
Matcha Frosting
- 1 3/4 cups powdered sugar
- 1/2 cup vegetable shortening or softened butter
- 2 Tbsp matcha powder
- 1 tsp vanilla
- 2 Tbsp coconut milk from a can or other milk
Decoration and Coating
- 20 oz melting chocolate approximately
- 2-3 tsp coconut oil I use about 1 tsp of coconut oil per 8 oz of melting chocolate
- sprinkles optional, for decoration
Instructions
Make Matcha Cake Base
- Preheat your oven to the temperature specified on your cake mix
- Prepare your white cake mix as the box instructs you to. Add the amount of eggs, water and oil specified on the box mix. Then, add your matcha. Mix it all up really well until it’s smooth.
- Pour your cake batter into a greased pan and bake according to the instructions on the box mix.
- Allow baked cake to cool completely to room temperature before continuing.
- Put cooled cake in a food processor and pulse until you get fine crumbs. Depending on the size of your food processor, you'll most likely have to do this in batches. Put your crumbs in a very large mixing bowl.
Make Matcha Frosting and Matcha Cake Balls
- Put all of your matcha frosting ingredients in a large mixing bowl. Beat together until smooth.
- Add about half of your matcha frosting to your cake crumbs and beat with an electric mixer. Keep adding more and more frosting until you get the consistency you want (You will most likely use all the frosting, but just in case, don't add it all at once!). You have a good consistency for cake pops when you can mold your dough into a ball and it holds its shape.
- Roll your matcha cake "dough" into 1-inch balls. Place on a cookie sheet lined with parchment paper. You might need multiple cookie sheets, as this recipe makes a lot.
- Chill your matcha cake balls in the freezer for at least 30 minutes.
Decorate Matcha Cake Pops
- Melt your melting candy according to the package instructions. I would work with about 8 oz of melting candy at a time so that it doesn't harden up on you all at once.
- Add a little bit of coconut oil to your melting candy to make the texture just a bit thinner and easier to work with. I don't measure it, but I would estimate about a teaspoon. Mix your coconut oil in really well until everything is smooth.
- Dip the end of a lollipop stick into the melted chocolate.
- Insert your dipped lollipop stick end into the middle of a chilled cake ball.
- Gently hold the cake pop upside down in your bowl of melted chocolate and use a spoon to drip chocolate onto your cake pop until it is completely coated.
- Gently life the cake pop (still upside down) out of the melted chocolate and spin it a bit until all the excess chocolate drips off.
- If you are decorating with sprinkles, add the sprinkles while the chocolate coating is still wet.
- Place your cake pop upright in a cake pop stand to dry.

Hey there! I’ve been following your website for
a long time now and finally got the bravery
to go ahead and give you a shout out from New Caney Texas!
Just wanted to say keep up the great job!
Hello and thank you so much for stopping by! I’m glad to know you enjoy these recipes! 🙂
It’s a pity you don’t have a donate button! I’d without a doubt donate to this superb blog!
I suppose for now i’ll settle for bookmarking and adding your RSS feed to my Google account.
I look forward to brand new updates and will share this
blog with my Facebook group. Talk soon!
Thanks for the vote of confidence! I’m glad you enjoy this blog!