
 The holiday season is all about spreading joy and (of course!) indulging in delicious treats. BUT who has the time to make elaborate desserts around the holidays? I certainly don’t! In this post, I cover some easy step-by-step instructions for both making these Christmas tree-shaped decorated brownies. You’ll see just how easy it is to make these adorable treats!
Pro Tips on How to Cut Christmas Tree Shapes out of Brownies
Grease your pan: Before you pour in your brownie batter to bake, make sure you grease that pan like crazy! You don’t want to cut out your beautiful Christmas trees and then have them stick to the pan in the end.

Let Your Brownies Cool Completely: Before you start cutting your brownies into Christmas tree shapes, it’s crucial to let them cool completely. You don’t want to cut warm, moist brownies and then have them fall apart on you.
Grease your Tree Cookie Cutter: The simplest way to create uniform Christmas tree shapes is by using a Christmas tree-shaped cookie cutter. Make sure the cutter is clean before you start cutting with it. If you really want to make sure your brownies slide out easily, you can spray a little bit of canola oil on your cookie butter, as well.

Bake a Little longer: Now, I’m not saying burn your brownies! However, if you want them to hold their shape a little better, you can opt to leave them in the oven for a minute or two longer than you normally would. They won’t really dry out with just a minute or two longer in the oven, and we’ll be adding frosting anyway, so the moisture from that will balance out your brownie in the end.
What You Need to Make These
Christmas Tree Cookie Cutter: If you want perfectly shaped trees, investing in a Christmas tree-shaped cookie cutter is a wise choice. I have 2 tree cookie cutters in my cupboard. I opted for the smaller of the two. I had to be extra gentle getting the brownies to pop out of the cookie cutter, but I ended up with more trees in the end that way.
Homemade Buttercream Frosting (see below for recipe): I firmly believe that the frosting you use makes or breaks a dessert. If you want to use brownies from a box for this, go for it! I used the Duncan Hines “family mix” because they had specific instructions for a 9×13 size pan. However, if you really want these Christmas tree brownies to be over the top, make your own frosting to decorate. Frosting from a can just can’t compete with the real stuff.

Decorating Supplies: I used a piping bag, a Wilton 4B frosting tip, some mini M&M’s and some silver candy pearls I found at Michael’s. I highly recommend you at least go for the piping bag and a good star-shaped tip to get your trees actually looking like trees. Then, once your trees are frosted, you can decorate them as you wish.
“Normal” Baking Supplies: You’ll need a 9×13 baking pan to bake your brownies in and whatever you would normally need like a mixing bowl, mixing spoon, etc.
How to Make and Decorate Christmas Tree-Shaped Brownies
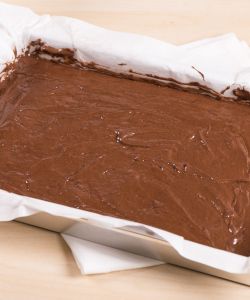
Prepare and Bake the Brownies
Bake your brownies according to the instructions on the box. I recommend putting your brownies in a 9”x13” baking pan, just so that you get enough trees in the end. An “8×8” pan won’t yield as many Christmas trees. However, make sure your batter is about ½ an inch thick in any pan you use so that your final, baked brownies are thick enough to hold their shape when you cut them.
If the mix you have doesn’t include instructions for a 9”x13” baking pan, make sure you keep an eye on them in the oven! You’ll probably need less time than you would for an 8”x8” pan, but make sure you use the old toothpick test to know if they’re done. Also, see the note above about baking a little bit longer.
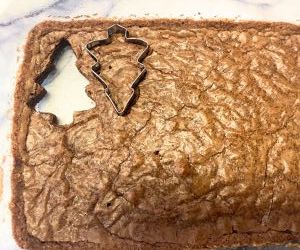
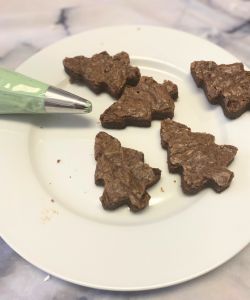
Cut the Brownies
Let your brownies cool completely before cutting them! Then, with a clean and greased cookie cutter, cut out your trees.
I started in a corner of the pan, and then flipped the next tree upside down to maximize the number of trees I could cut out in the end.
Make the Frosting
Ingredients:
-½ cup butter, softened
-2 cups powdered sugar
-1 tsp vanilla
-1 Tbsp milk (or heavy whipping cream)
-Green food coloring
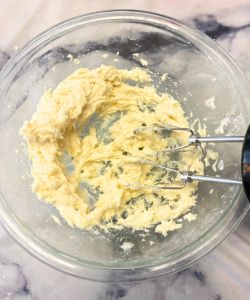
Instructions:
In a large mixing bowl, mix together the butter and powdered sugar. Start on a low speed and work your way up. Beat for about 2-3 minutes.
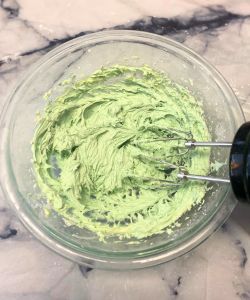
Then, add in vanilla and milk/cream. Beat until everything is smooth. If you think your frosting is too thick (although you want it pretty thick for this!), you can add in an extra teaspoon of milk/cream.
Add in green food coloring a couple drops at a time. Now, I will say, I needed a lot more green food coloring than I thought I would! I also added a couple drops of blue, because I think it helped the green darken up a bit faster.
Decorate Your Christmas Tree Brownies
I recommend laying down some parchment paper for this. First of all, frosting can get messy. But also, your brownies may stick to a plate, and are less likely to stick to parchment paper.
Put your piping tip in a piping bag and cut off the tip. Carefully put your frosting in the piping bag.
Carefully pipe frosting onto your trees, starting at the top and working your way down.
The motion you want is kind of like drawing a little line, and then you can give your wrist the tiniest of flicks at the end to make your “tree branches” kind of stand up.
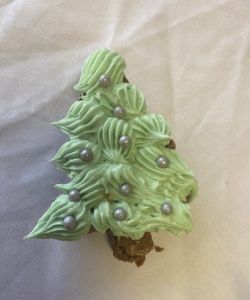
I went down my trees trying to make a pyramid-like pattern with my lines of frosting. 1 on the top, then 2 underneath that, etc. However, you can do whatever pattern you like that makes sense for the size and shape of your Christmas trees. I also left the trunk unfrosted, as it was brownie and already brown like a tree trunk!
Then, when your trees are frosted, feel free to decorate them with candies, sprinkles, etc, or just leave plain.

I would also let your brownies rest a couple hours so that the frosting “sets” a little bit.
And that’s it! With the right tools and a little creativity, you can transform simple box brownies into festive, eye-catching treats that will impress your friends and loved ones. So, put on your apron, gather your supplies, and let your imagination run wild as you create your own delicious forest of edible Christmas trees. Happy decorating!