
Last updated on August 25th, 2023 at 11:13 pm
 As the leaves change color and the crisp air brings a sense of excitement, it’s time to dive into the enchanting world of Halloween-themed cookies. Now, I’m a busy working mother, and I do not have hours to spend baking the perfect cookies! Hopefully, these instructions for simple decorated Halloween cookies can save you a lot of time and stress, too!
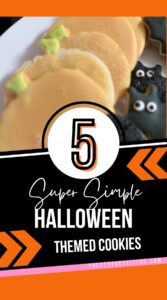
First Things First: A Spooktacular Cutout Cookie Recipe
Before we embark on our Halloween decorating adventure, let’s start with the backbone of our cookies – the cutout cookie recipe. These cookies provide a foundation that’s both delicious and easy to work with. Here’s what you’ll need:
Ingredients:
- 1 cup (2 sticks) unsalted butter, softened
- 1 cup granulated sugar
- 1 large egg
- 1 teaspoon vanilla extract
- 3 cups all-purpose flour
- 1/2 teaspoon salt
Tools:
- Various bowls for mixing and icing
- Halloween-Themed Cookie Cutters
- Royal Icing Mix (See below for a link to a homemade recipe)
- Food Coloring
- Small icing bottles (optional)
- Candy eyes (optional)
- Edible glitter (optional). If you want to learn how to make edible glitter, see here!
Instructions:
- Preheat your oven to 350°F (175°C).
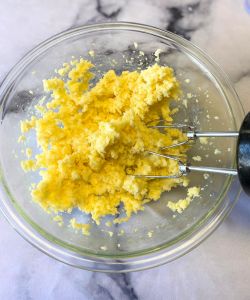
- Cream together softened butter and granulated sugar until light and fluffy.
- Add the egg and vanilla extract, mixing until well combined
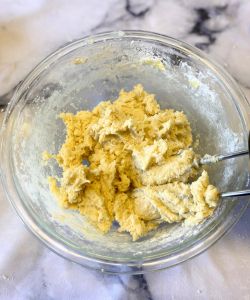
- Gradually add the flour a cup at a time to the wet ingredients. I added the salt with the second cup of flour. Mix until thick dough forms.
- Line a cookie sheet with parchment paper. Roll out the dough on a floured surface to about the size of your cookie sheet. Place dough on the cookie sheet and chill in the fridge for about 30 minutes or in the freezer for about 15 minutes.
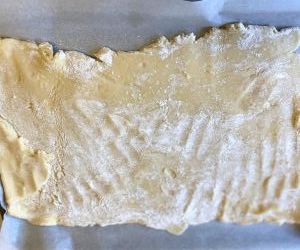
- Squish your dough into a ball and then roll out your dough on a floured surface until it’s about ¼ inch thick.
- Use Halloween-themed cookie cutters to cut out shapes.

- Transfer the cutouts to a parchment paper-lined baking sheet.
- Bake for 8-10 minutes, until the edges are lightly golden.
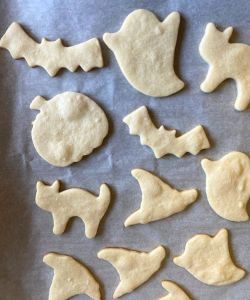
- Cool on the baking sheet for a few minutes, then transfer to a wire rack to cool completely.
Easy Royal Icing:
There are many options for royal icing, the type of icing one typically uses to frost cutout cookies. Personally, I always use this recipe from Sally’s Baking Addiction. You can also buy royal icing mix in craft stores or online. Royal icing certainly is not difficult to make, but buying the premade stuff can save you some time!
A note: I used the premade icing for this post, and I did not notice that it was lacking in flavor at all. However, I did notice that I needed more water than the instructions said I would.
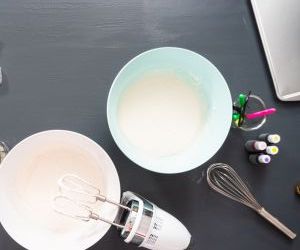
Prep:
Divide your royal icing into bowls if making multiple cookies that require multiple colors. I had a larger bowl of black icing for the witch’s hat, black cat and bat cookies. Then, I had smaller bowls of orange and white icing for the pumpkins and ghosts I made. You may need to adjust based on how many and what kinds of cookies you make.
I also had two little icing bottles: one with purple and one with green. These are optional for extra decorating. I’ll explain the optional uses below. Add food coloring to your royal icing until you get the colors you want.
Now we’re ready to decorate!
Some Pro Tips:
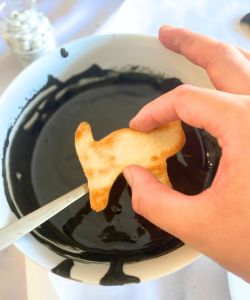
- Make your icing a little on the watery side. It’s a lot easier to dip the cookies in the icing if it’s a bit watery as opposed to thick.
- Have LOTS of paper towels and parchment paper on hand. Black food coloring somehow gets everywhere. I mean everywhere! Protect all of the surfaces near your cookie decorating area with parchment paper and have paper towels to wipe your hands on.
- Use your fingers to wipe off the excess icing. I know: gross! This is totally optional, of course. I wash my hands obsessively when I’m baking, so I felt this was safe to do. It saved me a lot of time in getting the excess icing off my cookies, as you really only want a thin layer of icing and I didn’t feel like waiting around for it to naturally drip off. But now my finger tips are all black. You can choose what you prefer!
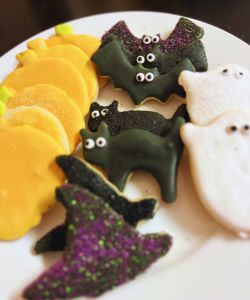
1. Witch’s Hat:
Stick the whole hat face-down in a bowl of black royal icing. Then, carefully pull the hat out and let the excess icing drip off. While the icing is still wet, sprinkle it with black edible glitter. I used sanding sugar that I got at Michael’s.
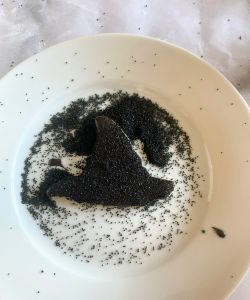
You can mix and match colors if you like too. I tried a black frosting base with purple sanding sugar, and I think it came out cute!
Optional: First, follow the steps above and let the frosting set. Then, take your icing bottles with purple and green and add a little band of color to your witch’s hat, or some other decoration!
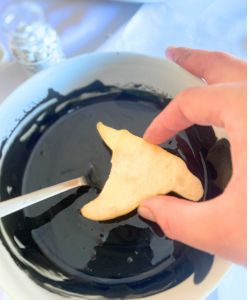
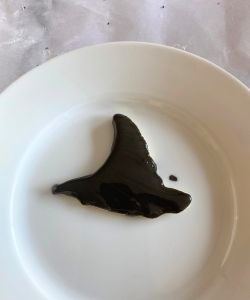
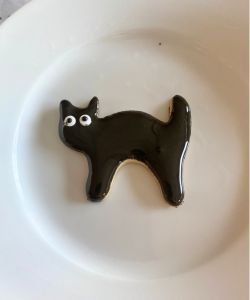
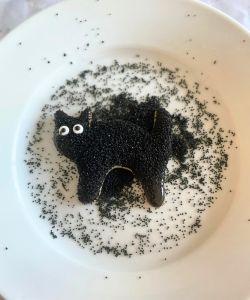
2. Black Cat:
Stick the whole cookie face-down in a bowl of black royal icing. Then, carefully pull it out and let excess icing drip off. While the icing is still wet, add candy eyes (if using) and then sprinkle with black glitter (or leave plain!)
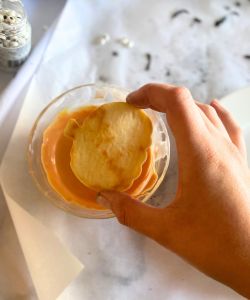
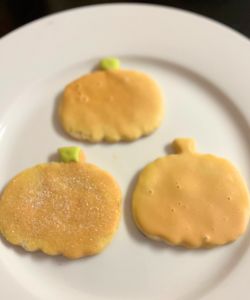
3. Pumpkin:
Dip the pumpkin face down in the orange royal icing, avoiding the stem if possible. Carefully remove the cookie from the icing and remove excess icing.
If you got some icing on the stem, carefully wipe it away with a paper towel or your finger. You can also leave it on! I tried both, and I think they turned out well.
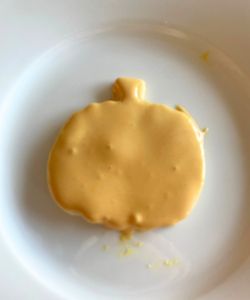
Optional: Sprinkle the cookie with orange edible glitter for added sparkle while the icing is still wet. Using your small icing bottle with green frosting, color in the pumpkin’s stem. Feel free to use green edible glitter for that part, too, but make sure your orange is completely dry before you add that.
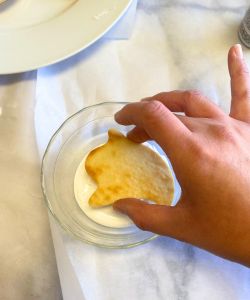
4. Ghost:
Dip the cookie face-down in white royal icing. Carefully pull the cookie out and remove the excess icing. While the icing is still wet, add eyes (if using) and sprinkle with white sanding sugar. You can also leave your ghost plain with no glitter if you wish.


Optional: You can use your small icing bottles to draw little bow-ties on your ghost, or give it any other decoration you’re able to draw in icing.
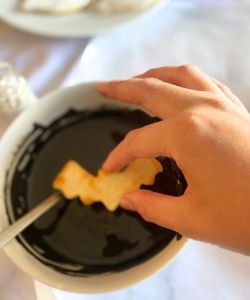
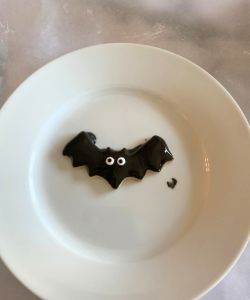
5. Bat:
Dip the cookie face-down in black royal icing. Carefully remove the cookie and remove the excess icing.
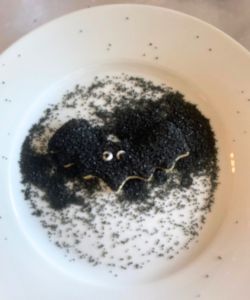
While the icing is still wet, add the eyes (if using) and sprinkle with black sanding sugar. You can also leave your bat without sanding sugar, or try to mix up the colors and maybe add some purple to see what you get.
Unleash Your Imagination:
Remember, the beauty of Halloween-themed cookies is that there’s no limit to your imagination. Get creative with colors, shapes, and details. You can use shimmering edible glitter for added magic, or just leave them plain and simple!
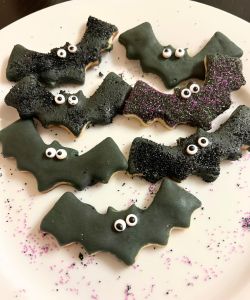
Once your cookies are decorated to perfection, lay them out to dry and set for a few hours. This will ensure that your artwork stays intact and ready to be devoured with delight.
And there you have it, my fellow Halloween enthusiasts! A delightful journey into the world of Halloween-themed cutout cookies. As you sink your teeth into these delicious creations, you’ll taste the magic of your own imagination.
Happy Halloween decorating, everyone – may your creativity be as boundless as the night itself!