
 The holiday season is upon us, and it’s time to get into the festive spirit. One of my favorite ways to embrace the holiday cheer is by baking up a batch of Easy Christmas Light Cut-Out Cookies. These delightful treats are not only simple to make, but also look adorable on any holiday dessert table. In this blog post, I’m excited to share my pro tips for handling cut-out cookie dough and easily decorating these festive cookies. Let’s get started on creating some edible Christmas magic!
Jump to Recipe
Pro Tips for Handling Cut-Out Cookie Dough
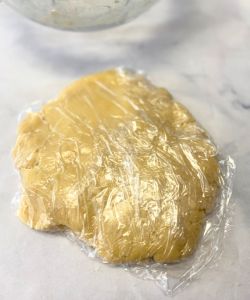
Chill Your Dough: One of the simplest secrets to perfect cut-out cookies is to ensure your dough is well-chilled before rolling it out. Once you’ve mixed your cookie dough, form it into a disk, wrap it in plastic wrap, and pop it in the refrigerator for at least an hour. Chilled dough is easier to work with, and it holds its shape during baking, giving you those beautifully defined cookie shapes.
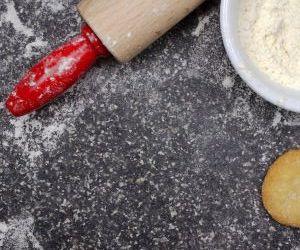
Rolling Pin Magic: Roll your dough out evenly to your desired thickness, usually around 1/4 inch. To ensure uniform cookies, you can use a rolling pin that has measuring rings on it. I don’t have one yet, but I will definitely be buying myself one this Christmas!
Keep it Cold: While working with your dough, remember that colder is better. If the dough starts to soften, pop it back in the fridge for a few minutes to firm up. This prevents the cookies from losing their shape during cutting and transferring to the baking sheet.
Flour Sparingly: When flouring your cookie cutting surface, try to resist the urge to throw down an extra cup of flour. A couple tablespoons should be good enough. Too much flour can toughen the cookies and alter their texture.
The Secret to Easily Decorating these Christmas Light Cookies
I have just 2 notes/hints that helped me decorate my cookies in the least amount of time possible with the least amount of frustration possible! Make sure you skim through these things before decorating your cookies.
The Lazy Method for Decorating Cut-Out Cookies
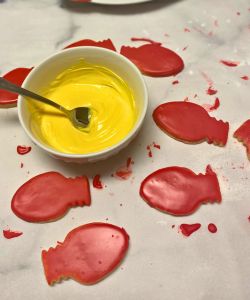
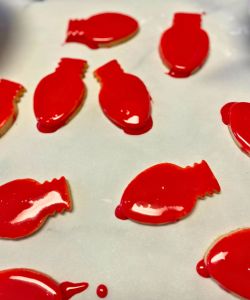
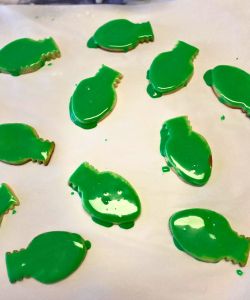
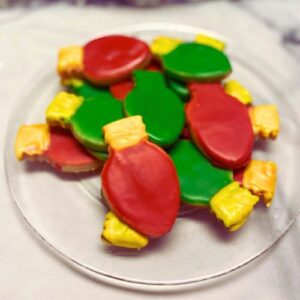
The easiest way to decorate cut-out cookies is to make them one solid color and then to add the details later. For example, for these cookies, I made some red and some green royal icing and put them in separate bowls. Then, I just laid the cookies face down in the icing, let the excess icing drip off, and laid them flat to dry.
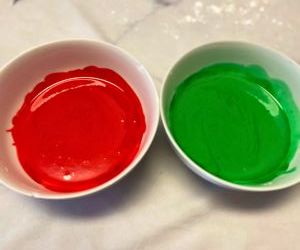

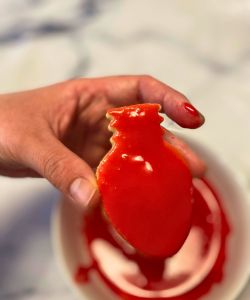
Voila! Super easy, and it leaves a nice, even coating of frosting on your cookies!
Use Melting Chocolate for Details
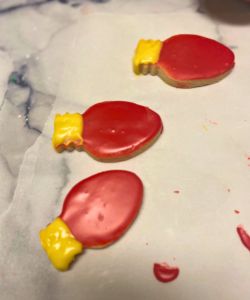
I really wanted to try making the metal part of my light bulb yellow. I tried dipping my cookies in yellow royal icing using my go-to easy method, but then the yellow color bled into the color of the light and it looked hideous!
So, instead, I waited for my royal icing to dry on my cookies, and melted some yellow melting chocolate that I had on hand. I added a little bit of coconut oil to make the texture a little thinner (more like royal icing) and spread that on top of the royal icing that was already on the cookie. It worked super well! The colors didn’t bleed, and I had a distinct yellow detail added to my cookies.

A Note About Sprinkles and Edible Decorations: Sprinkles and edible glitter are fantastic for adding extra sparkle and texture to your cookies. However, make sure your sprinkles or edible glitter are on the “thick” side. If your edible glitter resembles sugar, it will probably dissolve in the royal icing and then won’t look as pretty. Use a thick crystalized sugar or sprinkles that resemble ice cream sprinkles for best results.
How to Make Easy Christmas Light Cut-Out Cookies
Now that we’ve covered all my tips and tricks, it’s time to dive into the step-by-step process of making and decorating these adorable Easy Christmas Light Cut-Out Cookies.
Ingredients:
- 1 cup (2 sticks) unsalted butter, softened
- 1 cup granulated sugar
- 1 large egg
- 1 teaspoon vanilla extract
- 3 cups all-purpose flour
- 1/4 teaspoon salt
- Royal icing in various colors (I used this recipe from Sally’s Baking Addiction for my cookies. It’s my go-to royal icing recipe. You can also buy pre-made royal icing mix in craft stores or online. I find that using the mix, I usually have to add a lot more water than the instructions say you do.)
- Sprinkles and edible decorations (optional)
- Yellow melting chocolate (optional)
Instructions:
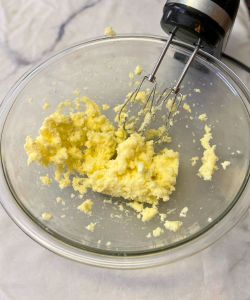
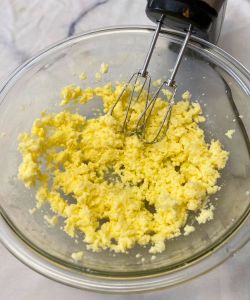
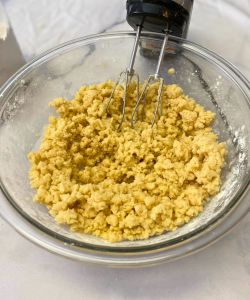
In a large mixing bowl, beat together the butter and sugar until light and fluffy. This should take about 2 minutes.
Add the egg and vanilla extract, mixing until well incorporated.
Add in the flour and salt, mixing until the dough comes together. I added in the flour a cup at a time, and then added the salt with the second cup.
Shape your dough into a disk, wrap in plastic wrap and chill in the fridge for at least an hour.
Preheat your oven to 350°F (175°C) and line baking sheets with parchment paper.
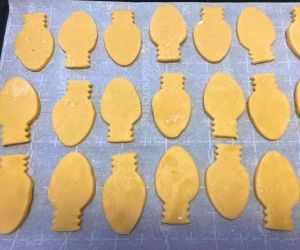
On a lightly floured surface, roll out your dough to about ¼ of an inch thick (I like to work with half the dough at a time). Use Christmas light-shaped cookie cutters to cut out your cookies and transfer them to the prepared baking sheets
 .
.
Bake for 8-10 minutes or until the edges are lightly golden. Be sure not to overbake to keep the cookies tender. I usually check the bottom of the cookies. If they’re slightly golden, they’re done.
Let the cookies cool on the baking sheets for a few minutes before transferring them to a wire rack to cool completely.
Once the cookies are cool, it’s time to decorate! See my notes above for the “lazy” way to decorate.
Allow the icing to dry completely before stacking or storing your cookies.
And there you have it, a batch of delightful Easy Christmas Light Cut-Out Cookies that are sure to bring smiles to everyone’s faces this holiday season. Happy baking, and may your holidays be merry and bright! 🎄✨
Easy Christmas Light Cut-Out Cookies
Ingredients
- 1 cup butter softened
- 1 cup granulated sugar
- 1 tsp vanilla
- 1 egg
- 3 cups flour
- 1/4 tsp salt
Instructions
- Cream the butter and sugar together until light and fluffy.
- Add in egg and vanilla. Mix until well-incorporated.
- Add in flour and salt gradually, mixing as you go, until everything is well-incorporated.
- Shape your finished cookie dough into a disk. Wrap in plastic wrap and chill in the fridge for at least one hour, or the freezer for 30 minutes.
- Preheat your oven to 350°F when just about ready to start baking. Line some cookie sheets with parchment paper.
- Removed chilled dough from the fridge and roll out to about 1/4 inch thick on a lightly floured surface.
- Cut out your Christmas lights and place them on the lined baking sheets. You don't need to leave much room for spreading.
- Bake your cookies for 8-10 minutes, or until they start to look golden on the bottom side touching the cookie sheet.
- Allow cookies to cool completely before decorating. Please see notes above about my easy method for decorating.
- Enjoy these cookies with a glass of milk, coffee or just on their own!