
Last updated on December 21st, 2025 at 04:37 pm
 Hey there, cake pop enthusiasts! Today, I’m excited to share a delightful and super simple recipe that combines two of my absolute favorites: chocolate and salted caramel. Brace yourselves for the ultimate treat — Chocolate Salted Caramel Cake Pops! Plus, this recipe uses a boxed cake mix and caramel sauce from a jar, so it’s incredibly easy to throw together! Trust me, your friends and family won’t know the difference, and I won’t tell them.
Jump to Recipe
Special Tools and Materials Needed
Now, don’t worry! Making cake pops really is quite simple! There are just a few things you need that will make these cake pops even simpler to put together.
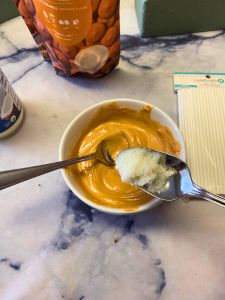
Salted Caramel Sauce: Like the kind used for ice cream sundaes. I admit, I couldn’t find a salted caramel variety when I went shopping, so I bought regular caramel sauce by Smuckers. In the end, it’s the salted caramel coating that makes the difference for this recipe. More on that in a second!
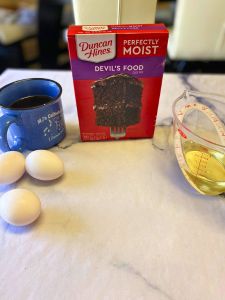
Chocolate Cake Mix: I used the Duncan Hines Devil’s Food mix, but you could use whatever chocolate cake mix you have on hand. My big suggestion for chocolate cake mixes that enhances the flavor SO much, is to replace any water with room temperature coffee. The coffee really brings out the chocolate flavor even more!
Salted Caramel Candy Melts: In order to get a real kick of salted caramel flavor, I highly, highly recommend these! You can find these salted caramel flavored candy melts at Michael’s. They were the true inspiration for me trying this recipe, and they definitely came through! If you can’t find salted caramel flavored candy melts, at least use some kind of chocolate candy melt. Never, ever, ever try to coat cake pops in regular chocolate chips that you melt. It will not work, and you will most likely end up setting your smoke detector off when you burn your regular chocolate chips.
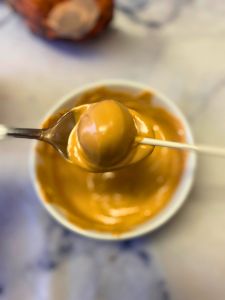
Coconut Oil: As much as I love the candy metals from Michael’s (And I buy them all the time!), they are a little thick when melted. I’m lazy, and I don’t feel like waiting around for my excess chocolate to drip off my cake pops (more on that later!). Thus, I add a little bit, maybe a teaspoon or so, or coconut oil to my melted candy melts. This makes the texture just a little bit thinner and easier to work with in my opinion. It also allows you to get a thinner coating on your cake pops, which means you end up buying less candy melts overall.
Cake Pop Stand/Styrofoam Blocks: I bought my styrofoam blocks at Michael’s ages ago, and they are still going strong! You can find them in the flowers section of craft stores, normally. You can also buy a cake pop stand. This will allow your cake pops to stand upright to dry and set.
Lollipop Sticks: I would recommend buying the longer kind. I used ones that are 6 inches long, which I also bought at Michael’s. Needless to say, the Michael’s employees see me pretty regularly!

How to Make Chocolate Salted Caramel Cake Pops
Now, let’s get into the fun part — crafting these adorable and scrumptious cake pops! The process might seem a bit intricate, but fear not, it’s a delightful adventure.
Step 1: Bake the Chocolate Cake
Start by following the instructions on your chosen chocolate cake mix for baking. Again, I recommend you replace any water your box mix calls for with coffee. You can just used a regular 9×13 pan, since we will be crumbling up the cake, anyway.
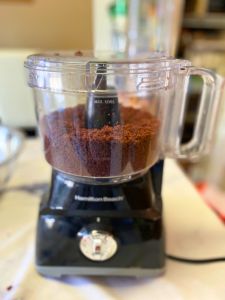
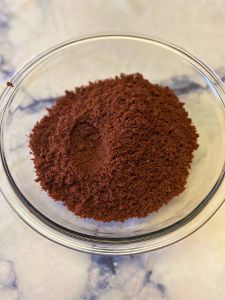
Once baked and cooled, crumble the cake into fine crumbs in a large bowl. I like to use a food processor to make the process easier.
Step 2: Forming the Cake Balls
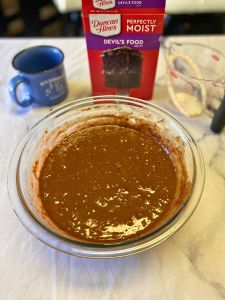
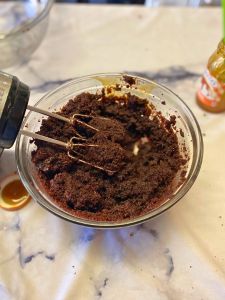
Then, add a generous dollop of that your salted caramel sauce to your cake crumbs. Mix it in until the cake crumbs come together, creating a dough like thick cookie dough or play dough that can hold its shape. I recommend starting with a little caramel sauce and working your way up! You can always add more caramel sauce, but you can’t take it away. However, I did end up using almost my entire 12 ounce jar of caramel sauce.
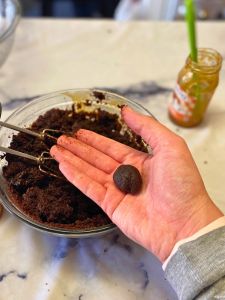
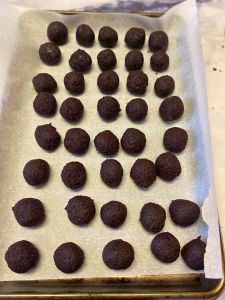
Next, it’s time to get your hands a little messy and roll the cake mixture into small, evenly sized balls. I aim for balls that are about an inch in diameter. Place your cake balls on a cookie sheet lined with parchment paper. Then, let your cake balls chill in the freezer for 30 minutes. You can let them chill in the fridge, but I like the freezer, because then they hold their shape better when you coat them in chocolate in the next step.
Step 3: Insert the Sticks
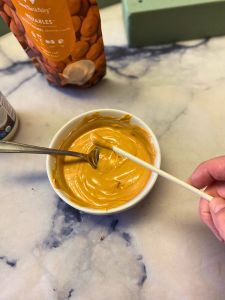
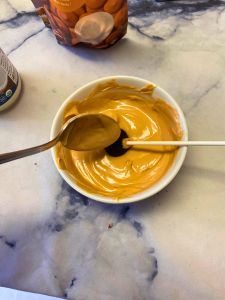
Melt your salted caramel candy melts according to the package instructions. If you see that the mixture is pretty thick, you can stir in some coconut oil (or vegetable oil) to thin it out a bit. Dip the tip of each lollipop stick into the melted candy melts and gently insert it into each cake ball. This will act as the deliciously edible glue that keeps your cake pops together.
Step 4: Coating the Cake Pops
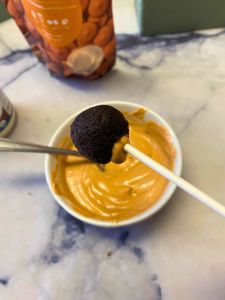
Dip each cake pop into the melted candy melts, ensuring the entire surface is coated. I like to stick my cake pops down in the bowl, and then use a spoon to gently spoon melted chocolate over them. Let any excess chocolate drip off, and then stick them upright to dry. Note: If you find your cake pops getting mushy and hard to work with, pop them back in the freezer for a few minutes. I made mine in 3 batches of around 16 each, and let the rest chill in the freezer for about 10 minutes so they could firm up while I coated the batch I was working on.
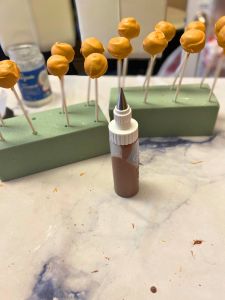
If you are going to decorate your cake pop with sprinkles or edible glitter, do it while the candy coating is still wet. I used some melted chocolate candy melts and a small icing bottle to drizzle on my decoration. If you use a drizzle, you can wait until the candy melt coating sets.
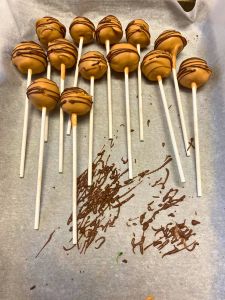
And voilà! You’ve created a batch of irresistible Chocolate Salted Caramel Cake Pops that are sure to steal the show at any gathering.
These little treats are perfect for a party, a special celebration, or just when you need a sweet pick-me-up. And they are SO easy to make! Happy baking!

Chocolate Salted Caramel Cake Pops
Ingredients
- 1 Chocolate cake mix I used Duncan Hines
- 1 cup coffee to replace water in your cake mix (Use whatever amount of water your cake mix calls for)
- 3 eggs or however many eggs your cake mix calls for
- 1/2 cup oil or however much oil your cake mix calls for
- 12 oz salted caramel sauce approximately! This is how much I used. You may need more or less. See notes above about how to know if you have the right consistency for your cake pops.
- 20 oz salted caramel candy melts 1 bag of the Michael's brand is 12 oz., so I needed 2 bags total
- 2-3 Tbsp coconut oil or vegetable oil, to make melted salted caramel candies a little thinner and easier to work with
- sprinkles, edible glitter, melted chocolate, etc. optional, for decoration
Instructions
- Prepare and bake your cake mix according to the instructions on the box. I recommend you replace any water with coffee, as coffee really enhances the chocolate flavor
- Allow your cake to cool completely. Then, crumble the cake into very fine crumbs. I like to put mine in a food processor to make it easier.
- Put all your fine cake crumbs in a large mixing bowl. Slowly add in more and more of your caramel sauce and mix with an electric mixer. Stop adding caramel sauce when your "dough" reaches a thick cookie dough consistency and can hold its shape when rolled into a ball.
- Line a cookie sheet with parchment paper. Roll your cake pop "dough" into balls about 1 inch in diameter. Place the balls on the cookie sheet. Let the cake pop balls chill in the freezer for at least 30 minutes.
- After chilling your cake pop balls, melt your salted caramel-flavored candy melts according to the package instructions* (see note below). You can add a little bit of coconut oil (or vegetable oil) to the melted candy melts to thin them out. You want the excess to be able to drip off your cake pops, and it's a little easier when the coating isn't so thick.
- Dip the end of a lollipop stick into the melted salted caramel candy melts, and insert that end straight in the middle of a chilled cake pop ball. This will help hold the cake pop in place.
- Carefully coat the rest of the cake pop in melted salted caramel candy melt. Leave it upright in a cake pop stand (or styrofoam block) to dry.
- If you are going to coat your cake pops in sprinkles or edible glitter, make sure you do that before the salted caramel coating on the outside dries.
- Store your finished cake pops in the fridge to keep them fresh. Enjoy!
Notes