Last updated on July 31st, 2024 at 08:38 pm
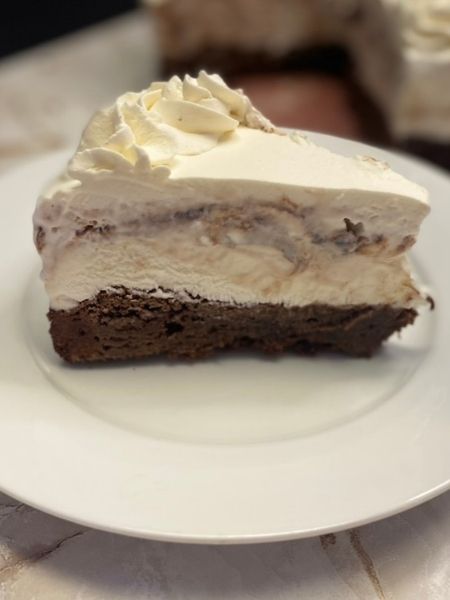
 Indulge your sweet tooth with the ultimate dessert: Brownie Sundae Ice Cream Cake. This decadent treat combines the rich, fudgy goodness of brownies with the creamy, cool delight of ice cream, all topped with your favorite sundae toppings. Whether you’re celebrating a special occasion or just craving something sweet, this dessert is sure to impress.
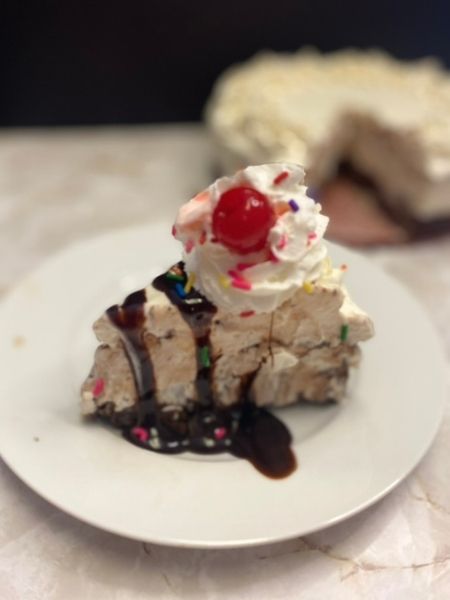
Imagine sinking your fork into layers of fudgy brownie, velvety ice cream, and a medley of toppings like hot fudge, whipped cream, and sprinkles. Each bite is a symphony of flavors and textures, making this dessert a true showstopper. Plus, it’s surprisingly easy to make, so you can enjoy this delicious treat anytime you like.
So, roll up your sleeves, grab your ingredients, and get ready to create a dessert masterpiece that will have everyone coming back for seconds.
Jump to Recipe
Ingredients for Brownie Sundae Ice Cream Cake
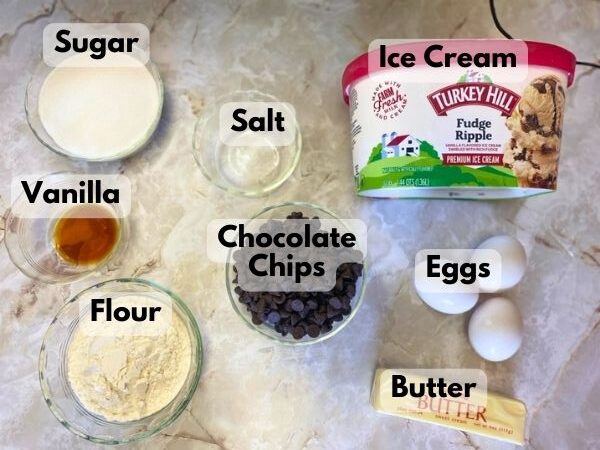
To make Brownie Sundae Ice Cream Cake, you will need the following ingredients:
Brownie Layer:
- 1/2 cup (1 stick) unsalted butter
- 8 oz semisweet chocolate, chopped
- 1 cup granulated sugar
- 3 large eggs
- 1 tsp vanilla extract
- 3/4 cup all-purpose flour
- 1/4 tsp salt
Ice Cream Layer:
- 1.5 quarts of your favorite ice cream (vanilla, chocolate, or any flavor you like), slightly softened. I used fudge ripple.
Whipped Cream Frosting Layer:
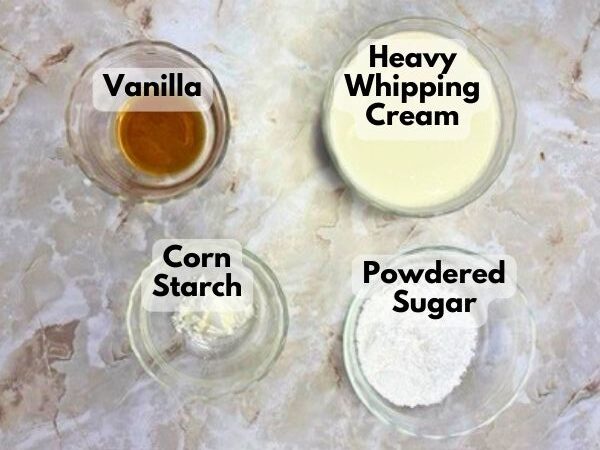
- 1 cup heavy whipping cream (cold)
- 1/4 cup (60 g) powdered sugar
- 1 teaspoon vanilla extract
- 1/2 tablespoon cornstarch
Optional Toppings:
- Hot fudge sauce
- Whipped cream
- Sprinkles, nuts, cherries, etc.
Video – How to Make Brownie Sundae Ice Cream Cake
How to Make Brownie Sundae Ice Cream Cake
This cake has to be constructed layer by layer, and there are three layers. But don’t worry! It’s really not as complicated as it seems!
Prepare the Brownie Base:
1. Preheat your oven to 350°F (175°C). Grease a 9-inch springform pan.
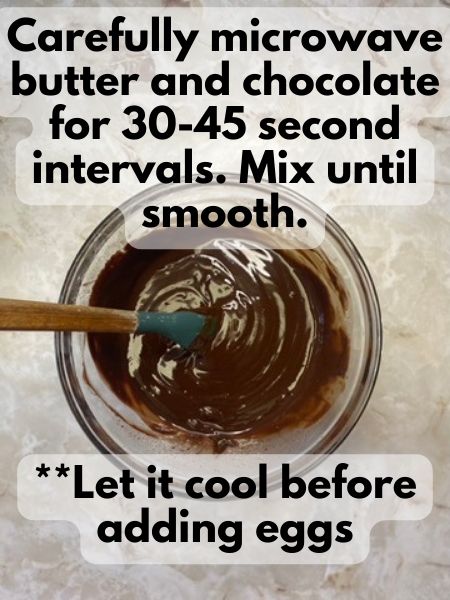
2. Carefully microwave butter and chocolate for 30-45 second intervals (depending on the strength of your microwave). Stir in between each round in the microwaving. Keep microwaving and stirring until everything is melted and smooth. Let cool for a bit before continuing.
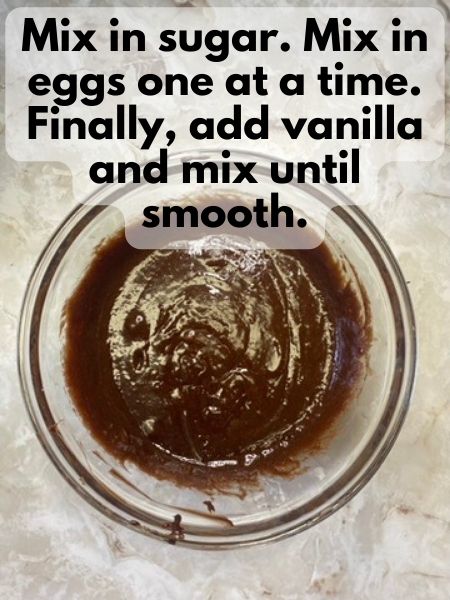
3. Stir in the sugar until well combined. Add the eggs one at a time, mixing well after each addition. Stir in the vanilla extract.
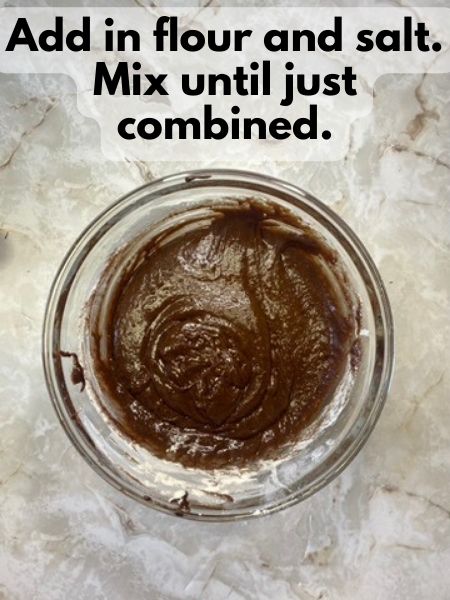
4. Add the flour and salt, and stir until just combined. Do not overmix.
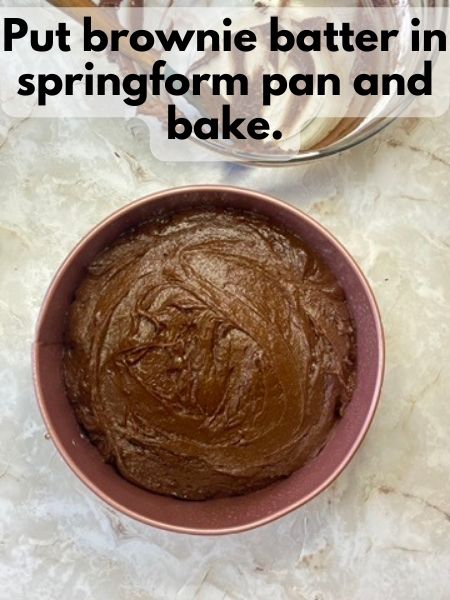
5. Pour the brownie batter into the prepared springform pan and smooth the top.
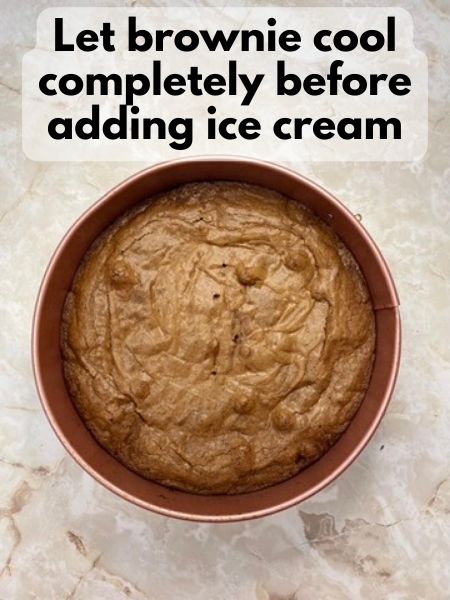
6. Bake for 25-30 minutes, or until a toothpick inserted into the center comes out with a few moist crumbs. Let cool completely in the pan. Do not remove outer ring of your springform pan yet.
Add the Ice Cream Layer:
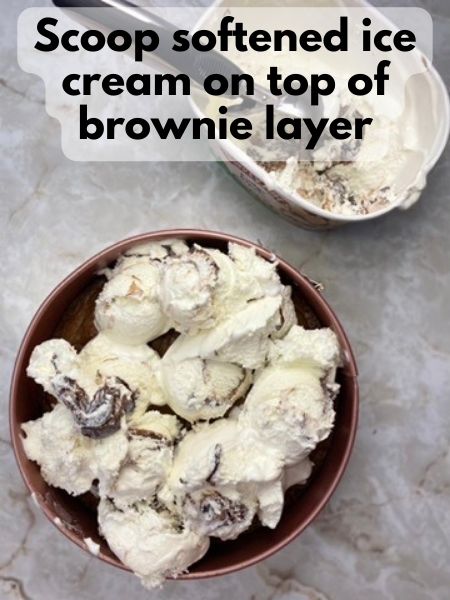
1. Once the brownie base is completely cool, spread the softened ice cream evenly over the brownie layer in the springform pan.
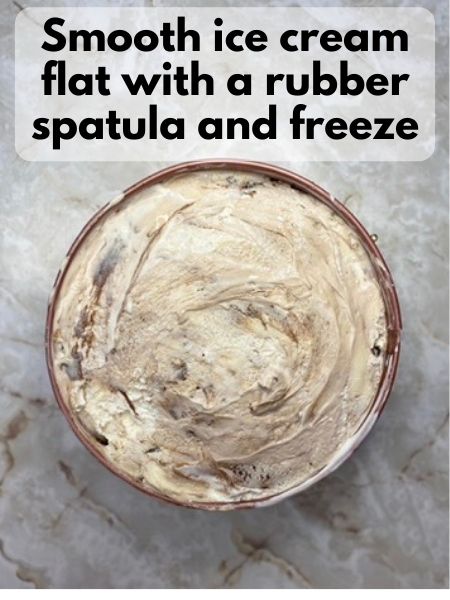
2. Smooth the top with a spatula. Cover the pan with plastic wrap or aluminum foil and freeze for at least 4 hours, or until the ice cream is firm.
Make Whipped Cream Layer
1. Place your mixing bowl and beaters in the refrigerator for about 15-20 minutes before you begin. Cold equipment helps the cream whip up better. This is optional, but helpful.
2. Take the chilled mixing bowl and add the heavy whipping cream, powdered sugar, vanilla extract, and corn starch..
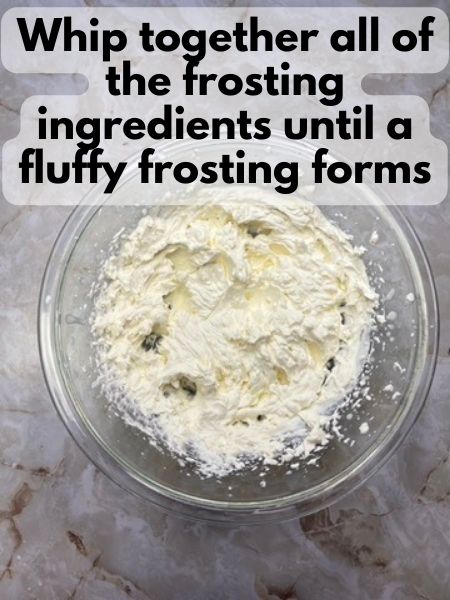
3. Using an electric mixer, start whipping the mixture on low speed, gradually increasing to high speed. Beat until stiff peaks form. This should take about 3-5 minutes. Be careful not to overbeat, as the cream can turn into butter.
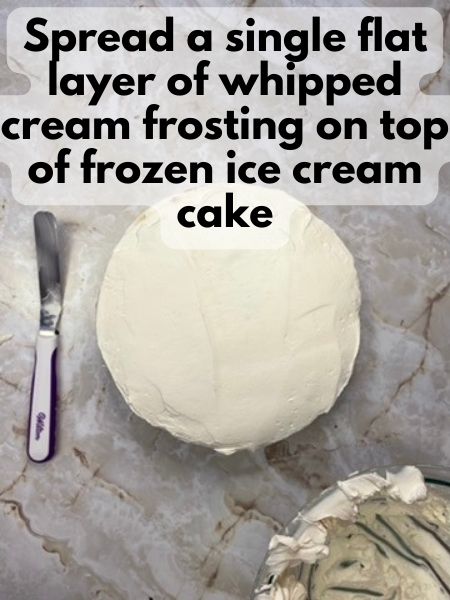
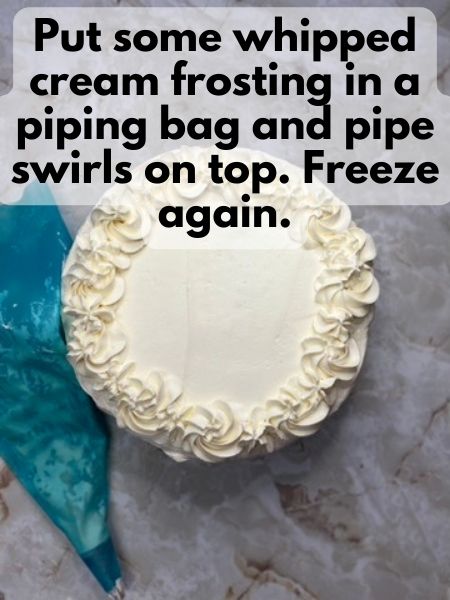
3. Carefully remove your brownie sundae cake from the springform pan. Immediately use the whipped cream to frost your ice cream cake.
You should have just enough to put a thin flat layer on top and then pipe some pretty swirls on top. How you decorate is up to you! You could also skip this step if you like and choose to just put whipped cream on your ice cream cake right before you eat it.
4. Once frosted, place the ice cream cake back in the freezer to firm up until you’re ready to serve.
Pro Tips
- A Note on Whipped Cream Frosting: I debated whether to add the whipped cream frosting to this recipe in the first place. Tbh, you can consider it optional, as you will likely want to put some fresh whipped cream, sprinkles, hot fudge, etc. on your brownie sundae cake anyway. Also, another note, if you don’t have cornstarch to make your frosting more stable, you could substitute it for some instant vanilla pudding, as that’s what these kinds of recipes typically call for. I just didn’t have any pudding lying around, and thought I would try cornstarch to see if it worked. Good news: it did! I was really happy with how the whipped cream frosting turned out, and I think it made the overall cake look prettiers. However, if you don’t feel like going that extra step when you’re likely to add whipped cream from a can anyway, you can definitely skip that!
- Use a scale to measure your chocolate chips. This recipes calls for 8 ounces of chocolate based in weight not volume. You probably could measure it by volume, but the recipe won’t turn out as rich or chocolate-y. I would recommend you get out a food scale, or at least try to estimate 8 ounces of chocolate chips based on the total weight of the bag of chocolate chips you have.
- For a twist on the classic recipe, try using different flavors of ice cream or adding in mix-ins like chocolate chips or crushed cookies. Consider experimenting with different flavors to create unique combinations. For instance, vanilla ice cream can be swapped out for flavors like mint chocolate chip, strawberry or even cookie dough. These variations can add a whole new dimension to the dessert and surprise your taste buds with unexpected flavor profiles. Additionally, mix-ins like chocolate chips, crushed cookies, or caramel swirls can take your ice cream to the next level. Feel free to get creative and mix and match different ingredients to find your perfect combination!
- To make slicing easier, run a knife under hot water before cutting the cake. When it comes to slicing an ice cream cake, running a knife under hot water can make the whole process much smoother and easier. By heating up the blade, it helps to melt through the cake without causing any crumbling or messy edges. Also, make sure you “dig in” with your knife when you get to the brownie layer, as it is a bit thick.
- Customize your sundae toppings to suit your preferences – the possibilities are endless! Whether you prefer classic toppings like hot fudge, caramel sauce, whipped, and chopped nuts, or you want to mix it up with fresh fruits, candy pieces, cookie crumbles, or even breakfast cereals, the possibilities are truly endless! Don’t forget to add a cherry on top for that perfect finishing touch. With so many choices available, you can customize your sundae to suit your preferences and create a delicious treat that is all your own.
FAQs
- Can I make this dessert ahead of time? Yes, you can assemble the Brownie Sundae Ice Cream Cake ahead of time and keep it in the freezer until you’re ready to serve. If you make it more than a day or so ahead of time, try to cover it so that freezer burn and other smells from your freezer don’t leak into it. You can freeze it first so it’s really solid, and then gently cover it with some aluminum foil or plastic wrap.
- Can I use a different flavor of ice cream? Absolutely! Feel free to experiment with different ice cream flavors to create your own unique twist on this dessert.
- How long will the cake keep in the freezer? The Brownie Sundae Ice Cream Cake will keep well in the freezer for up to a week, but it’s best enjoyed within a few days for optimal freshness. If you do keep it longer than a week, it should really be fine. My biggest concerns would be about freezer burn or other flavors from your freeze seeping into your ice cream cake. You can always cover it with aluminum foil or plastic wrap to kind of protect leftovers a little bit more.
- Can I use a boxed brownie mix? I think you could, absolutely! I haven’t tested it personally, but I do not see why you could not. Please just note that, depending on the size of your springform pan, if you use an entire box of brownie mix, your brownie layer for this might be rather thick. This isn’t necessarily a bad thing, of course! It’s up to your preference. Brownies don’t puff up too, too much while baking, so the amount you have in your pan before baking will pretty much be what you have in the end. Whether or not you want to use a whole box of brownie mix depends on personal preference.
If You Liked This Brownie Sundae Ice Cream Cake, Check Out:
Cookie Butter Ice Cream Pie
Oreo Strawberry Crunch Pie
No Churn Cookie Butter Ice Cream
Salted Caramel Brownie Fries
Brownie Sundae Ice Cream Cake
Equipment
- 1 Springform pan any size, but I used 9 inches
- 1 food scale not necessary, but recommended for measuring chocolate chips
Ingredients
For Brownie Layer
- 1/2 cup butter melted
- 8 oz chocolate chips *measure in 8 ounces weight, not volume
- 1 cup granulated sugar
- 3 eggs
- 1 tsp vanilla
- 3/4 cup flour
- 1/4 tsp salt
For Ice Cream Layer
- 1.5 quarts pre-made ice cream slightly softened
For Whipped Cream Frosting
- 1 cup heavy whipping cream cold
- 1/4 cup powdered sugar
- 1 tsp vanilla
- 1/2 Tbsp corn starch
Instructions
Prepare and Bake Brownie Layer
- Preheat your oven to 350°F (175°C). Grease a 9-inch springform pan.
- Carefully microwave butter and chocolate for 30-45 second intervals (depending on the strength of your microwave). Stir in between each round in the microwaving. Keep microwaving and stirring until everything is melted and smooth.
- Let melted chocolate cool for a bit before continuing. Otherwise, it will cook your eggs.
- Stir in the sugar until well combined. Add the eggs one at a time, mixing well after each addition. Stir in the vanilla extract.
- Add the flour and salt, and stir until just combined.
- Pour the brownie batter into the prepared springform pan and smooth the top.
- Bake for 25-30 minutes, or until a toothpick inserted into the center comes out with a few moist crumbs. Let cool completely in the pan on a wire rack.
Add Ice Cream Layer
- Let your ice cream sit out of the freezer for a bit to soften it up before adding it on top of your completely cooled brownie layer.
- Scoop your ice cream into the springform pan on top of the brownie layer and smooth flat with a spatula.
- Cover the pan with plastic wrap or aluminum foil and freeze for at least 4 hours, or until the ice cream is firm.
Make Whipped Cream Frosting Layer
- Optional: Place your mixing bowl and beaters in the refrigerator for about 15-20 minutes before you begin. Cold equipment helps the cream whip up better, but it's not necessary.
- Take the chilled mixing bowl and add the heavy whipping cream, powdered sugar, vanilla extract, and corn starch.
- Using an electric mixer, start whipping the mixture on low speed, gradually increasing to high speed. Beat until stiff peaks form. This should take about 3-5 minutes. Be careful not to overbeat, as the cream can turn into butter.
- Carefully remove your brownie sundae cake from the springform pan.
- Immediately use the whipped cream to frost your ice cream cake. You should have just enough to put a thin, flat layer on top and then pipe some pretty swirls on top. How you decorate is up to you! You could also skip the frosting altogether if you like, and just decorate with whipped cream from a can when you serve this brownie sundae ice cream cake.

