Last updated on October 25th, 2023 at 02:44 am
 Scones are a delightful treat that can elevate any breakfast or afternoon tea to a whole new level of indulgence. But if you’re looking to take your scone game to a whole new level, get ready for these Brown Butte Maple Scones with a Brown Butter Maple Glaze. These Browned Butter Maple Scones with Browned Butter Maple Glaze are a true masterpiece of flavor!
How to Brown Butter
Browning butter is a simple process that adds a depth of flavor and a nutty aroma to your scones. Here’s how you can master the art of browned butter:
Ingredients:
– 1 ¼ cup (2 ½ sticks) unsalted butter (1 cup for scones, ¼ cup for glaze)
Instructions:
Start with a heavy-bottomed saucepan. Cut the butter into tablespoon-sized chunks to ensure even melting.
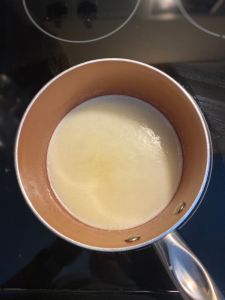
Place the butter in the saucepan and melt it over low to medium heat. Stir occasionally to prevent the butter from sticking to the pan.
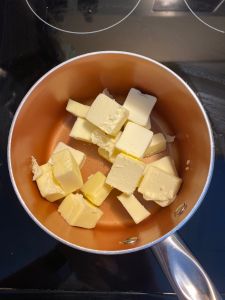
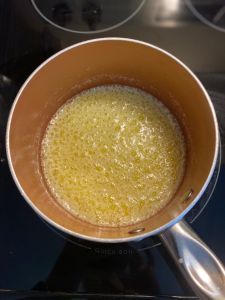
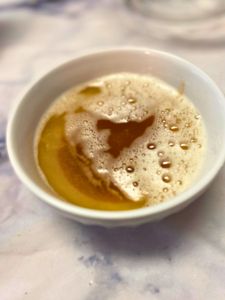
As the butter melts, it will go through several stages. First, it will become frothy as the water content begins to evaporate. Then, it will start to bubble, and you’ll see the milk solids separate and settle to the bottom of the pan.
Continue to cook the butter, stirring frequently, until it turns a rich golden brown. The frothy-ness will kind of come back, so you’ll have to push that froth aside to really see the butter underneath. You’ll notice a nutty aroma and the appearance of brown specks at the bottom of the pan.
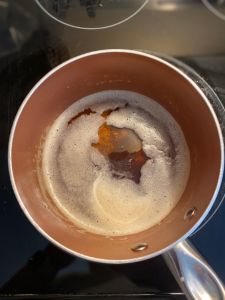
Remove the pan from the heat and transfer the browned butter to a heat proof container.
Separate one cup of browned butter (Make sure to get in an equal amount of those brown specks!) in another container and put it in the fridge. Let it cool completely in the fridge until it’s solid again. The rest of the butter you can keep aside at room temperature for the browned butter maple glaze.
Pro Tips for these Browned Butter Maple Scones
Scones are delightful and can be quite easy to whip up, once you know how to do it. Make sure you read through these tips to save yourself some time and effort! The first two (not one, but two!) times I ever made scones, I burned them beyond being able to eat them. Scones can be a little finicky, but I have some tips that worked well for me making these.
1. Don’t Overwork Your Dough.
I wasn’t sure how to treat scone dough the first time I made scones, so I turned to the internet, naturally. I saw a video of someone rolling out scone dough, folding it in half and then rolling it out again a couple times. However, I do not recommend you do that with this scone recipe! Perhaps it works with other scone recipes, but I found that this dough comes out best if you don’t mess with it too much. The first batch I made of these came out more like dense cookies rather than scones, and I think that’s because I worked the dough way too much.
2. Chill Your Dough.
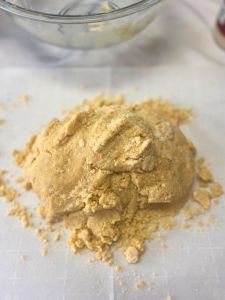
This is very important. You want your scone dough to be cold to a) get the right texture in the end and b) to avoid burning the bottoms of your scones into blackened charcoal. Trust me! That was another rookie scone-making mistake I made. You absolutely must chill your dough for at least 30 minutes in the fridge.
3. Use Clean Parchment Paper to Line Your Pan.
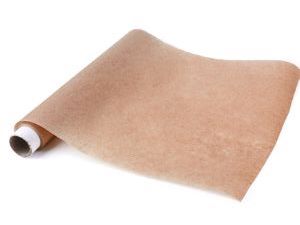
Yet another rookie mistake I made… I was trying to be thrifty and reuse the parchment paper from one batch of scones to the next. Don’t do it! Any little bit of butter or dough on that parchment paper will burn right up, and that burnt-ness will seep into the bottom of your scones. If you shape your scone dough on a piece of parchment paper before you chill it in the fridge, get another piece of fresh parchment paper to line your baking pan before you stick those scones in the oven.
4. Use a Cold Pan.
I would recommend sticking your cookie sheet in the freezer for a few minutes before putting your scones on to bake. If you forget to do that, at least don’t use a warm cookie sheet that just came out of the oven. This is another easy way to blacken the bottom of your scones into inedible charcoal. Scone dough and pans really just need to be cold.
5. Don’t Overbake.
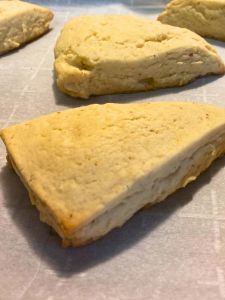
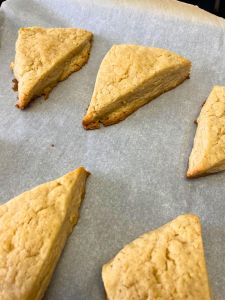
This is kind of obvious, but warrants a mention here. Especially because of the maple syrup in this particular recipe, this dough can burn easily. If you want to know when your scones are done, look at the bottom of them while they’re baking. The bottom will be slightly golden, and the tops will not be jiggly/squishy when you touch them. The tops of some of my scones kind of started to “crack” a little bit, but I would focus on the bottom parts touching the pan. If the bottoms look golden brown, they’re done, and they’ll quickly turn black if you don’t get them out of the oven!
Now that you have read through all the mistakes I once made and would like for you to avoid, you’re ready to dive into making your Browned Butter Maple Scones with Browned Butter Maple Glaze.
How to Make Browned Butter Maple Scones with Browned Butter Maple Glaze
Ingredients:
For the Scones:
– 1 cup (2 sticks) browned butter, chilled in the fridge
– 2/3 cup granulated sugar
– 2 large eggs
– 1/2 cup pure maple syrup
– 2 teaspoons pure vanilla extract
– 4 cups all-purpose flour
– 1 tablespoon baking powder
– 1/2 teaspoon salt
For the Browned Butter Maple Glaze:
– 1/4 cup browned butter, cooled to room temperature
– 1/4 cup pure maple syrup
– 1 cup powdered sugar
Instructions:
Brown 1 ¼ cups of butter using the instructions above. Set aside 1 cup of browned butter in the fridge, and wait for it to cool back into a solid butter form. Keep the other ¼ cup at room temperature for the glaze.
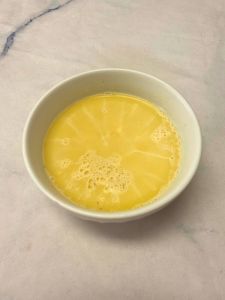
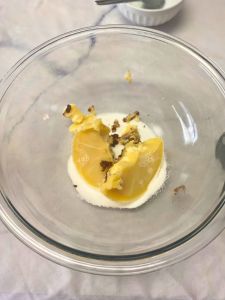
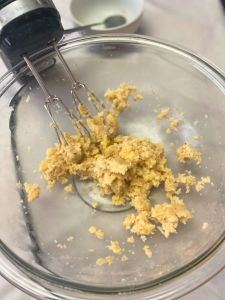
In a large mixing bowl, cream the chilled browned butter and granulated sugar together until smooth and fluffy. You can microwave your chilled browned butter for 5-10 seconds so it’s easier to get out of whatever container you put it in.
Beat in the eggs one at a time, followed by the pure maple syrup and vanilla extract.
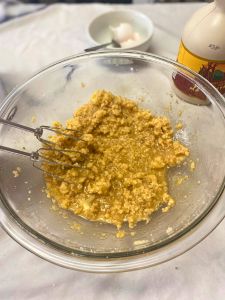
In a separate bowl, whisk together the flour, baking powder, and salt.
Gradually add the dry ingredients to the wet ingredients and mix until just combined.
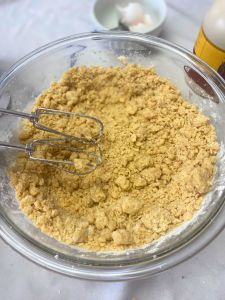
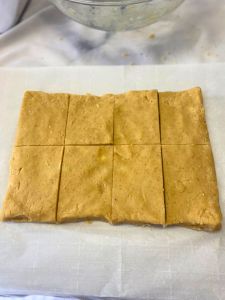
Turn the dough out onto a piece of parchment paper and gently shape it into a 1-inch-thick rectangle (You can also do a circle if you prefer). Transfer the dough to the fridge.
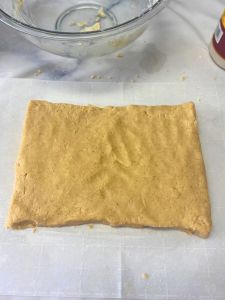
Chill the dough for at least 30 minutes. Preheat your oven to 375° while your dough is chilling.
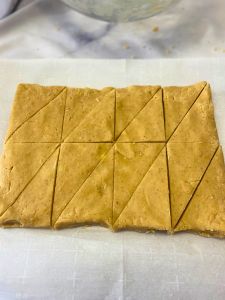
Cut the dough into 16 equal wedges (for triangular scones)
Line a baking sheet with clean parchment paper. Place your chilled, cut scones on the baking sheet, leaving 1-2 inches between them, as they will expand. I had to make mine in batches because they didn’t all fit in the oven at once with all that space.
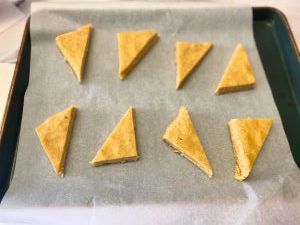
Bake the scones in the preheated oven for 12-15 minutes, or until they are lightly golden brown on the bottom. Allow to cool completely. If you see them still browning on the cookie sheet after you take them out of the oven, transfer to a wire rack to cool completely.
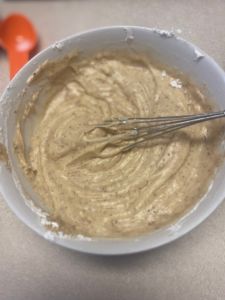
While the scones are cooling, prepare the Browned Butter Maple Glaze. Take your browned butter that was at room temperature and stir in the maple syrup and powdered sugar.
Drizzle the glaze generously over the cooled scones, or spread all over the top using the back of a spoon.
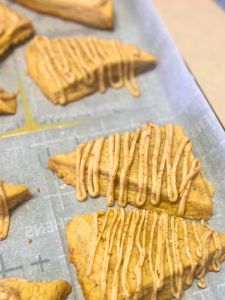
Let the glaze set for a few minutes before serving, and enjoy your Browned Butter Maple Scones with a hot cup of coffee or tea.
Browned Butter Maple Scones with Browned Butter Maple Glaze are a stunning creation, and a delectable treat that will undoubtedly become a favorite in your baking repertoire. I hope you enjoy this recipe as much as I did!
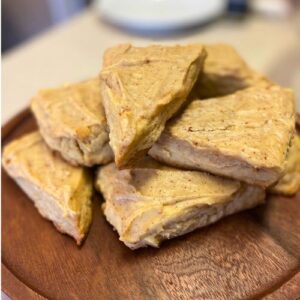
Browned Butter Maple Scones with Browned Butter Maple Glaze
Ingredients
Browned Butter Maple Scones
- 1 cup browned butter chilled in the fridge until solid
- 2/3 cup granulated sugar
- 2 eggs
- 1/2 cup maple syrup
- 2 tsp vanilla
- 4 cups all-purpose flour
- 1 Tbsp baking powder
- 1/2 tsp salt
Browned Butte Maple Glaze
- 1/4 cup browned butter cooled to room temperature
- 1/4 cup maple syrup
- 1 cup powdered sugar
Instructions
Make Scone Dough
- Brown 1 1/4 cup butter. Set aside 1 cup of browned butter and put in the fridge until solid (Probably about an hour, maybe longer). Set aside other 1/4 cup and let chill to room temperature.
- After 1 cup of browned butter has chilled until solid, remove from the fridge (You can put it in the microwave for a couple of seconds to help loosen it from its container). Cream solid browned butter and granulated sugar together.
- Add eggs one at a time, mixing after each.
- Add maple syrup and vanilla. Mix again until well-incorporated.
- In a separate bowl, mix together flour, baking powder and salt.
- Gradually add the dry ingredients to the wet until just incorporated. The mixture will be crumbly and have lumps.
- Carefully lay out your dough on a clean piece of parchment paper. Shape into a rectangle that's about 1 inch thick. Place your dough in the fridge to chill for at least 30 minutes.
- Preheat your oven to 375° while your dough chills.
- Once the dough has chilled, remove from the fridge. Cut into 16 triangular pieces.
- Line a cookie sheet with clean parchment paper. Place your cut scones on the cookie sheet leaving plenty of room for them to expand. You will probably have to bake in batches. Make sure you stick your dough back in the fridge to chill, and you let your pan cool completely between batches.
- Bake your scones for 12-15 minutes. You will know they are done with the bottoms turn a light golden brown color.
- Remove your scones from the oven and let them cool completely before adding browned butter maple glaze. If you see them continuing to brown on the hot pan, remove them from the pan and allow them to cool on a wire rack.
Make Browned Butter Maple Glaze
- Combine 1/4 cup of browned butter cooled to room temperature, maple syrup and powdered sugar in a bowl. Whisk until it forms a smooth glaze.
- Spread glaze over cooled scones. Allow the glaze an hour or so to get.

