
Last updated on March 14th, 2025 at 08:32 pm
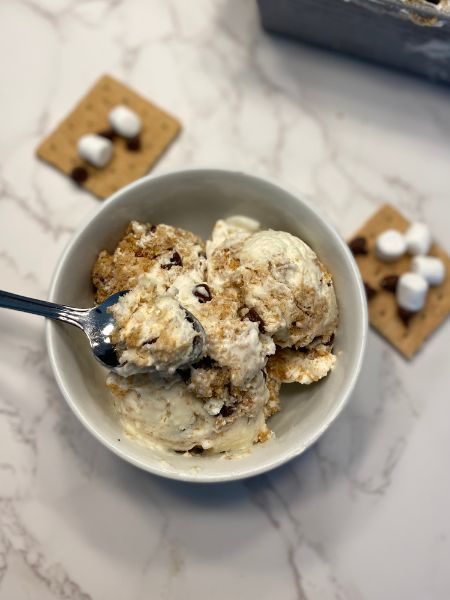
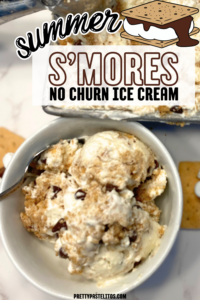 This No-Churn S’mores Ice Cream is the perfect way to get your s’mores fix while beating the summer heat. There’s something magical about s’mores. That irresistible combination of gooey marshmallows, melty chocolate, and crunchy graham crackers instantly brings back childhood memories of summer nights by the campfire. But what if I told you that you don’t need a fire—or even an ice cream maker—to enjoy those flavors in a cool and creamy way? That’s right!
If you’ve never made no-churn ice cream before, you’re in for a treat. It’s incredibly easy—just a handful of ingredients, a mixing bowl, and a freezer are all you need. Trust me, after one bite, you’ll be hooked!
Ingredients for Easy No-Churn S’mores Ice Cream
This recipe is made with simple ingredients that come together for the ultimate s’mores-inspired dessert. Here’s what you’ll need:
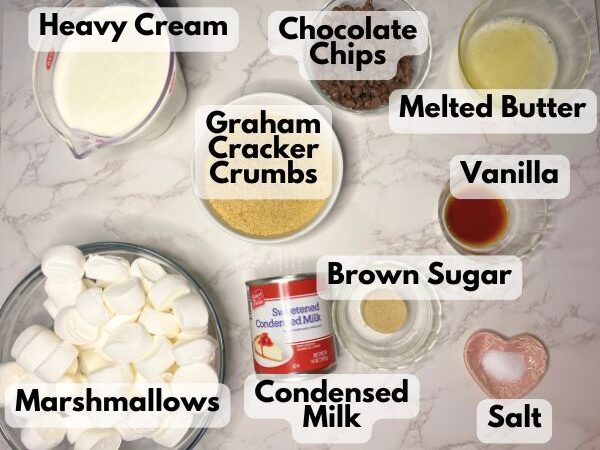
- 1 10 oz. bag large marshmallows, cut in half (Or 1 10 oz bag of mini marshmallows)
- 2 cups heavy whipping cream, cold
- 1 can (14 oz) sweetened condensed milk
- 1 teaspoon vanilla extract
- 1/2 teaspoon salt
- 1 ½ cups crushed graham crackers (about 8 graham crackers)
- 6 tablespoons unsalted butter, melted
- 2 tablespoons brown sugar
- 1/2 cup chopped chocolate or chocolate chips (Or mini chocolate chips!)
How to Make No-Churn S’mores Ice Cream
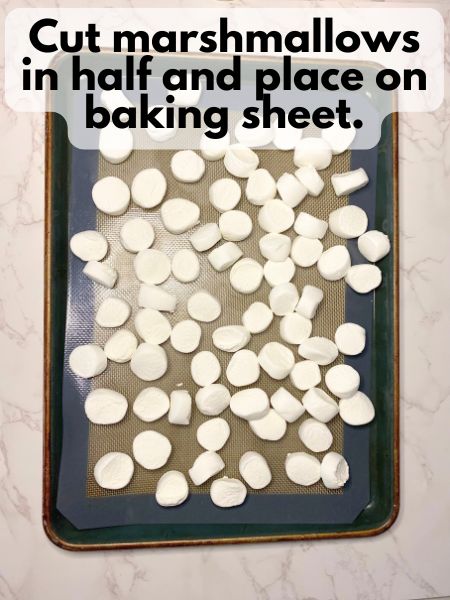
1. Toast the Marshmallows:
- Line a baking sheet with a silicone baking mat
- If using large marshmallows, cut each marshmallow in half before spreading the marshmallows out on the prepared baking sheet. If using mini marshmallows, no need to cut them in half; just spread them out on the baking sheet.
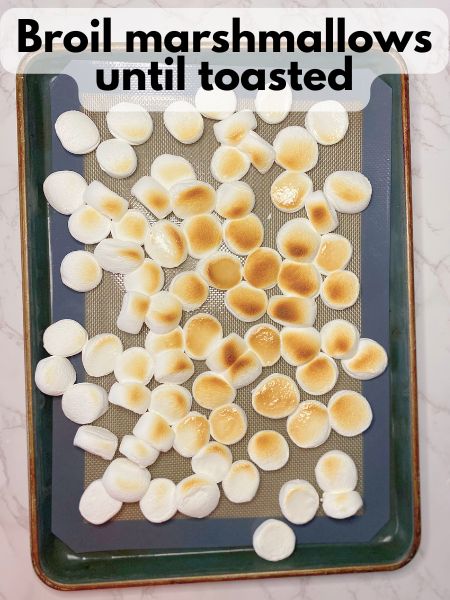
- Broil on high for 2-3 minutes until golden brown (watch closely to prevent burning).**If using mini marshmallows aim for 1-2 minutes and start checking at 1 minute
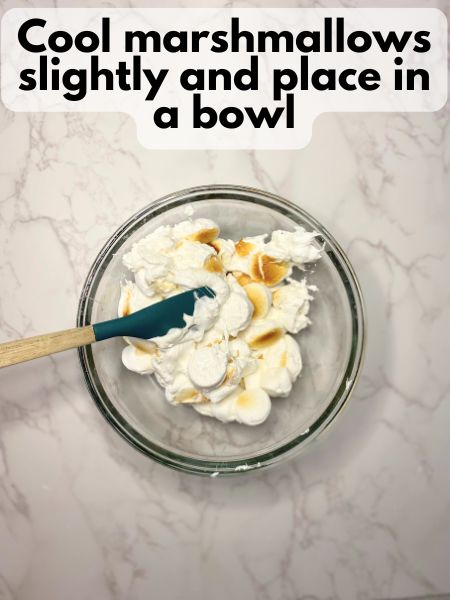
- Let cool slightly, then transfer to a mixing bowl.
2. Make the Marshmallow Ice Cream Base:
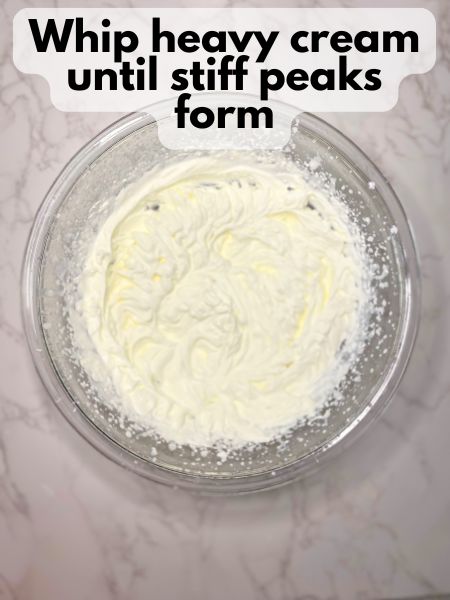
- In a large mixing bowl, whip the heavy cream until stiff peaks form.
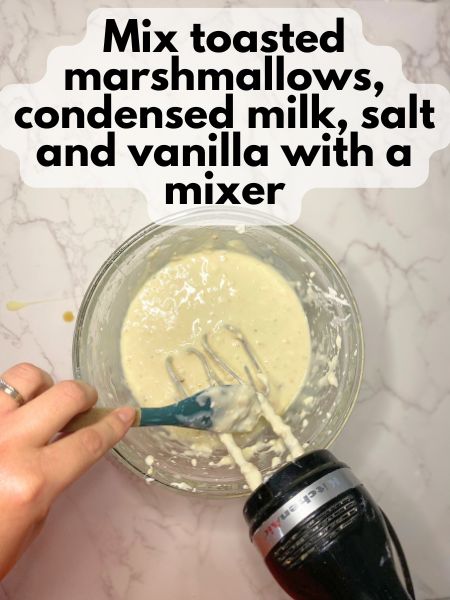
- In another bowl, mix the toasted marshmallows, sweetened condensed milk, vanilla extract, and salt. Stir until well combined.
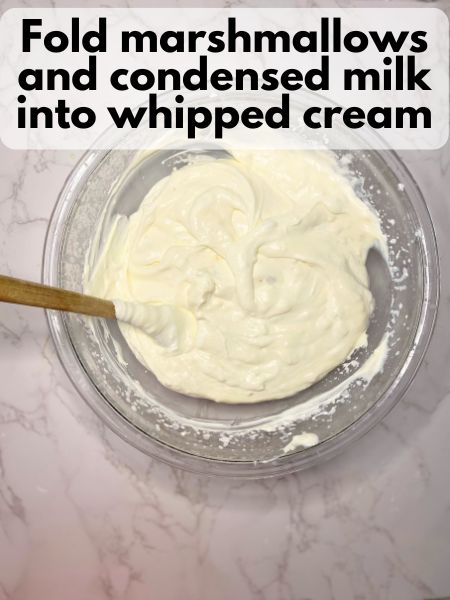
- Gently fold the marshmallow mixture into the whipped cream until smooth and combined.
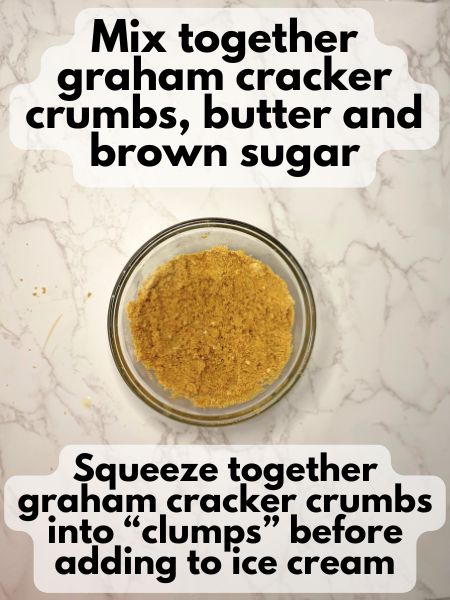
3. Prepare the Graham Crackers:
- In a small bowl, mix crushed graham crackers, melted butter, and brown sugar until it forms a wet sand-like texture.
- Try to squeeze your graham cracker crumbs together into larger clumps with your hands. I would say maybe clumps that are about an inch in diameter are good, but certainly it’s not a science.
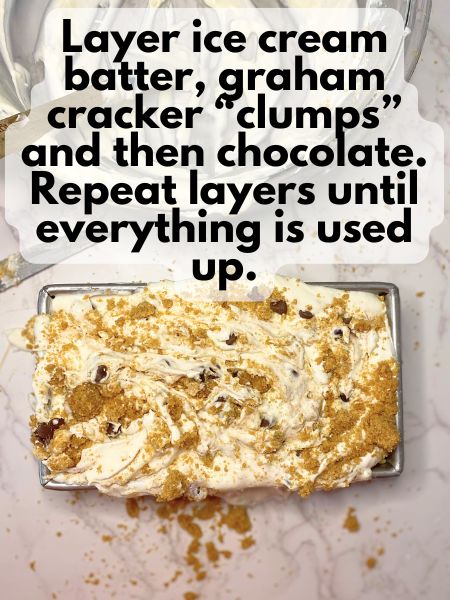
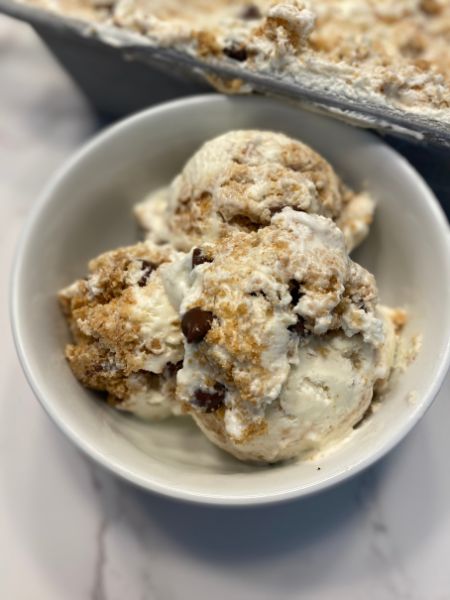
Assemble the Ice Cream:
- In a freezer-safe container, layer half of the ice cream mixture, then drizzle some of the graham cracker mixture and sprinkle some chocolate.
- Repeat the layers until all ingredients are used
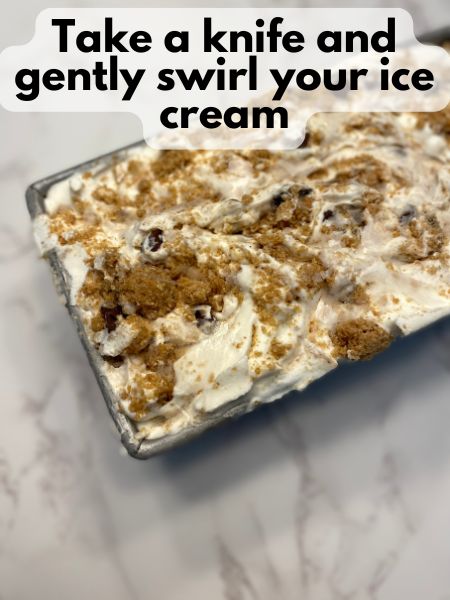
- Swirl everything gently with a knife.
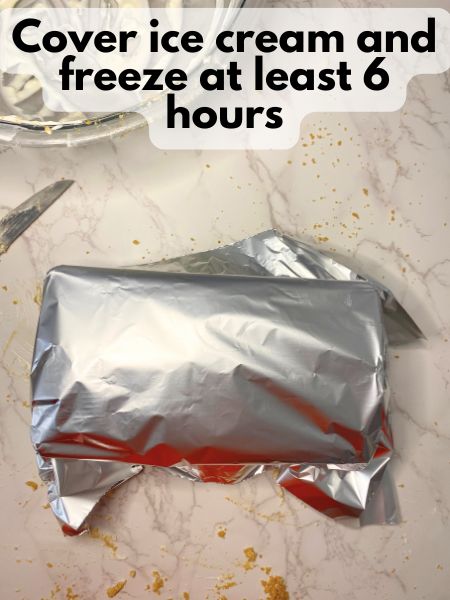
Freeze:
- Cover with plastic wrap or a lid and freeze for at least 6 hours or overnight until firm.
Pro Tips for the Best No-Churn S’mores Ice Cream
- Toast the marshmallows for that authentic flavor – This step is optional, but it really enhances the s’mores experience! Also, use a baking sheet lined with a silicone mat for toasting your marshmallows if you have one! It’s really easy to just scrape the toasted marshmallows off into a bowl with a rubber spatula, and then you can just soak your silicone mat in some warm soapy water to clean it. I’m not sure what would happen if you used parchment paper, but I have a feeling you might end up ripping the paper and getting bits of it in your ice cream.
- Squeeze together your graham crackers – The graham crackers will kind of be like wet sand. To ensure that you have some good chunks of graham cracker goodness spread throughout, try to squeeze together your graham cracker crumbs into clumps. Then, when you swirl everything around with a knife, you’ll have some solid parts of graham crackers rather than graham cracker dust everywhere.
- Cut your marshmallows in half – This really helps with the even browning of the marshmallows and ensures that the top part of your marshmallow doesn’t burn by the time the bottom starts to melt.
- Use a food processor to crush your graham crackers – If you don’t have pre-made graham cracker crumbs, you can quickly crush regular graham crackers in your food processor. It gives you nice even crumbs.
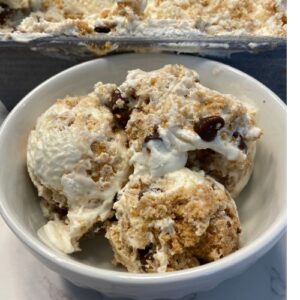
- Let it sit before scooping – No-churn ice cream can be quite firm straight from the freezer. A few minutes at room temperature will make it scoop like a dream
FAQs
Can I use marshmallow fluff instead of toasted marshmallows?
If you don’t want to toast marshmallows, you can swirl in about ¾-1 cup of marshmallow fluff instead. It’ll give you that gooey texture without needing a broiler. I will say that I really do think that toasting the marshmallows added to the depths of flavors in this dessert. However, there is no judgment from me whatsoever if you need to save some time and energy! Marshmallow is marshmallow at the end of the day.
How long does no-churn ice cream last in the freezer?
This s’mores ice cream will stay fresh for up to 2 weeks if stored in an airtight container. However, good luck making it last that long—it disappears fast in my house!
What if I don’t have a loaf pan?
No problem! You can use any freezer-safe container—a Tupperware dish or a cake pan. In fact, my ice cream batter was just a bit too big for my loaf pan, and I really wish I had used a large Tupperware container so that I could have frozen every last bite!
Can I use store-bought chocolate fudge instead of using chocolate chips?
Yes! If you want to save time, you can drizzle in your favorite store-bought fudge sauce instead of chocolate.
There you have it—the easiest, creamiest No-Churn S’mores Ice Cream that tastes just like your favorite campfire treat! Whether you’re making it for a summer party, a family movie night, or just because you love s’mores (who doesn’t?), this recipe is sure to be a hit. The best part? No ice cream maker required!
Give this recipe a try, and let me know how it turns out in the comments below. Happy scooping! 🍦🔥
No-Churn S'mores Ice Cream
Equipment
- electric mixer Or stand mixer
- 2 Large mixing bowls
- Freezer-safe container with a lid That holds at least 6 cups.
Ingredients
- 10 oz large marshmallows cut in half (Or 10 ounces of mini marshmallows)
- 2 cups heavy whipping cream cold
- 14 oz sweetened condensed milk
- 1 tsp vanilla
- 1/2 tsp salt
- 1 1/2 cups graham cracker crumbs about 8 graham crackeres
- 6 Tbsp unsalted butter melted
- 2 Tbsp brown sugar
- 1/2 cup chopped chocolate or chocolate chips or mini chocolate chips work too
Instructions
Toast Marshmallows
- Line a baking sheet with a silicone baking mat (I would recommend that over parchment paper just because the marshmallows get really sticky and it will harder to scrape them off paper)
- If using large marshmallows, cut each marshmallow in half before spreading the marshmallows out on the prepared baking sheet. If using mini marshmallows, no need to cut them in half; just spread them out on the baking sheet.
- Broil on high for 2-3 minutes until golden brown (watch closely to prevent burning). If using mini marshmallows aim for 1-2 minutes, start checking at 1 minute.
- Let cool slightly, then transfer to a mixing bowl.
Make the Marshmallow Ice Cream Base
- In a large mixing bowl, whip the heavy cream until stiff peaks form.
- In another bowl, mix the toasted marshmallows, sweetened condensed milk, vanilla extract, and salt. Stir until well combined.
- Gently fold the marshmallow mixture into the whipped cream until smooth and combined.
Prepare the Graham Cracker Swirl
- In a small bowl, mix crushed graham crackers, melted butter, and brown sugar until it forms a wet sand-like texture.
- Try to squeeze your graham cracker crumbs together into larger clumps with your hands. It just makes sure you have more of graham cracker swirl instead of graham cracker dust scattered throughout your ice cream.
Assemble the Ice Cream
- In a freezer-safe container, layer half of the ice cream mixture, then drizzle some of the graham cracker mixture and sprinkle some chocolate.
- Repeat the layers until all ingredients are used
- Swirl everything gently with a knife
- Cover with plastic wrap or a lid and freeze for at least 6 hours or overnight until firm.