Last updated on March 22nd, 2025 at 11:31 am
 Spring is here, and Easter is just around the corner! What better way to celebrate than with beautifully decorated Easter sugar cookies? These Easter cut out cookies are not only delicious but also so much fun to make and decorate. Shaped like eggs and decorated with my easy cookie decorating hacks. Whether you’re hosting an Easter brunch, baking for friends and family, or just want to flex your decorating skills, these Easter egg sugar cookies will steal the show.
I’ll guide you through the recipe, decorating process, and share all my pro tips so your cookies will look like they came straight from a bakery!
Ingredients for Easter Cut Out Cookies
To make these adorable Easter egg cookies, you’ll need just a few basic ingredients for the sugar cookies and royal icing. Here’s what you’ll need:
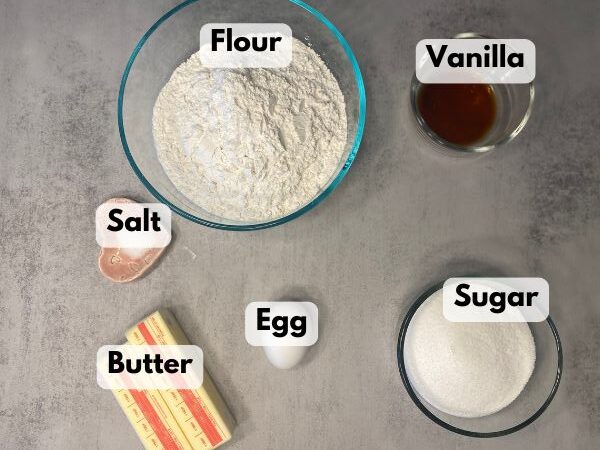
- 1 cup (2 sticks) unsalted butter, softened
- 1 cup granulated sugar
- 1 large egg
- 1 teaspoon vanilla extract
- 3 cups all-purpose flour
- 1/2 teaspoon salt
For the Royal Icing:
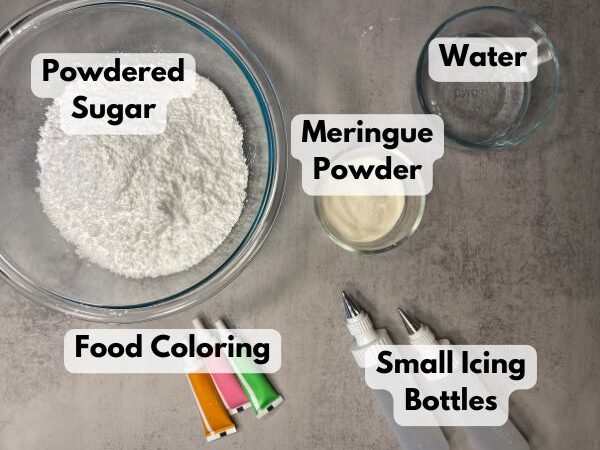
- 4 cups powdered sugar
- 3 tablespoons meringue powder
- 7-9 tablespoons water
- Gel food coloring in Easter shades (think pink, yellow, lavender, blue, and green!)
- Piping bags or small icing bottles fitted with small, round plain tips.
These ingredients create a soft yet sturdy cookie that holds its shape when baked—perfect for decorating. For the royal icing, I always use this recipe here, but they also make pre-made royal icing mix you can buy.
How to Make and Decorate Easter Egg Cookies with Royal Icing
Here’s a step-by-step guide to creating these stunningly easy Easter cut out cookies.
Step 1: Make the Sugar Cookie Dough
In a medium bowl, whisk together the flour, baking powder, and salt. Set aside.
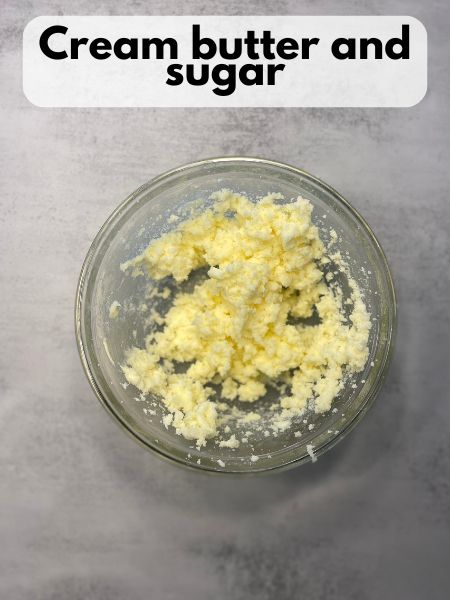
In a large bowl, use an electric mixer to beat the butter and sugar until light and fluffy (about 2-3 minutes).
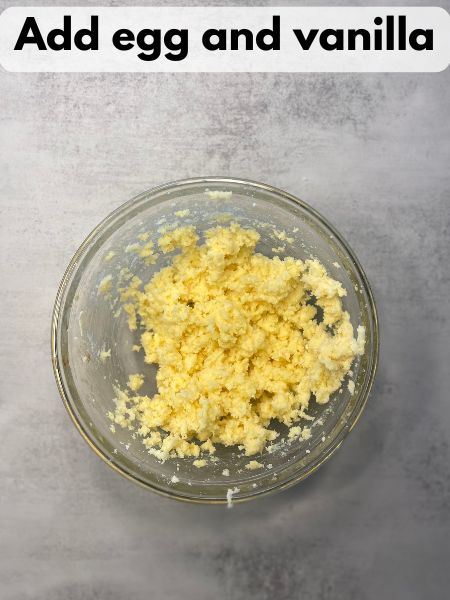
Add the egg and vanilla extract. Beat until fully combined.
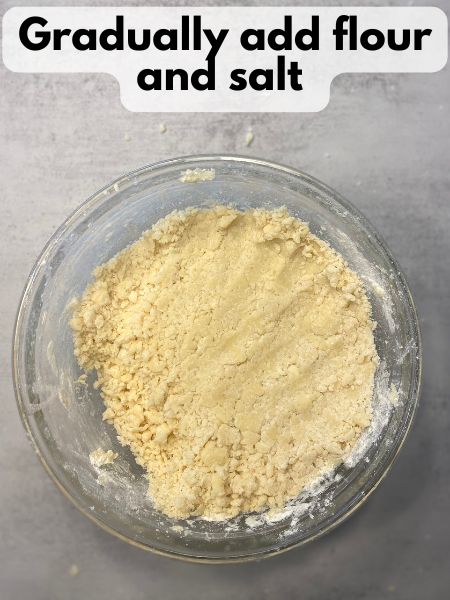
Gradually add the dry ingredients to the wet ingredients, mixing until a dough forms.
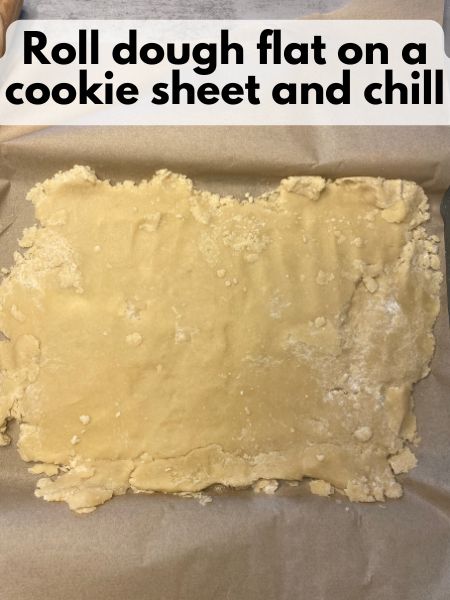
Line a cookie sheet with parchment paper, roll out your dough on top of the parchment paper and let it chill in the freezer for about 30 minutes (You can also use the fridge and chill for about an hour)
Step 2: Roll and Cut the Cookies
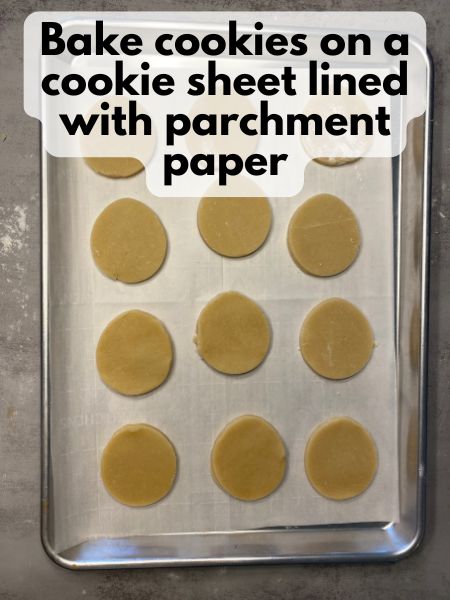
Preheat your oven to 350°F (175°C) and line baking sheets with parchment paper.
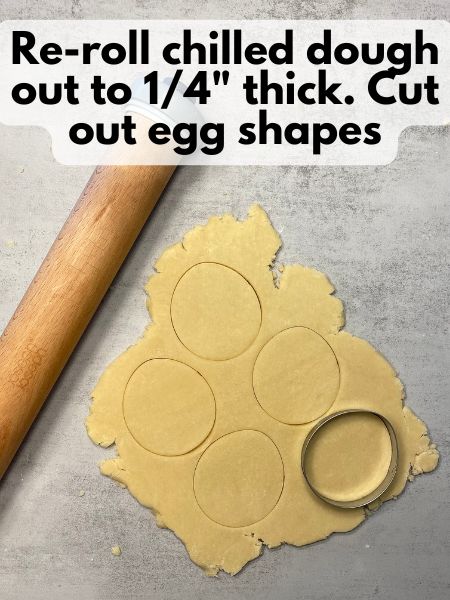
Roll out the chilled dough on a lightly floured surface to about 1/4-inch thickness. If you chilled your dough in the freezer, you might have to work your dough a big for it to roll out flat, but it’s still better to chill your dough before you start.
Use an egg-shaped cookie cutter to cut out as many cookies as possible, re-rolling the scraps as needed.
Place the cookies on the prepared baking sheets and bake for 8-10 minutes, or until the edges are just lightly golden.
Let the cookies cool on the baking sheets for 5 minutes before transferring them to a wire rack to cool completely.
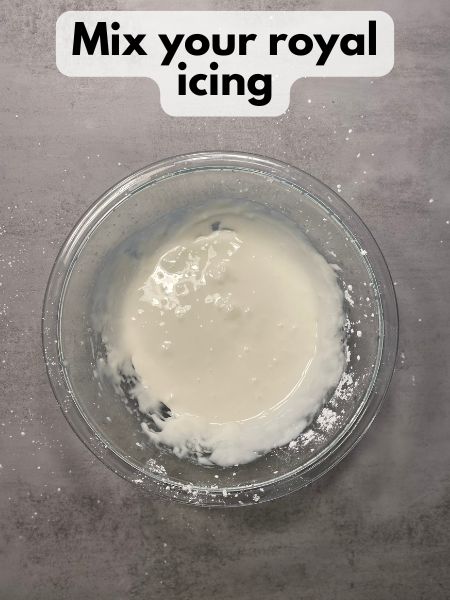
Step 3: Make the Royal Icing
In a mixing bowl, combine the powdered sugar and meringue powder.
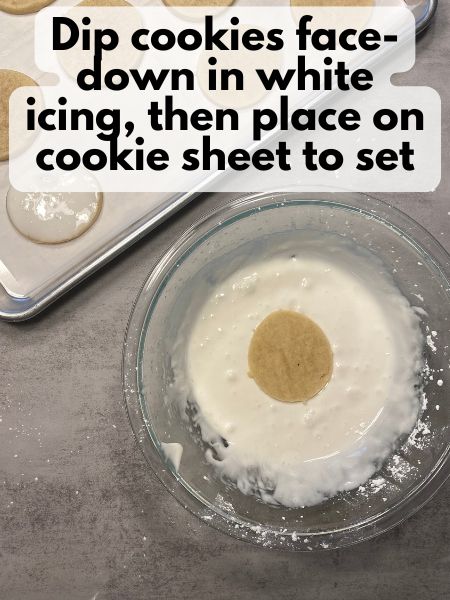
Add 5 tablespoons of water and beat with an electric mixer on low speed until the icing is smooth. Add more water, a teaspoon at a time, until the icing reaches your desired consistency. For this, I would say you want your frosting a bit on the runny side because we’re going to dip the cookies face-down in the frosting and you want the excess frosting to drip off easily
Step 4: Decorate the Cookies
Now comes the creative part—decorating your Easter egg cookies with royal icing!
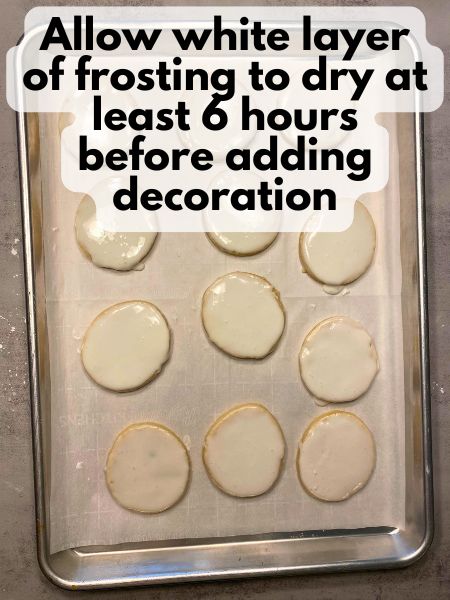
Background Color: Dip all of your cooled cookies face-down in your bowl of white royal icing. Place them icing-side up on a cookie sheet lined with parchment paper to dry.
Pop Any Frosting Bubbles: If you see small bubbles forming in your white icing on your cookies, carefully pop them with a toothpick. Then, gently swirl the icing around to fill in the space left by the popped bubbles.
Let Background Color Set: Wait at least 6 hours for your royal frosting to set before continuing to decorate.
Store the rest of your icing: While your white royal icing is setting on your cookies, put the rest of the icing in an air-tight container with a lid so it doesn’t harden while you wait.
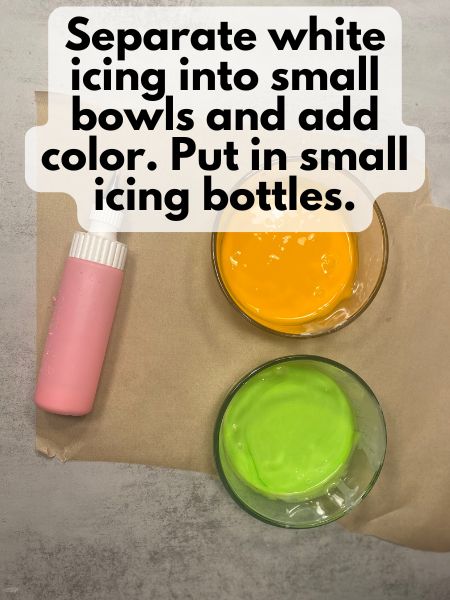
Prepare Colored Frosting: After the white frosting on your cookies has set, give your leftover frosting a stir and it should be good as new. You might have to add a teaspoon or so of water to “refresh” your royal icing. Then, divide up your leftover frosting into smaller bowls, one for each color you want to use to decorate. You should have enough to do 3 or 4 colors, as you don’t need a ton for any one color. Add a couple drops of food coloring to your individual bowls and stir well until the color is distributed.
Put Colored Frosting in Piping Bags: Put each color of frosting in a piping bag or a small icing bottle fitted with a small (I mean small!) round tip. I like to work with only one or two colors at a time, and then wash and switch out my icing bottles for multiple colors because I only have 2 small icing bottles and 2 small icing tips.
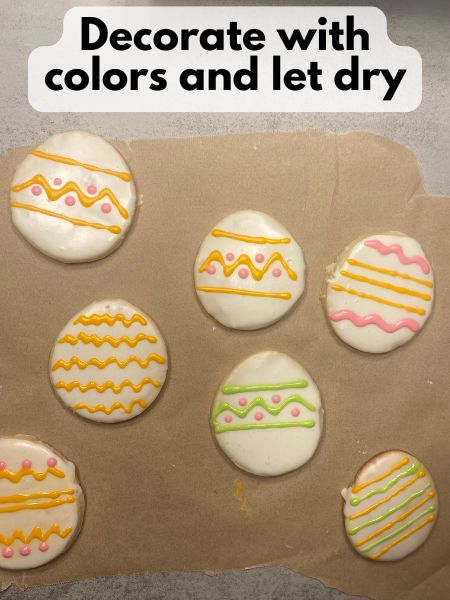
Decorate Your Easter Egg Cut Out Cookies: Using the piping bags or small icing bottles of colored icing, draw pretty designs on your cookies. Then, let the cookies set again another couple hours for the decoration to dry.
Pro Tips for Easter Egg Sugar Cookies
- Use an Icing Bottle for Decorating: I really, really love my icing bottles for this kind of thing! I got mine at Michael’s for around $10 and I use them all the time. A piping bag works, but you won’t have a ton of colored frosting, so a small icing bottle is just an easier size to handle.
- Use Gel Food Coloring: Gel colors are more vibrant and won’t water down your royal icing.
- Practice First: If you’re new to cookie decorating, practice your designs on a piece of parchment paper before decorating the cookies.
- Definitely use small icing tips for your decoration: I’m talking about the tip that looks so small, you think it will be too small. That one will probably be perfect for decorating like this!
- Let Your Background Color Set Well: If your background color of icing is still wet, when you go to decorate, your colored icing will run into the white and it won’t look as pretty. It’s a bummer to have to wait, but it’s worth it if you want super cute cookies in the end. You can always make the cookies and put on the white frosting a day ahead of time, store them in an airtight container overnight, and then decorate them the next day.
- Chill the Dough: Chilled dough is easier to roll and cut, and it prevents the cookies from spreading while baking. Don’t skip this step!

FAQs About Easter Egg Cookies with Royal Icing
- Can I make the cookies ahead of time? Absolutely! You can bake the cookies a day or two in advance and store them in an airtight container until you’re ready to decorate. I would recommend that if you do that, you put on your layer of white icing either in the morning of the day you want to decorate or late the night before. Your leftover royal icing should keep fresh in an airtight so you can use it again for decorating, but it might not stay fresh for days on end.
- How long does royal icing take to dry? Royal icing can take 6-8 hours to fully set, depending on the humidity in your home. I recommend either adding that layer of white frosting the morning of the day you want to decorate or late the night before. Then, you can save the leftover royal icing to color and decorate, but you’ll be able to give your first layer time to dry.
- What if I don’t have meringue powder? You can also buy pre-made royal icing mix. Honestly, if you’re going to do that, it might be cheaper to just buy the meringue powder. In my experience, royal icing mix is pricey, but making royal icing is relatively cheap. Plus, meringue powder lasts for years.
- Can I freeze the cookies? Yes! Freeze undecorated cookies in an airtight container for up to 3 months. Thaw them at room temperature and decorate as desired.
- How long will my royal icing last in a bowl if I don’t use it all? That depends on a lot of different factors, like how much you have left, the humidity in your home and what kind of container you store it in. If you store it in an airtight glass container with a fitted lid, it should last around a day or two.
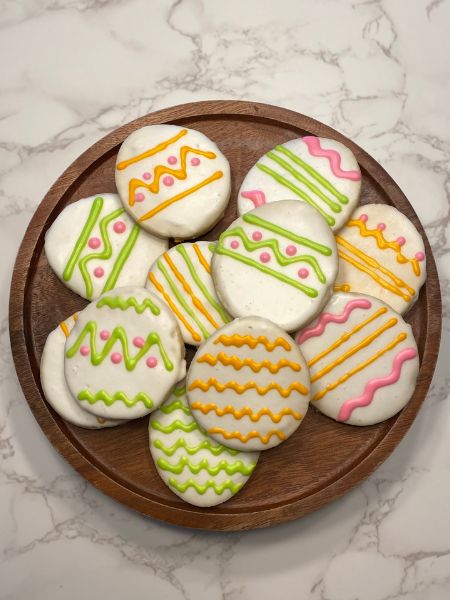
Decorating Easter egg cookies with royal icing is such a fun and creative way to celebrate spring and the Easter season. These Easter sugar cookies decorated with pastel colors and pretty designs are sure to impress at any gathering. Plus, the process is as enjoyable as the final result! Whether you’re a seasoned baker or a beginner, this recipe is easy to follow and perfect for creating beautiful Easter egg sugar cookies. Happy baking!

Easter Egg Cut Out Cookies
Equipment
- 3-4 small icing bottles fitted with small round tips or piping bags will also work
Ingredients
Cut Out Cookies
- 1 cup unsalted butter softened
- 1 cup granulated sugar
- 1 egg
- 1 tsp vanilla
- 3 cups flour
- 1/2 tsp salt
Royal Icing *See note below
- 4 cups powdered sugar
- 3 Tbsp meringue powder
- 7-9 Tbsp water
- Gel food color in Easter colors
Instructions
Make the Sugar Cookie Dough
- In a medium bowl, whisk together the flour, baking powder, and salt. Set aside.
- In a large bowl, use an electric mixer to beat the butter and sugar until light and fluffy (about 2-3 minutes).
- Add the egg and vanilla extract. Beat until fully combined.
- Gradually add the dry ingredients to the wet ingredients, mixing until a dough forms.
- Chill your dough for about 30 minutes in the freezer or 1 hour in the fridge. I like to roll my dough out flat on a cookie sheet lined with parchment paper to help it chill faster. You can also make two discs with your dough and wrap them in plastic wrap to chill.
Roll and Cut the Cookies
- Preheat your oven to 350°F (175°C) and line baking sheets with parchment paper.
- Roll out the chilled dough on a lightly floured surface to about 1/4-inch thickness.
- Use an egg-shaped cookie cutter to cut out as many cookies as possible, re-rolling the scraps as needed.
- Place the cookies on the prepared baking sheets and bake for 8-10 minutes, or until the edges are just lightly golden.
- Let the cookies cool on the baking sheets for 5 minutes before transferring them to a wire rack to cool completely.
Make the Royal Icing
- In a mixing bowl, combine the powdered sugar and meringue powder.
- Add 5 tablespoons of water and beat with an electric mixer on low speed until the icing is smooth. Add more water, a teaspoon at a time, until the icing reaches your desired consistency. For this, I would say you want your frosting a bit on the runny side but still thick enough that it sticks to the cookies.
Decorate the Cookies
- Background Color: Dip all of your cooled cookies face-down in your bowl of white royal icing. Place them icing-side up on a cookie sheet lined with parchment paper to dry.
- Pop Any Frosting Bubbles: If you see small bubbles forming in your white icing on your cookies, carefully pop them with a toothpick. Then, gently swirl the icing around to fill in the space left by the popped bubbles.
- Let Background Color Set: Wait at least 6 hours for your royal frosting to set before continuing to decorate.
- Store the rest of your icing: While your white royal icing is setting on your cookies, put the rest of the icing in an air-tight container with a lid so it doesn’t harden while you wait.
- Prepare Colored Frosting: After the white frosting on your cookies has set, give your leftover frosting a stir and it should be good as new. You might have to add a couple drops or so of water to “refresh” your royal icing. Then, divide up your leftover frosting into smaller bowls, one for each color you want to use to decorate. You should have enough to do 3 or 4 colors, as you don’t need a ton for any one color. Add a couple drops of food coloring to your individual bowls and stir well until the color is distributed.
- Put Colored Frosting in Small Icing Bottles: Put each color of frosting in a piping bag or a small icing bottle fitted with a small (I mean small!) round tip. I like to work with only one or two colors at a time, and then wash and switch out my icing bottles for multiple colors because I only have 2 small icing bottles and 2 small icing tips.
- Decorate Your Easter Egg Cut Out Cookies: Using the piping bags or small icing bottles of colored icing, draw pretty designs on your cookies. Then, let the cookies set again another couple hours for the decoration to dry.

