 These strawberry cheesecake cake pos are cute, easy to eat, and make any occasion feel a little more special. Today, I’m sharing an easy recipe for strawberry cake pops that will have you’ll want to make again and again. Made with a strawberry cake mix and homemade cream cheese frosting, these little bites are sweet, tangy, and completely irresistible. Just one batch makes about 4 dozen strawberry cake pops, so you’ll have plenty left to share, too.
Jump to Recipe
Ingredients
Here’s what you’ll need to whip up these strawberry cheesecake cake pops:
For the Cake:
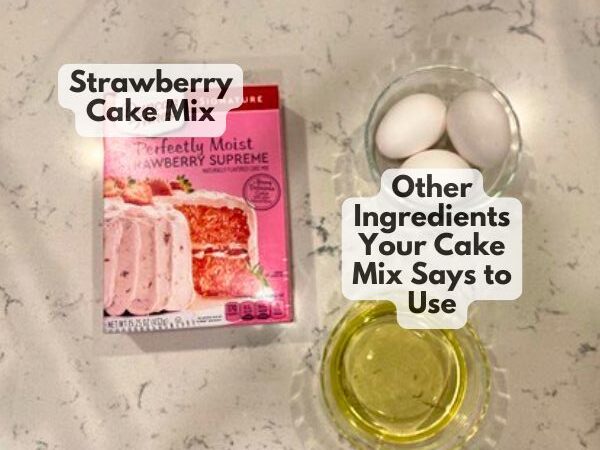
- 1 box of strawberry cake mix (plus the ingredients listed on the box: eggs, oil, and water)
For the Cream Cheese Frosting:
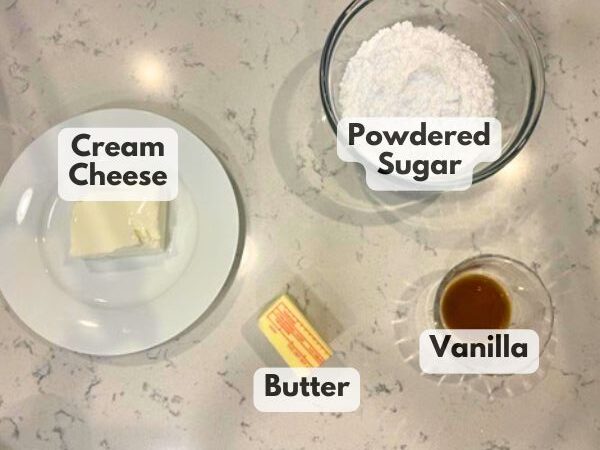
- 4 oz cream cheese, softened
- 1/4 cup unsalted butter, softened
- 2 cups powdered sugar
- 1 teaspoon vanilla extract
For the Coating and Decorating:
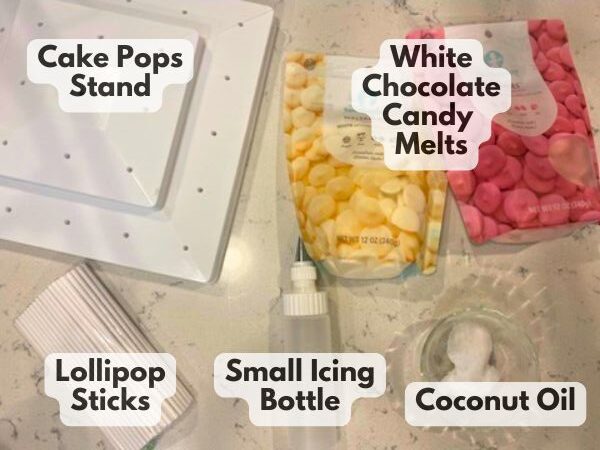
- 24 ounces white chocolate or pink candy melts (you might need a little bit more or less)
- 1-2 tablespoons coconut (or vegetable) oil
- Small icing bottle (optional, for decorating)
- Sprinkles (optional, for decorating. Not shown in the picture because I didn’t use them for this recipe)
Tools:
- Lollipop sticks
- Styrofoam block or cake pop stand
How to Make Strawberry Cheesecake Cake Pops
Step 1: Bake the Cake
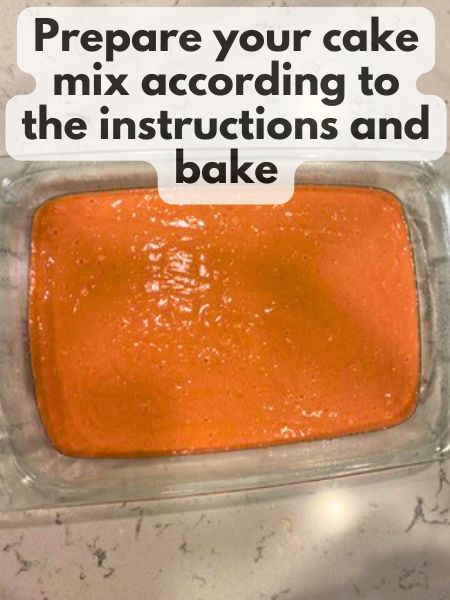
Start by baking the strawberry cake according to the instructions on the box. Once baked, let the cake cool completely. This step is crucial because a warm cake will turn your frosting into a melty mess.
Step 2: Make the Cream Cheese Frosting
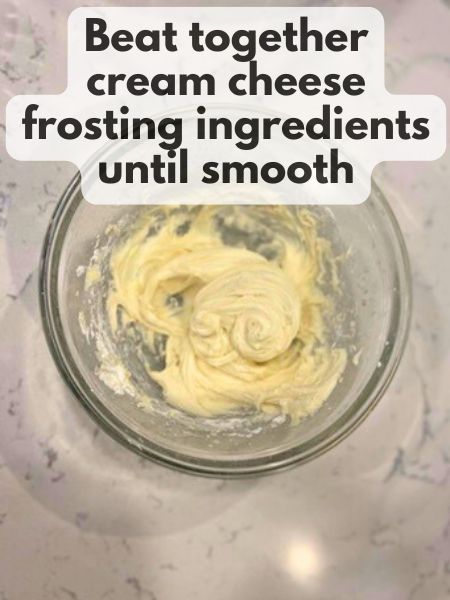
While the cake cools, it’s time to whip up the frosting. In a large bowl, beat the softened cream cheese and butter together until smooth and creamy. Add the vanilla extract, then gradually mix in the powdered sugar until the frosting is thick and spreadable. This frosting is what gives our cake pops that dreamy “strawberry cheesecake” vibe.
Step 3: Crumble and Combine
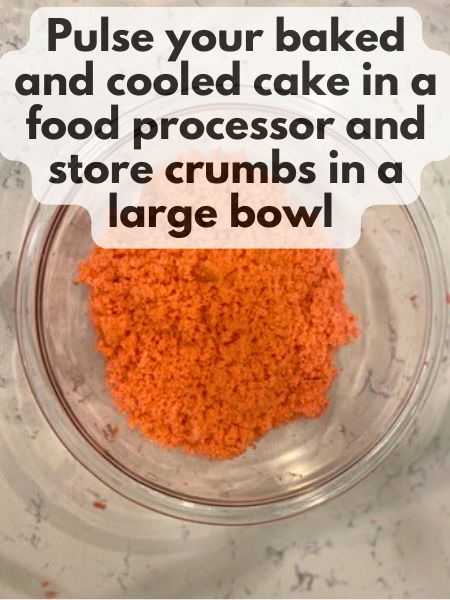
Once the cake has cooled, crumble it into a large mixing bowl.To make this faster, I put my cake in a food processor to get fine crumbs quickly.
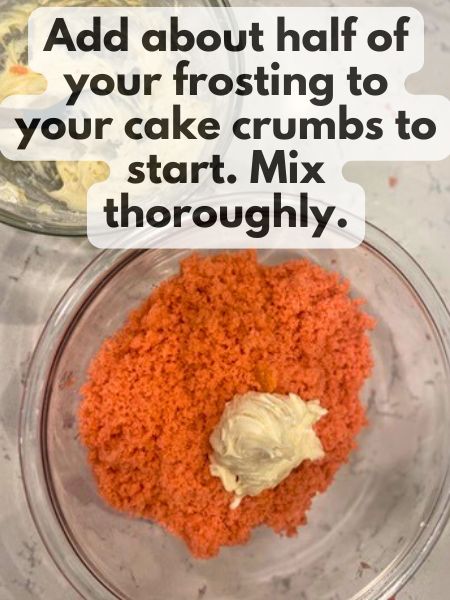
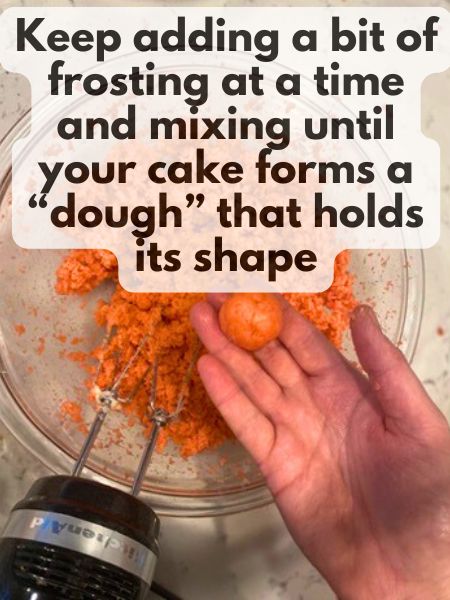
Add about half of the cream cheese frosting and mix until the texture is similar to cookie dough. If the mixture is still crumbly, add more frosting a little at a time. You might nd up using all of the frosting (I normally do!), but it’s easier to add more frosting if you don’t have enough, rather than starting with too much frosting and having to add more cake to balance it.
Step 4: Roll into Balls
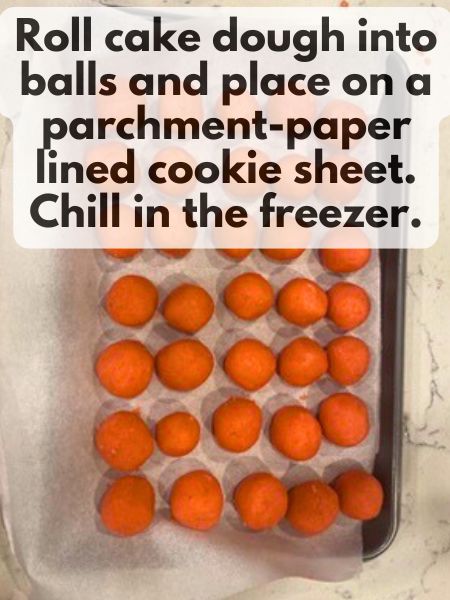
Using your hands or a cookie scoop, roll the cake mixture into 1-inch balls. Place them on a baking sheet lined with parchment paper. Pop the tray into the freezer for about 15-20 minutes—this helps the cake pops firm up and makes dipping much easier.
Step 5: Melt the Coating
While the cake balls chill, melt your white chocolate or candy melts according to the package instructions. If the coating seems too thick, you can thin it out with a small amount of vegetable oil or coconut oil. For health reasons, I prefer coconut oil, but from a flavor perspective, vegetable oil may be best. The coconut oil leaves a bit of a coconut-y flavor behind and it is pretty noticeable with these strawberry cake pops.
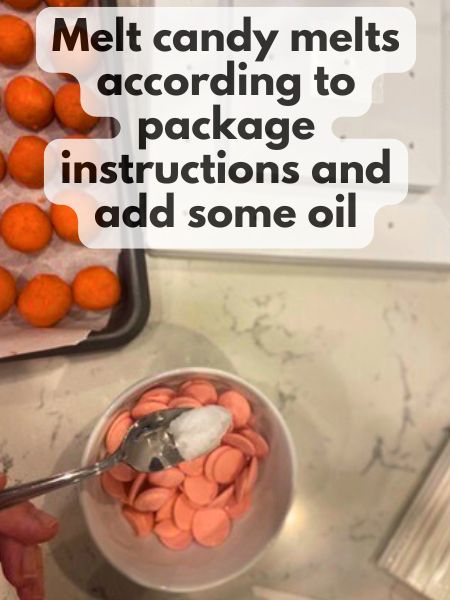
Step 6: Dip and Decorate
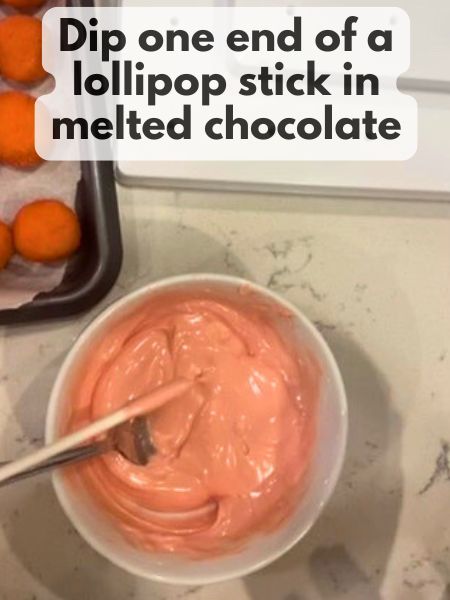
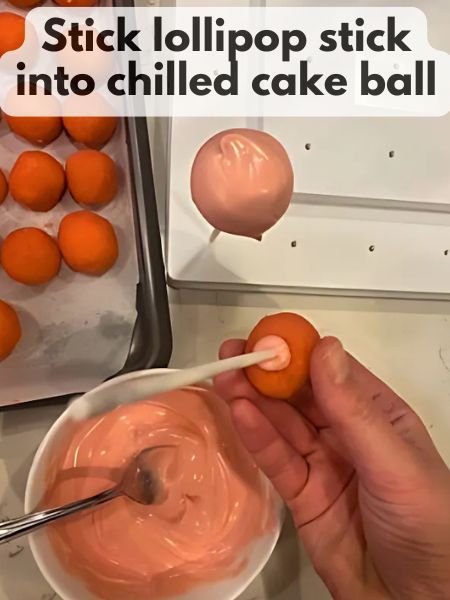
Remove the cake balls from the freezer. Dip the end of a lollipop stick into the melted chocolate, then insert it about halfway into a cake ball. This acts like glue, securing the stick to the cake pop.
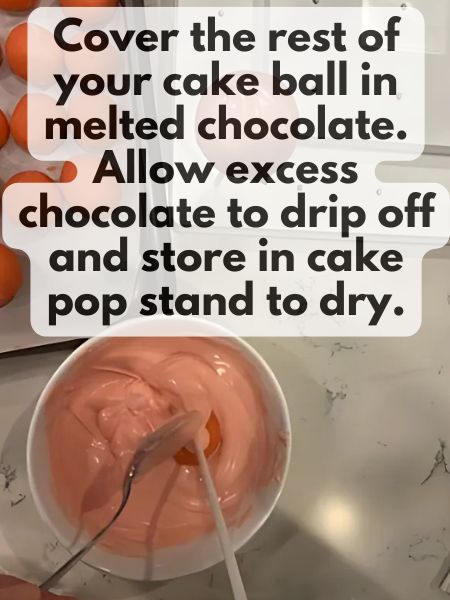
Next, dip each cake pop into the melted chocolate, ensuring it’s fully coated. Gently swirl your cake pop upside down until all the excess chocolate drips off, then add sprinkles if you’d like. Place the finished cake pops in a styrofoam block or cake pop stand to set.
Pro Tips for Strawberry Cheesecake Cake Pops
- Use Homemade Frosting – In a pinch, you could definitely use the cream cheese frosting you can buy pre-made at the grocery store. However, for best results and flavor, I would highly recommend using homemade frosting. It’s really what takes your cake pops from just ordinary care pops to gourmet strawberry cake pops.
- Chill, Chill, Chill- Chilling the cake balls before dipping is a game-changer. It keeps the balls from falling apart and makes the coating process much smoother.
- 3. Thin Out Your Coating – If your melted chocolate is too thick, stir in some vegetable or coconut oil. If your chocolate is on the thinner side, it makes it easier for the excess chocolate to drip off your cake pops before you let them dry.
- Choose Your Oil – Going along with thinning out that chocolate coating, you have a couple options. I like to use coconut oil, but the coconut oil does leave a faint coconut flavor on your cake pops
- Don’t Overdo the Frosting- You want the cake mixture to hold together, but too much frosting can make it overly soft. Start with half the frosting and add more only as needed. You’ll probably end up with most of the frosting being used, if not all, but it’s easier to add more frosting than to have to more cake to get a good cake to frosting ratio.
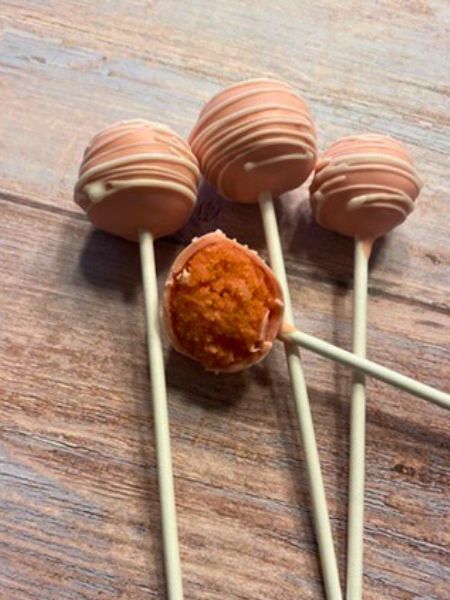
- Add a Pop of Color- If you’re feeling extra festive, you can use pink or red candy melts for a colorful twist. They’re perfect for Valentine’s Day, baby showers, or birthdays! I like to coat my cake pops in one color and then add a bit of a drizzle with another color using a small icing bottle with a plain, round tip.
FAQs
Q: Can I use homemade strawberry cake instead of a mix?
A: Absolutely! If you have a go-to strawberry cake recipe, feel free to use it. Just make sure it’s fully cooled before crumbling.
Q: How long do these cake pops last?
A: Strawberry cheesecake cake pops can be stored in an airtight container in the refrigerator for up to 5 days. They’re great for making ahead!
Q: Can I freeze these cake pops?
A: Yes! Freeze the undipped cake balls for up to 2 months. When you’re ready to enjoy, let them thaw slightly before dipping and decorating.
Q: What can I use instead of lollipop sticks?
A: If you don’t have lollipop sticks, I’ve heard that paper straws or even wooden skewers cut into smaller pieces work well. I haven’t tried them, but I have definitely seen other people use them. Also, if you’re worried about the use of disposable paper products, they do make reusable plastic cake pops sticks that you can wash and use again!
Q: Why are my cake pops cracking?
A: Cracks usually happen when the cake balls are too cold, and the melted chocolate is too warm. Let the chilled balls sit at room temperature for a few minutes before dipping to avoid this.
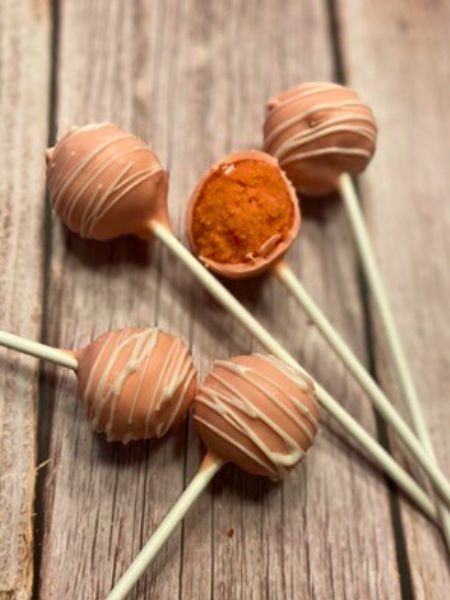
These strawberry cheesecake cake pops are the perfect combination of sweet and tangy, with a creamy coating that’ll keep you coming back for more. Whether you’re making them for a party, gifting them to a friend, or just treating yourself, they’re sure to be a hit. Have fun, get creative with your decorations, and enjoy every delicious bite!
Strawberry Cheesecake Cake Pops
Equipment
- electric mixer
- 48 Lollipop sticks
- Cake pops stand or styrofoam blocks (for drying cake pops)
- 1 Small icing bottle with plain, round tip optional, for decorating cake pops
Ingredients
Strawberry Cake
- 1 Strawberry cake mix I used the Duncan Hines brand, but any brand will do
- Other ingredients your cake mix calls for Usually oil and eggs, but check your mix to be sure!
Cream Cheese Frosting
- 4 oz cream cheese softened
- 1/4 cup unsalted butter softened
- 2 cups powdered sugar
- 1 tsp vanilla
Coating and Decoration
- 24 oz white melting chocolate I used the pink color and then gave it a white chocolate drizzle, but feel free to be creative
- 1-2 Tbsp coconut oil or vegetable oil (coconut oil can leave a bit of a coconut-y taste)
Instructions
Make Cake Pops
- Prepare your strawberry cake mix according to the package instructions. Bake your cake mix according to the package instructions. You can use any size pan you want. I usually go with a 9x13 pan because it's the fastest.
- Allow your cake to cool completely before adding frosting
- Mix your frosting by beating softened cream cheese and butter together until smooth. Slowly add powdered sugar and vanilla to cream cheese and butter. Keep beating until everything is smooth.
- After your cake has cooled, crumble your cake into fine crumbs and store the crumbs in a large bowl. I like to pulse my cake in a food processor to make this faster.
- Take about half of the frosting you made and add it to the bowl with your cake crumbs. Use an electric mixer to mix the frosting into the cake crumbs. Keep adding frosting a little bit at a time until your cake and frosting resemble a dough that you can mold into a ball that holds its shape.
- Line a cookie sheet with parchment paper
- Roll your cake dough into 1-inch balls and place them on the prepared cookie sheet. This recipe makes so many, you may need more than one cookie sheet.
- Place your cake balls in the freezer for 20-30 minutes to set and chill.
Decorate Cake Pops
- In a small bowl, melt your some chocolate candy melts according to the package instructions. I like to work with about 10-12 ounces at a time. If you melt too much at once, you risk it hardening up again before you can use it.
- Add a little bit of coconut oil (or vegetable oil) to your melted chocolate and stir until everything is smooth. You want a texture that's a little bit on the thin side so that the excess chocolate will drip off your cake pops easily, but you don't want it so watery that it all falls off your cake pops.
- Dip the end of a lollipop stick in the melted chocolate. Then, stick that end of the stick into the middle of a chilled cake ball. The melted chocolate will act like a glue that holds your cake ball to the stick.
- Carefully stick your cake ball into the bowl of melted chocolate, holding it by the stick. Gently use a spoon to cover the entire cake ball in melted chocolate. Lift the cake ball out of the bowl by the stick and gently move it around a bit so that the excess chocolate drips back down into the bowl.
- Stick your cake pop upright in the cake pop stand or styrofoam blocks to dry. If you want to decorate with sprinkles, do this before your chocolate coating dries.
- Repeat this for all of the cake pops. You may have to stick some cake balls back in the freezer for a bit to re-chill to make it easier to decorate them. You don't want them getting mushy while you decorate.
- Optional: I like to melt some melting candies of a different color and add a decent amount of oil. Then, I put the different color in a small icing bottle with a plain round tip and drizzle it on my cake pops for decoration.
- Store your cake pops in the fridge for up to 5 days.

