
Last updated on April 18th, 2025 at 10:14 pm
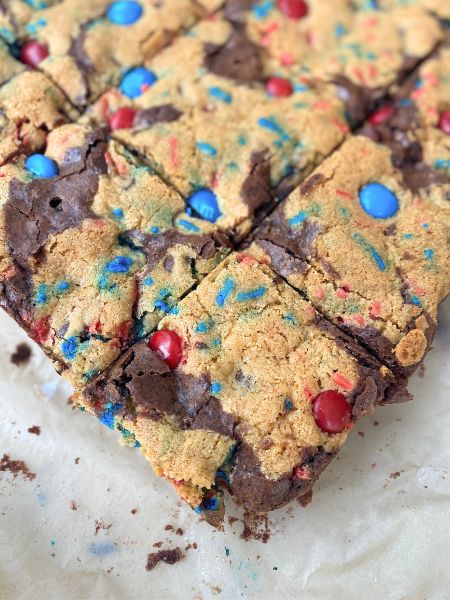
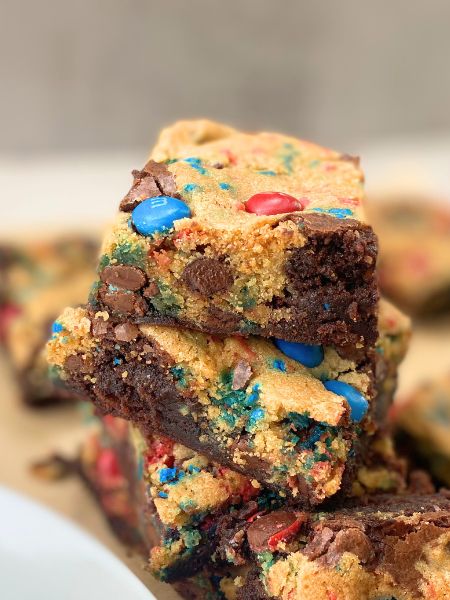
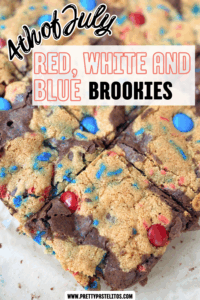 For the Fourth of July, I’m always looking for that perfect combination of fun, festive, and easy. That’s why these 4th of July brookies—a chewy, fudgy, red, white and blue twist on the classic brownie-cookie bar–are perfect.
They start with a fudgy brownie base, then get topped with a soft and chewy cookie layer packed with red and blue sprinkles and M&Ms. The whole thing bakes up into gooey, rich layers that are festive without being fussy—just how I like it. Whether you’re heading to a picnic, BBQ, or just hanging out in the backyard watching fireworks, these bars are the kind of Fourth of July treats everyone will be asking about.
Jump to Recipe
Ingredients for 4th of July Brookies
Here’s everything you’ll need to whip up a batch of these easy layered brookies. I love using boxed brownie mix and simple ingredients to keep this recipe stress-free.
For the brownie layer:
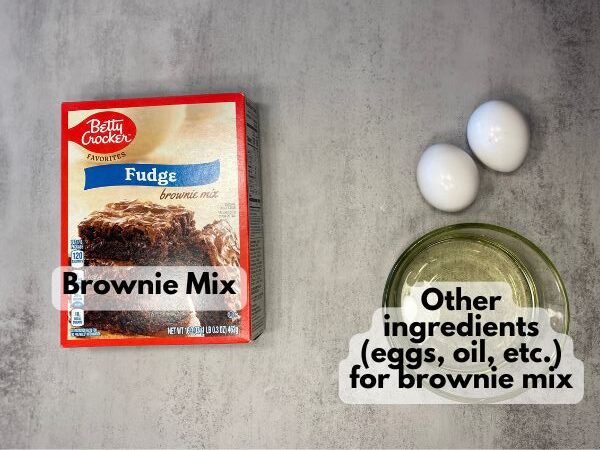
- 1 box (18–19 oz) brownie mix (plus eggs, oil, and water as called for on the box)
For the cookie layer:
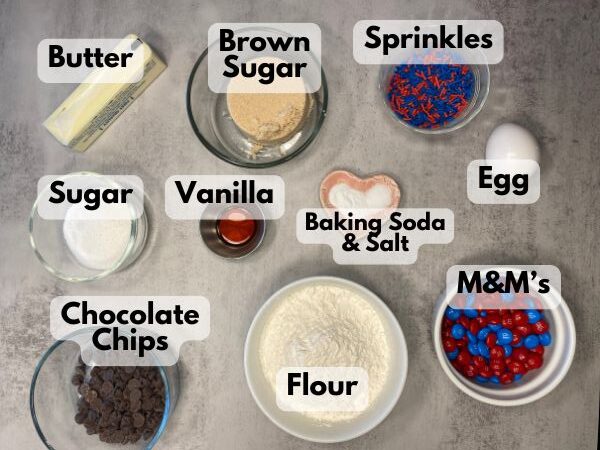
- 1/2 cup (1 stick) unsalted butter, softened
- 1/2 cup granulated sugar
- 1/4 cup brown sugar (light or dark)
- 1 large egg
- 1 tsp vanilla extract
- 1 1/4 cups all-purpose flour
- 1/2 tsp baking soda
- 1/4 tsp salt
- 1/2 cup mini chocolate chips (optional, but tasty!)
- 1/2 cup red and blue M&Ms (plus a few extra for pressing on top)
- ¼ cup red and blue sprinkles (jimmies work best)
How to Make 4th of July Brookies
These bars come together in two easy layers, but they bake all in one pan. Here’s how to make them step by step:
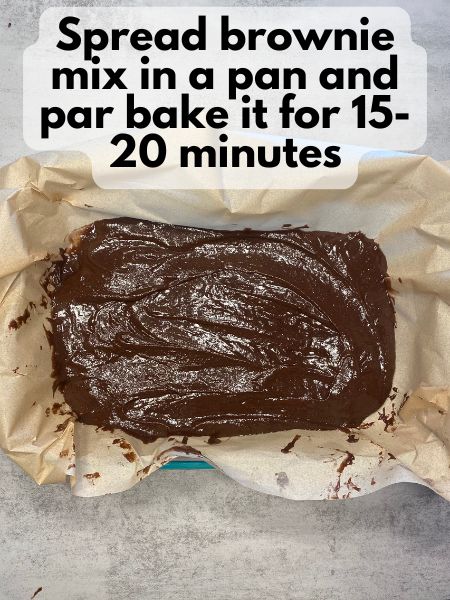
1. Prep your pan and oven.
Preheat the oven to 350°F and grease a 9×13-inch baking pan (or line it with parchment paper for easier cleanup). This makes it simple to lift the brookies out and slice them later.
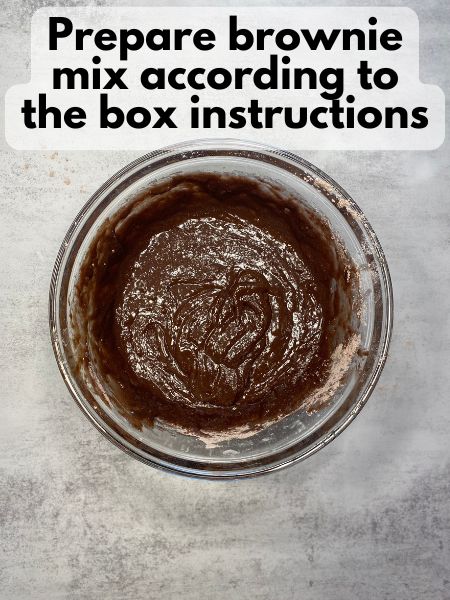
2. Make the brownie base.
Prepare the brownie batter according to the instructions on the box. Pour it into your prepared pan and spread it into an even layer. This is your base layer and will bake up into that gooey, chocolatey bottom we all love.
3. Par-bake the brownie layer
Put your brownie layer in the oven for around 15-20 minutes to allow it to set a bit before adding the cookie dough layer. Don’t bake them all the way, though. We’re aiming for about halfway done.
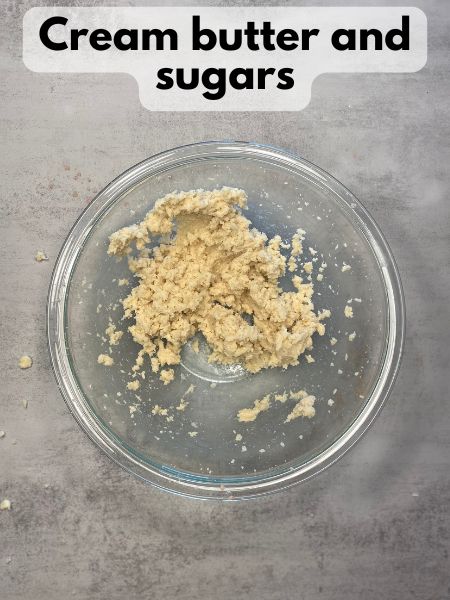
4. Make the cookie dough.
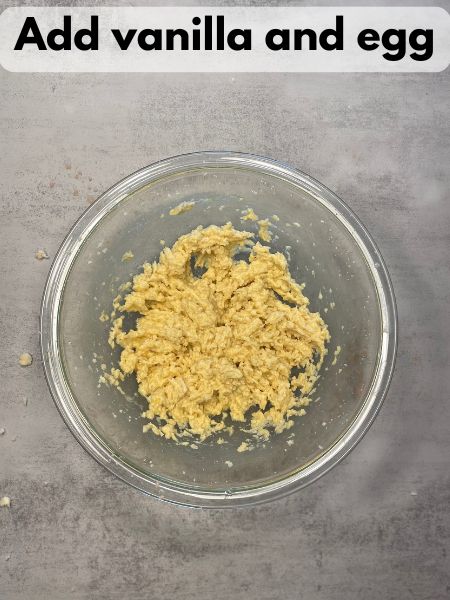
In a large bowl, beat together the softened butter and both sugars until light and fluffy. Mix in the egg and vanilla until well combined.
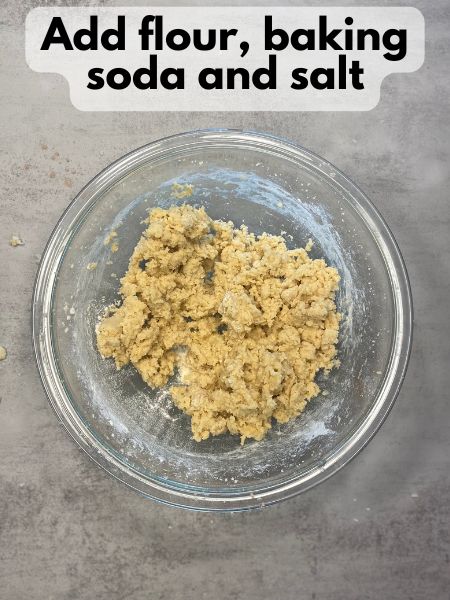
Add in the flour, baking soda, and salt, and stir until a soft dough forms.
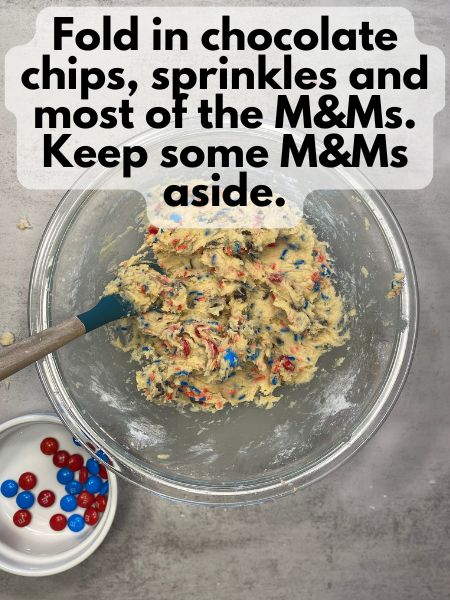
Fold in the chocolate chips, M&Ms and sprinkles. Keep a few extra M&Ms aside for pressing them into the top later.
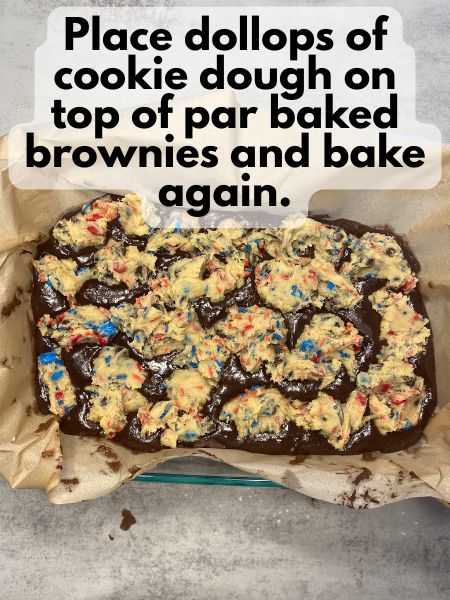
5. Layer the cookie dough on top.
Drop spoonfuls of cookie dough all over the brownie batter. You don’t need to spread it out completely; it will spread as it bakes. In fact, a few brownie swirls peeking through give it a fun marbled look.
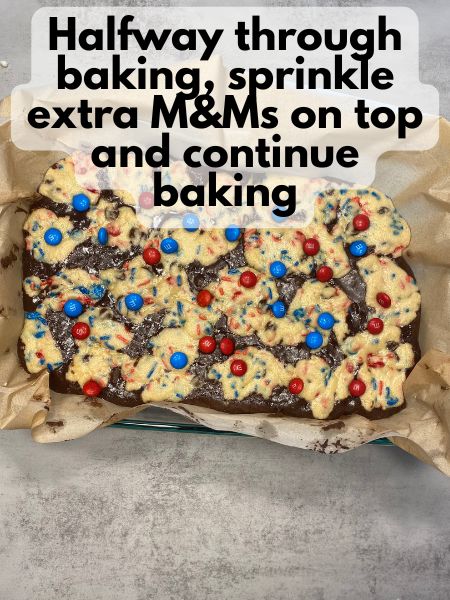
6. Bake and add M&Ms.
Bake your brownie and cookie dough layer together for about 15-20 minutes, then sprinkles the M&M’s you kept aside on top.
7. Continue baking for another 15-20 minutes, or until the cookie top is lightly golden and a toothpick inserted into the center comes out with just a few moist crumbs. Don’t overbake—brookies are best when they’re still a little soft and gooey in the middle.
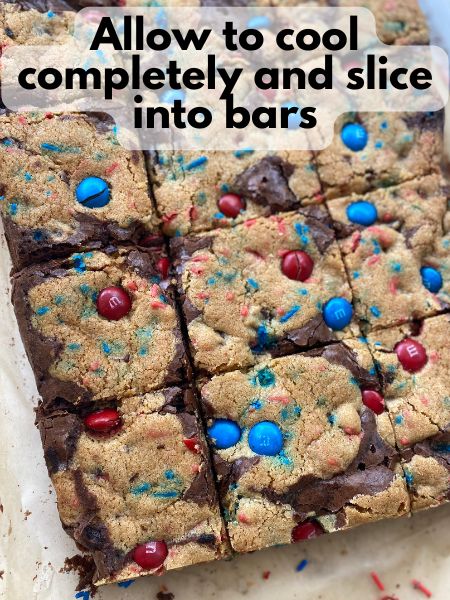
Let them cool completely in the pan before slicing. This helps the layers set up nicely and makes cutting so much easier.
Pro Tips for the Best Fourth of July Brookies
- Don’t skip par baking the brownies. Make sure you partially bake your brownie layer before adding the cookie dough layer on top. This ensures that your brownie layer and cookie layer are distinct from one another, rather than baking into one another. Also, the cookie dough layer will bake faster than the brownie layer, so you want to give those brownies a head start.
- Chill before slicing if you want super clean edges. I usually pop mine in the fridge for 30 minutes before cutting if I’m taking them to a party.
- Add extra M&Ms on top This is part of the instructions too, but I wanted to add it here. Saving a handful of M&Ms to sprinkle on top of your half-baked cookie dough layer adds a pretty touch in the end. If you forget, your bookies will still taste the same, of course! This is purely aesthetic.
- Pick out the red and blue M&Ms. Usually around the 4th of July, you can buy bags of just red, white and blue M&Ms made exactly for something like this. In case you can’t find them, however, you should be able to buy a bag of the “sharing” size and just pick out the red and blue ones. Usually, there are enough red and blue in one bag. If you really struggle to get enough red and blue, you could also pick out other colors and just make sure those colors get buried in the bottom and middle of your cookie layer. Then, press the red and blue ones on the top to ensure they stick out.
FAQs
Can I make these ahead of time?
Yes! These brookies can be made 1–2 days in advance. Just store them tightly covered at room temperature. You can also freeze them (sliced or whole) for up to 2 months.
What kind of brownie mix should I use?
Any boxed brownie mix will work here! I like to use the kind labeled “fudgy” for that rich, gooey texture. Avoid ones with mix-ins or extra swirl packs—just the classic kind is best.
Can I double the cookie layer?
You sure can, but your brookies will be thicker and may need an extra 5–10 minutes in the oven. Just keep an eye on the top and check with a toothpick for doneness.
What if I don’t have sprinkles?
No worries! These bars are still delicious without them. You can add extra M&Ms or leave them as a chocolate chip cookie top instead.
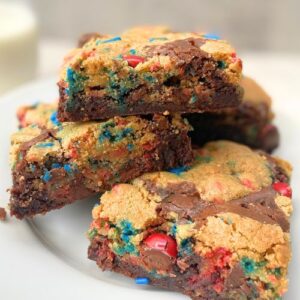
There’s something about layered desserts that just makes them extra fun, and these brookies are no exception. They’re bold, colorful, and totally indulgent—perfect for any backyard celebration. Plus, they hold up really well in warm weather, making them a great addition to your Fourth of July food spread.
I also love that these can be made with a boxed brownie mix, so you don’t have to dirty too many dishes while making them. They’re the kind of Fourth of July dessert that looks impressive but is secretly super easy to make—my favorite kind. If you’ve been searching for a festive new twist on your classic brownie or cookie recipe, this is it. Happy baking!
4th of July Brookies
Ingredients
Brownie Layer
- 1 brownie mix any brand will do
- The other ingredients your brownie mix calls for usually eggs, oil, water, etc.
Cookie Layer
- 1/2 cup unsalted butter softened
- 1/2 cup granulated sugar
- 1/4 cup brown sugar
- 1 egg
- 1 tsp vanilla
- 1 1/4 cup all-purpose flour
- 1/2 tsp baking soda
- 1/4 tsp salt
- 1/2 cup mini chocolate chips optional, but tasty
- 1/2 cup red and blue M&M's plus a few extra for sprinkling on top
- 1/4 cup red and blue sprinkles jimmies work best
Instructions
Par Bake Brownie Layer
- Preheat the oven to 350°F and grease a 9x13-inch baking pan (or line it with parchment paper for easier cleanup). This makes it simple to lift the brookies out and slice them later.
- Prepare the brownie batter according to the instructions on the box. Pour it into your prepared pan and spread it into an even layer.
- Put your brownie layer in the oven for around 15-20 minutes to allow it to set a bit before adding the cookie dough layer. Don’t bake them all the way, though. We’re aiming for about halfway done.
Make Cookie Layer
- In a large bowl, beat together the softened butter and both sugars until light and fluffy.
- Mix in the egg and vanilla until well combined.
- Add in the flour, baking soda, and salt, and stir until a soft dough forms.
- Fold in the chocolate chips, M&Ms and sprinkles. Keep a few extra M&Ms aside for pressing them into the top later.
Layer and Bake
- Drop spoonfuls of cookie dough all over the brownie batter. You don’t need to spread it out completely; it will spread as it bakes.
- Bake your brownie and cookie dough layer together for about 15-20 minutes, then sprinkles the M&M’s you kept aside on top.
- Continue baking for another 15-20 minutes, or until the cookie top is lightly golden and a toothpick inserted into the center comes out with just a few moist crumbs. Don’t overbake—brookies are best when they’re still a little soft and gooey in the middle.
- Let them cool completely in the pan before slicing. This helps the layers set up nicely and makes cutting so much easier.